tutorial

How to Build an Advanced Space Remover Tool With React

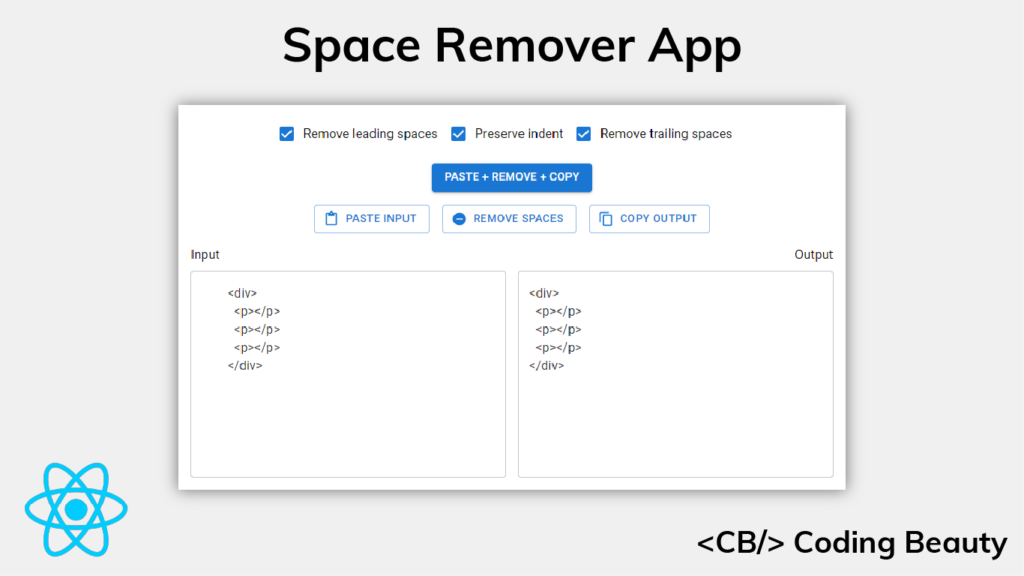
In this article, we’re going to learn how to build a web app that will let us easily remove leading and trailing spaces from any text, with the ability to optionally preserve the indentation of the text. We’ll be using the React.js library to build this tool, let’s get started.

Setting up the Project

Let’s begin by creating a new React app using Create React App. We’ll be using Yarn.

yarn create-react-app remove-spaces

We’ll also be using a bit of TypeScript, you can set it up using the instructions here.

Writing the removeSpaces() Function

The core part of the app will be a removeSpaces() function that takes a string as input and returns a new string with the spaces removed. Let’s write this function in a new remove-spaces.ts file.

src/remove-spaces.ts

export default function removeSpaces(params: {
  text: string;
  leading: boolean;
  trailing: boolean;
  preserveIndent: boolean;
}) {
  let regex: RegExp;
  const { text, leading, trailing, preserveIndent } = params;
  let spaceCountPattern: string | undefined;

  let leadingMatch: string;
  if (leading) {
    if (preserveIndent) {
      const firstSpacePattern = new RegExp(String.raw`^(\s*).+?((\r\n)|\n|$)`);
      const firstSpaces = text.match(firstSpacePattern)?.[1];
      const spaceCount = firstSpaces?.length;
      spaceCountPattern = `{0,${spaceCount}}`;
    } else {
      spaceCountPattern = '*';
    }
    leadingMatch = String.raw`\s${spaceCountPattern}`;
  } else {
    leadingMatch = '';
  }

  const trailingMatch = trailing ? String.raw`\s*?` : '';
  regex = new RegExp(String.raw`((()((\r\n)|\n))|(.*?((\r\n)|\n|$)))`, 'g');
  const lines = text.match(regex);
  const lineRegex = new RegExp(
    String.raw`^${leadingMatch}(.*?)${trailingMatch}((\r\n)|\n|$)`,
    'g'
  );

  const result = lines
    ?.map((line) => {
      if (line === '\r\n' || line === '\n') return line;
      return line.replace(lineRegex, '$1$2');
    })
    .join('');
  return result;
}

Apart from the input string, the function accepts options that will allow the user to customize how the spaces are removed.

When leading is true and preserveIndent is false, the leading spaces are removed from the text, apart from the spaces that add indentation.

When leading is true and preserveIndent is false, all the leading spaces are removed from the text.

When trailing is true, all the trailing spaces are removed from the text.

The function creates a regular expression from the combination of these options. It uses the String replace() method to replace each line of the text with captured groups from the regex.

Testing the removeSpaces() function

We can test this function to be sure it works as intended. Let’s install the Jest testing framework to do this.

yarn add --dev jest ts-jest @types/jest

Initialize ts-jest with the following command:

yarn ts-jest config:init

Let’s write some tests for the function in a new remove-spaces.test.ts file:

src/remove-spaces.test.ts

import removeSpaces from './remove-spaces';

const s2 = '  ';
const s4 = '    ';

const text = `${s4}<div>${s4}
${s4}${s2}<p></p>${s4}
${s4}</div>${s4}`;

it('removes leading spaces without preserving indent', () => {
  const expectation = `<div>${s4}
<p></p>${s4}
</div>${s4}`;
  const result = removeSpaces({
    text,
    leading: true,
    trailing: false,
    preserveIndent: false,
  });
  expect(result).toBe(expectation);
});

it('removes leading spaces and preserves indent', () => {
  const expectation = `<div>${s4}
${s2}<p></p>${s4}
</div>${s4}`;
  const result = removeSpaces({
    text,
    leading: true,
    trailing: false,
    preserveIndent: true,
  });
  expect(result).toBe(expectation);
});

it('removes trailing spaces', () => {
  const expectation = `${s4}<div>
${s4}${s2}<p></p>
${s4}</div>`;
  const result = removeSpaces({
    text,
    leading: false,
    trailing: true,
    preserveIndent: false,
  });
  expect(result).toBe(expectation);
});

it('removes leading and trailing spaces', () => {
  const expectation = `<div>
<p></p>
</div>`;
  const result = removeSpaces({
    text,
    leading: true,
    preserveIndent: false,
    trailing: true,
  });
  expect(result).toBe(expectation);
});

The function should pass all these tests if it was written correctly.

Creating the Text Inputs

It’s time for us to start creating the user interface with React. We’ll begin with the text inputs. We’ll create two – one will take will user input, and the other will be readonly and display the output.

We’ll be using the Material UI framework to make the app look great, you can set it up using the instructions here.

src/App.js

import { Box, Typography, TextField } from '@mui/material';
import { useState } from 'react';

function App() {
  const [input, setInput] = useState('');
  const [output, setOutput] = useState('');

  const handleInputChange = (event) => {
    setInput(event.target.value);
  };

  return (
    <Box
      sx={{
        height: '100%',
        display: 'flex',
        flexDirection: 'column',
        padding: 2,
        boxSizing: 'border-box',
      }}
    >
      <Box
        sx={{
          display: 'grid',
          gridTemplateColumns: 'repeat(auto-fit, minmax(400px, 1fr))',
          justifyContent: 'stretch',
          marginTop: 2,
          rowGap: '16px',
        }}
      >
        <Box sx={{ flex: 1, marginRight: 1, textAlign: 'left' }}>
          <Typography>Input</Typography>
          <TextField
            sx={{ width: '100%', marginTop: 1, minWidth: '300px' }}
            multiline
            value={input}
            minRows={10}
            inputProps={{
              style: { maxHeight: '300px', overflow: 'auto' },
            }}
            onChange={handleInputChange}
          ></TextField>
        </Box>
        <Box sx={{ flex: 1, marginLeft: 1, textAlign: 'right' }}>
          <Typography>Output</Typography>
          <TextField
            sx={{
              width: '100%',
              marginTop: 1,
              minWidth: '300px',
            }}
            multiline
            value={output}
            readOnly
            minRows={10}
            inputProps={{
              style: { maxHeight: '300px', overflow: 'auto' },
            }}
          ></TextField>
        </Box>
      </Box>
    </Box>
  );
}

export default App;
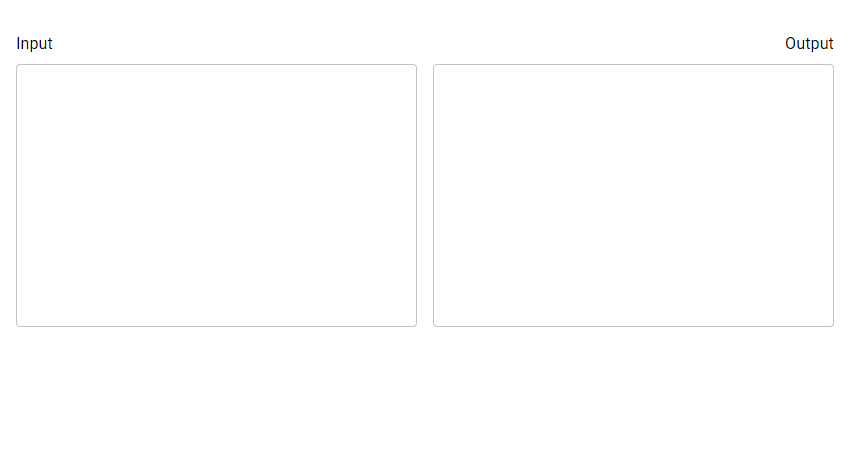
Creating the text inputs.

Pasting Input from the Clipboard

Let’s create a button that will paste text from the system clipboard to the input text field when clicked.

src/App.js

// ...
import { Box, Typography, TextField, Stack, Button } from '@mui/material';
import { ContentPaste } from '@mui/icons-material';

function App() {
  // ...

  const pasteInput = async () => {
    setInput(await navigator.clipboard.readText());
  };

  const handlePasteInput = async () => {
    await pasteInput();
  };

  return (
    <Box
      sx={{
        height: '100%',
        display: 'flex',
        flexDirection: 'column',
        padding: 2,
        boxSizing: 'border-box',
      }}
    >
      <Stack
        direction="row"
        spacing={2}
        justifyContent="center"
        sx={{ flexWrap: 'wrap', marginTop: 2 }}
      >
        <Box>
          <Button
            onClick={handlePasteInput}
            variant="outlined"
            startIcon={<ContentPaste />}
          >
            Paste input
          </Button>
        </Box>
      </Stack>
      {/* ... */}
    </Box>
  );
}

export default App;
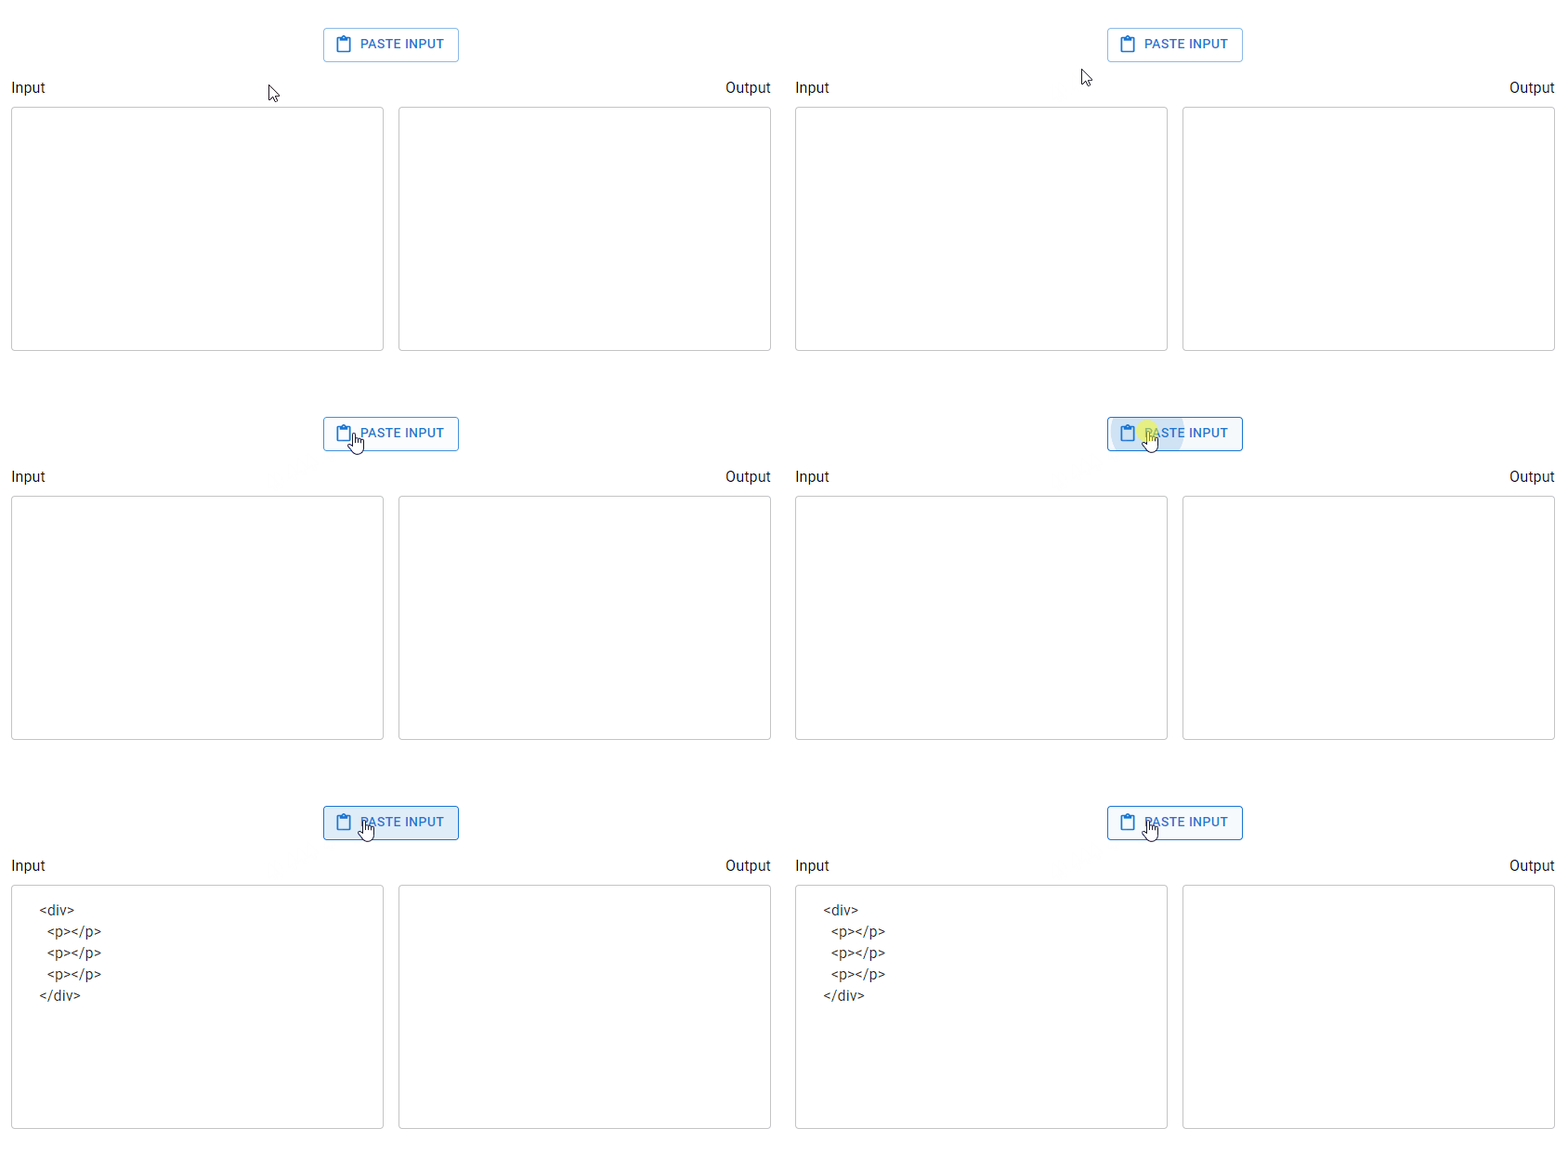
Pasting input from the clipboard.

Adding Options

Let’s create the options that will let the user decide how the spaces will be removed from the text. There will be three boolean options, each represented with a checkbox:

  1. Remove leading spaces
  2. Remove trailing spaces
  3. Preserve indent

We’ll pass the options directly to the removeSpaces() function when the user decides to remove the spaces.

import {
  Box,
  Typography,
  TextField,
  Stack,
  Button,
  FormControlLabel,
  Checkbox,
} from '@mui/material';
import { useState } from 'react';
import { ContentPaste } from '@mui/icons-material';

function App() {
  // ...

  const [leading, setLeading] = useState(true);
  const [trailing, setTrailing] = useState(true);
  const [preserveIndent, setPreserveIndent] = useState(true);

  const handleLeadingChange = (event) => {
    setLeading(event.target.checked);
  };

  const handleTrailingChange = (event) => {
    setTrailing(event.target.checked);
  };

  const handlePreserveIndentChange = (event) => {
    setPreserveIndent(event.target.checked);
  };

  return (
    <Box
      sx={{
        height: '100%',
        display: 'flex',
        flexDirection: 'column',
        padding: 2,
        boxSizing: 'border-box',
      }}
    >
      <Box sx={{ display: 'flex', justifyContent: 'center' }}>
        <FormControlLabel
          control={
            <Checkbox checked={leading} onChange={handleLeadingChange} />
          }
          label="Remove leading spaces"
        />
        <FormControlLabel
          control={
            <Checkbox
              checked={preserveIndent}
              onChange={handlePreserveIndentChange}
            />
          }
          label="Preserve indent"
        />
        <FormControlLabel
          control={
            <Checkbox checked={trailing} onChange={handleTrailingChange} />
          }
          label="Remove trailing spaces"
        />
      </Box>
     {/* ... */}
    </Box>
  );
}

export default App;
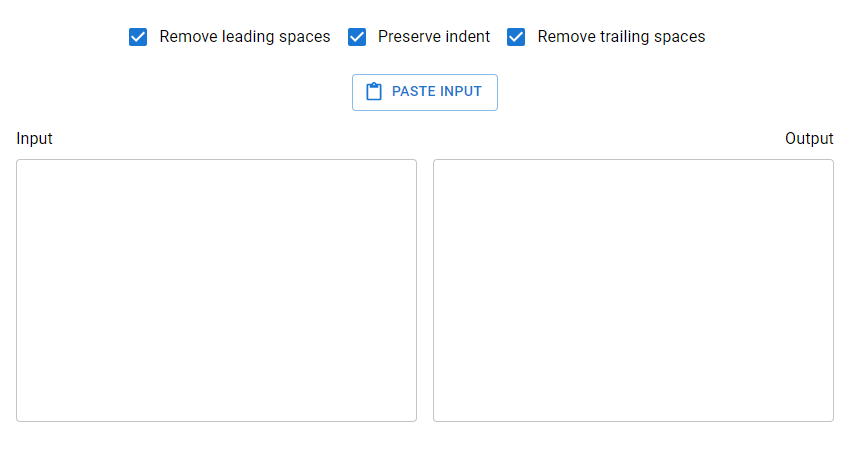
Adding options.

Removing the Spaces

Now let’s add a button that will cause the spaces to be removed from the input text when clicked.


// ...
import removeSpaces from './remove-spaces';

function App() {
  const handleRemoveSpaces = () => {
    setOutput(removeSpaces({ text: input, leading, trailing, preserveIndent }));
  };

  return (
    <Box
      sx={{
        height: '100%',
        display: 'flex',
        flexDirection: 'column',
        padding: 2,
        boxSizing: 'border-box',
      }}
    >
      <Box sx={{ display: 'flex', justifyContent: 'center' }}>
        {/* ... */}
        
        <Box>
          <Button
            onClick={handlePasteInput}
            variant="outlined"
            startIcon={<ContentPaste />}
          >
            Paste input
          </Button>
        </Box>

        {/* Button to remove spaces */}
        <Box>
          <Button
            onClick={handleRemoveSpaces}
            variant="outlined"
            startIcon={<RemoveCircle />}
          >
            Remove spaces
          </Button>
        </Box>
      </Stack>
      {/* ... */}
      </Box>
    </Box>
  );
}

export default App;
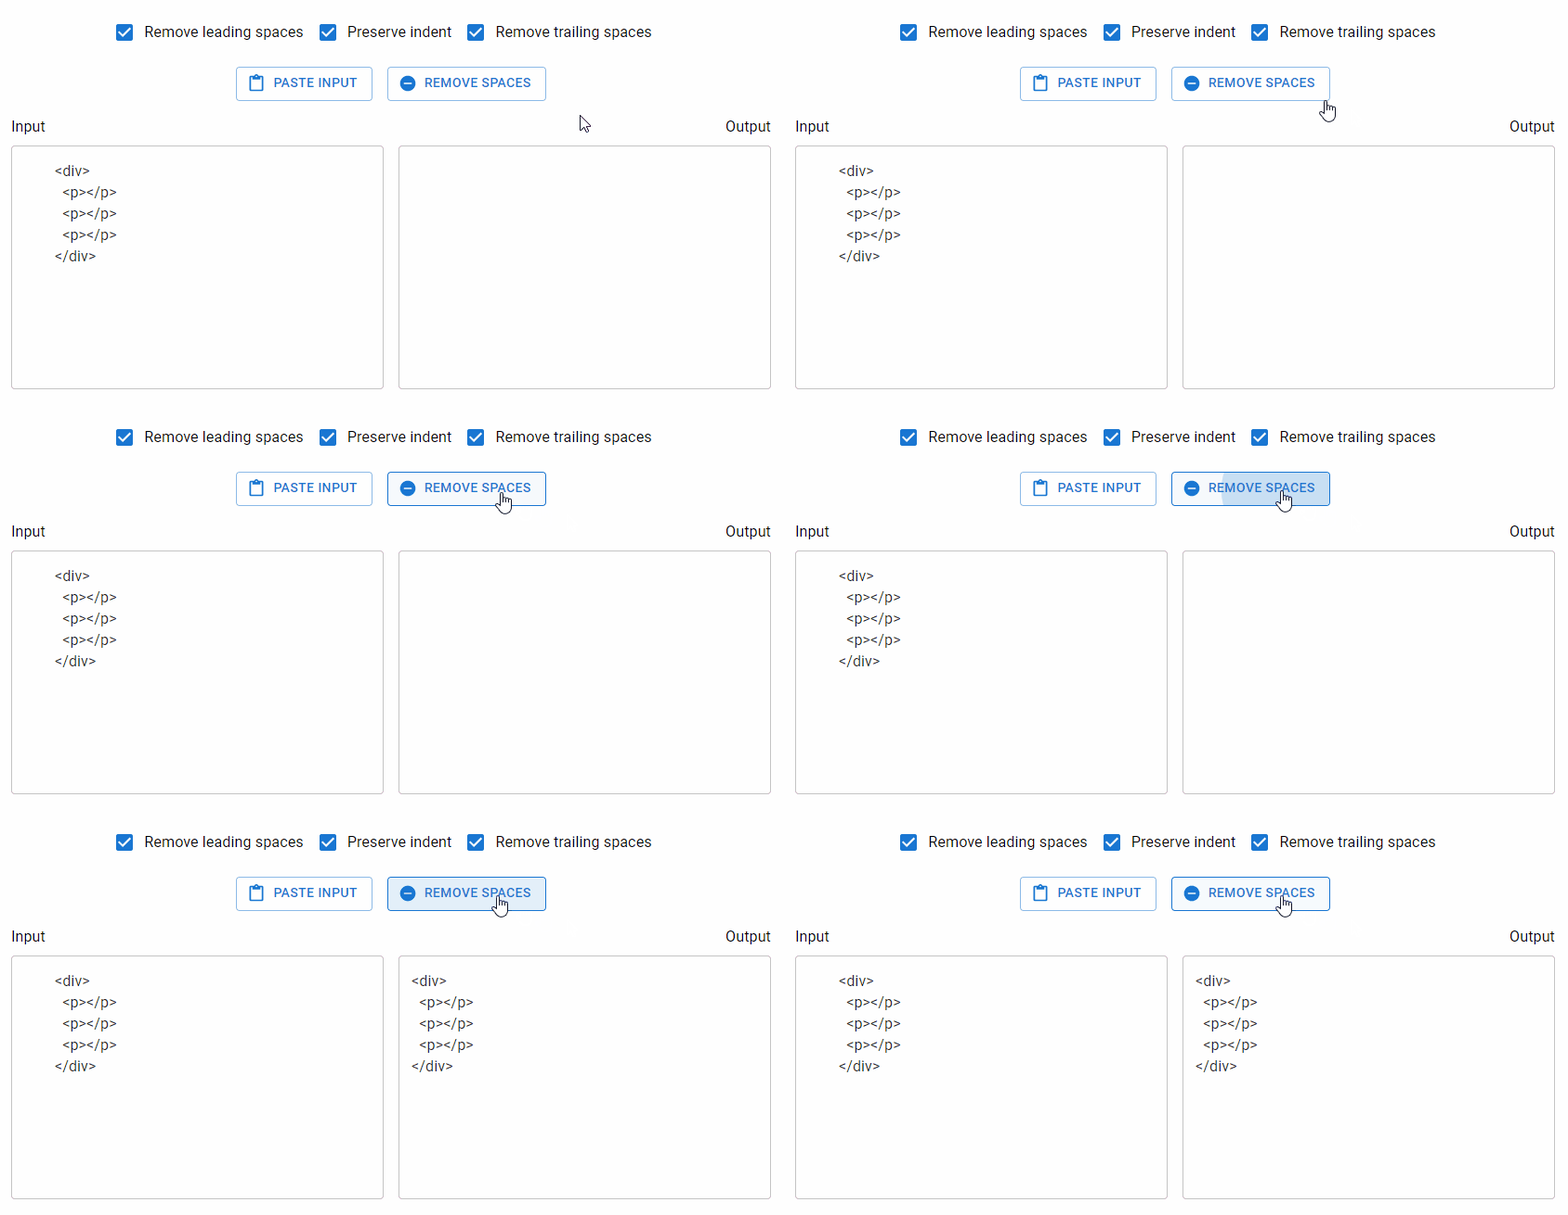
Removing the spaces.

Copying Output to Clipboard

Let’s create another button that will copy the text in the output text field to the system clipboard when clicked.


// ...
import { ContentCopy, ContentPaste, RemoveCircle } from '@mui/icons-material';
import removeSpaces from './remove-spaces';

function App() {
  // ...

  const handleCopyOutput = () => {
    navigator.clipboard.writeText(output);
  };

  return (
    <Box
      sx={{
        height: '100%',
        display: 'flex',
        flexDirection: 'column',
        padding: 2,
        boxSizing: 'border-box',
      }}
    >
      {/* ... */}
      <Stack
        direction="row"
        spacing={2}
        justifyContent="center"
        sx={{ flexWrap: 'wrap', marginTop: 2 }}
      >
        {/* ... */}
        <Box>
          <Button
            onClick={handleRemoveSpaces}
            variant="outlined"
            startIcon={<RemoveCircle />}
          >
            Remove spaces
          </Button>
        </Box>

        {/* Button to copy output */}        
        <Box>
          <Button
            startIcon={<ContentCopy />}
            onClick={handleCopyOutput}
            variant="outlined"
          >
            Copy output
          </Button>
        </Box>
      </Stack>
          
    </Box>
  );
}

export default App;
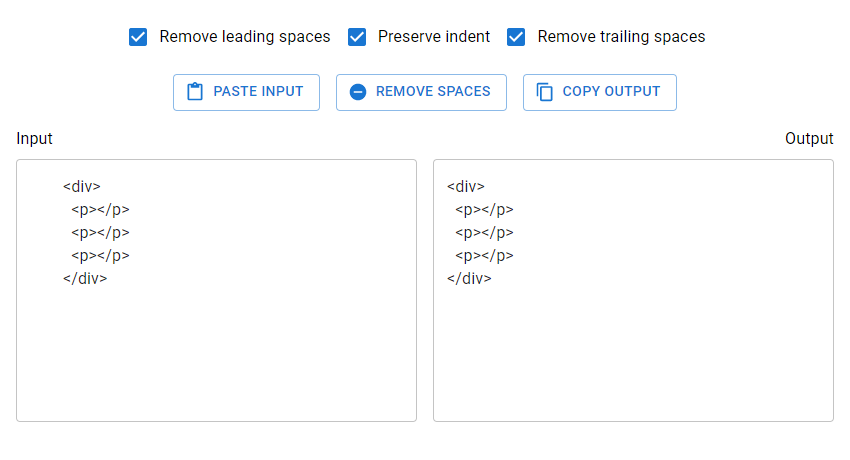
Copying output to clipboard.

Combining Paste, Remove, and Copy Actions

It’s quite likely that users will use this tool by performing the following actions in order:

  1. Click the Paste Input button to put the text from the clipboard in the input text field
  2. Click the Remove Spaces button to remove the spaces from the input text and put the result in the output text field
  3. Click the Copy Output to copy the text from the output text field to the clipboard.

To make things easier, we’ll create a button that will let the user perform these three actions at once:

// ...

function App() {
  // ...

  const handlePasteRemoveCopy = async () => {
    const input = await navigator.clipboard.readText();
    const output = removeSpaces({
      text: input,
      leading,
      trailing,
      preserveIndent,
    });
    navigator.clipboard.writeText(output);
    setInput(input);
    setOutput(output);
  };

  return (
    <Box
      sx={{
        height: '100%',
        display: 'flex',
        flexDirection: 'column',
        padding: 2,
        boxSizing: 'border-box',
      }}
    >
      <Box sx={{ display: 'flex', justifyContent: 'center' }}>
        {/* ... */}
        <FormControlLabel
          control={
            <Checkbox checked={trailing} onChange={handleTrailingChange} />
          }
          label="Remove trailing spaces"
        />
      </Box>

      {/* Button to perform past, remove, and copy actions at once */}
      <Box sx={{ display: 'flex', justifyContent: 'center', marginTop: 2 }}>
        <Button onClick={handlePasteRemoveCopy} variant="contained">
          Paste + Remove + Copy
        </Button>
      </Box>

      <Stack
        direction="row"
        spacing={2}
        justifyContent="center"
        sx={{ flexWrap: 'wrap', marginTop: 2 }}
      >
        <Box>
          <Button
            onClick={handlePasteInput}
            variant="outlined"
            startIcon={<ContentPaste />}
          >
            Paste input
          </Button>
        </Box>
        {/* ... */}
      </Stack>
    </Box>
  );
}

export default App;
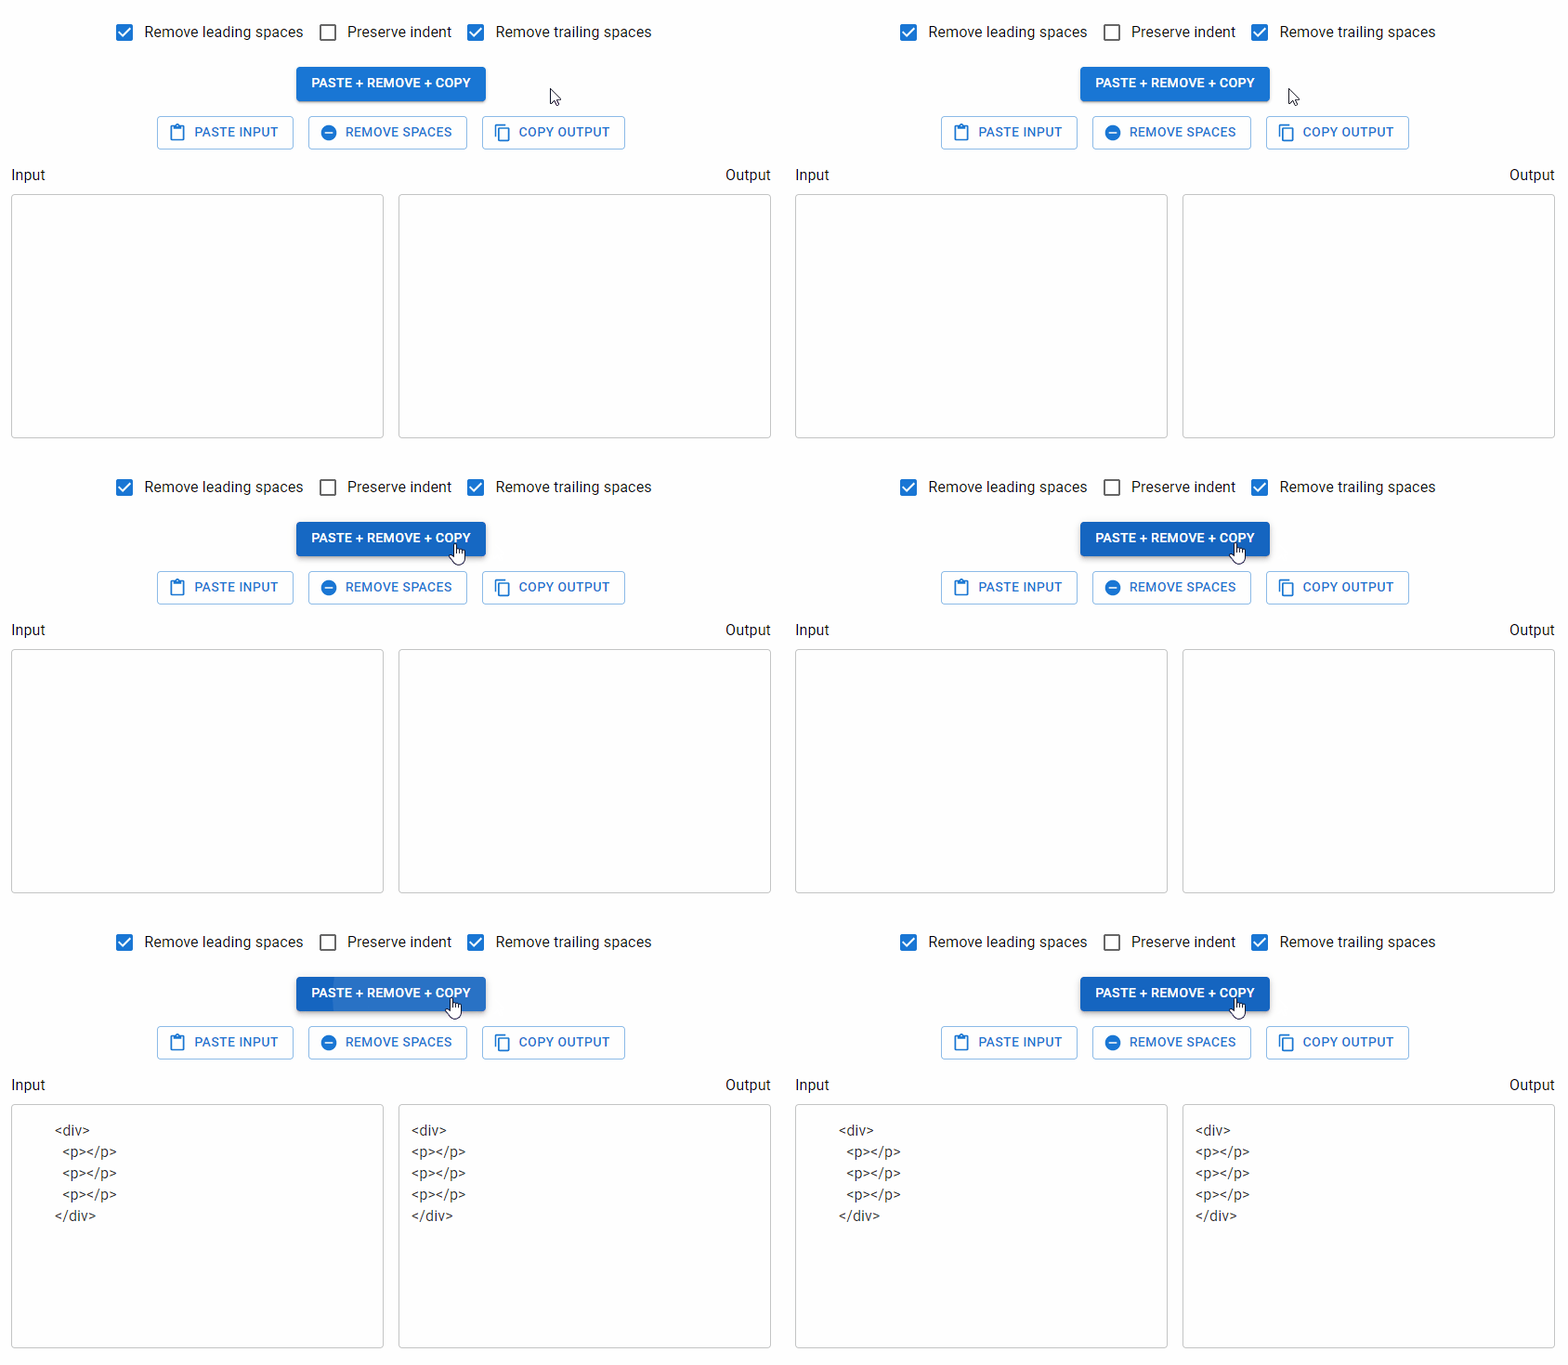
Our space remover app is complete! We’ve been able to build a handy utility for removing leading and trailing spaces from any text and preserving indentation if necessary.

What Can This Tool Be Used for?

At Coding Beauty, we found this tool useful when creating code snippets displaying a portion of code from an HTML or JSX markup that was indented by some amount. For example, in our Material UI button tutorial, there were times when the file for an example contained markup like this:
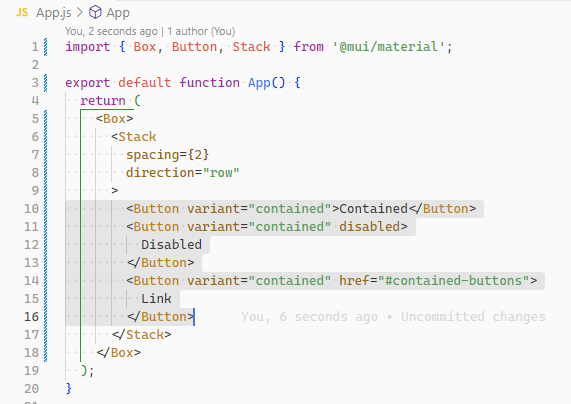
The complete source code for an example in the tutorial.

But we would only want to show the section of the file relevant to the example:
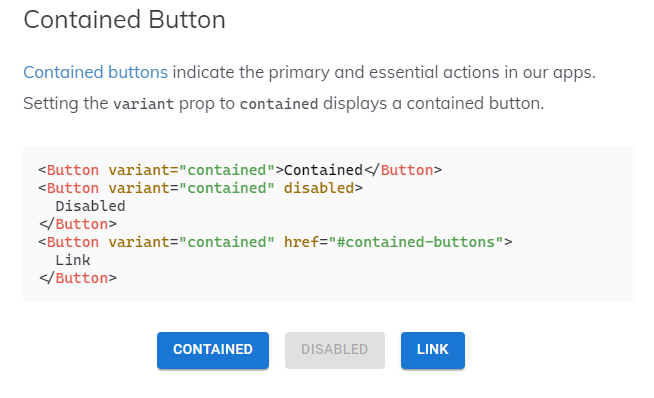
Explaining contained buttons in the Material UI button tutorial.

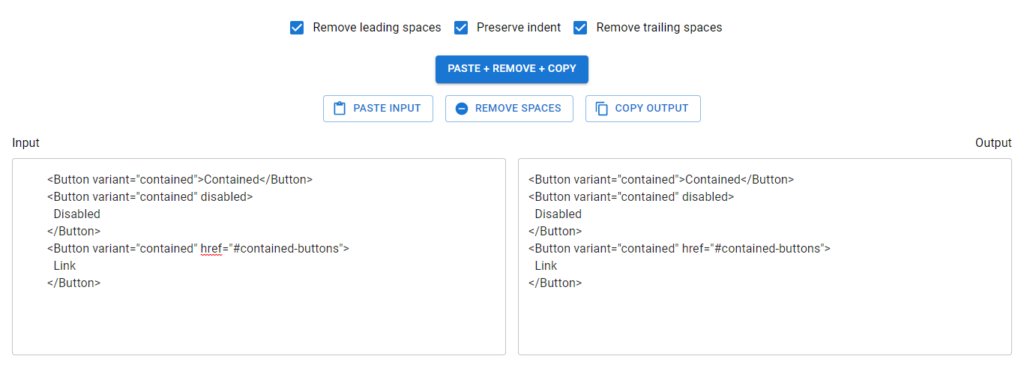
This tool helped format the relevant section properly by removing the spaces.
What about String trim()?

We couldn’t use the trim() or trimStart() string methods because then it wouldn’t be possible to preserve the indent of the entire text. These methods can only remove all the leading spaces in a given string.

How to Get a Month Number from Month Name in JavaScript

In this article, we’ll learn how to use JavaScript to get the position of a month in the list of the 12 months from its name. That is, we’ll get 1 from January, 2 from February, 3 from March, and so on.

To do this, create a date string from the name and pass this string to the Date() constructor. Then use the getMonth() method to get the month number. For example:

function getMonthNumberFromName(monthName) {
  return new Date(`${monthName} 1, 2022`).getMonth() + 1;
}

console.log(getMonthNumberFromName('January')); // 1
console.log(getMonthNumberFromName('February')); // 2
console.log(getMonthNumberFromName('March')); // 3

We interpolate the month into a string that can be parsed by the Date() constructor to create a new Date object. Then we use the getMonth() method to get the month of the date.

The getMonth() method returns a zero-based index of the month, i.e., 0 for January, 1 for February, 2 for March, etc.

const month1 = new Date('January 1, 2022').getMonth();
console.log(month1); // 0

const month2 = new Date('February 1, 2022').getMonth();
console.log(month2); // 1

This is why we add 1 to it and return the sum from as the result.

Our function will also work for abbreviated month names, as the Date() constructor can also parse date strings with them.

function getMonthNumberFromName(monthName) {
  return new Date(`${monthName} 1, 2022`).getMonth() + 1;
}

console.log(getMonthNumberFromName('Jan')); // 1
console.log(getMonthNumberFromName('Feb')); // 2
console.log(getMonthNumberFromName('Mar')); // 3

If the month name is such that the resulting date string can’t be parsed by the Date() constructor, an invalid date will be created and getMonth() will return NaN.

const date = new Date('Invalid 1, 2022');

console.log(date); // Invalid Date
console.log(date.getMonth()); // NaN

This means our function will return NaN as well:

function getMonthNumberFromName(monthName) {
  return new Date(`${monthName} 1, 2022`).getMonth() + 1;
}

console.log(getMonthNumberFromName('Invalid')); // NaN

It might be better if we return -1 instead. We can check for an invalid date with the isNaN() function.

function getMonthNumberFromName(monthName) {
  const date = new Date(`${monthName} 1, 2022`);

  if (isNaN(date)) return -1;

  return date.getMonth() + 1;
}

console.log(getMonthNumberFromName('Invalid')); // -1

Alternatively, we could throw an error:

function getMonthNumberFromName(monthName) {
  const date = new Date(`${monthName} 1, 2022`);

  if (isNaN(date)) {
    throw new Error('Invalid month name.');
  }

  return date.getMonth() + 1;
}

// Error: Invalid month name.
console.log(getMonthNumberFromName('Invalid'));

How to Add 1 Year to a Date in JavaScript

Let’s look at some ways to easily add 1 year to a Date object in JavaScript.

1. Date setFullYear() and getFullYear() Methods

To add 1 year to a date, call the getFullYear() method on the date to get the year, then call the setFullYear() method on the date, passing the sum of getFullYear() and 1 as an argument, i.e., date.setFullYear(date.getFullYear() + 1).

For example:

function addOneYear(date) {
  date.setFullYear(date.getFullYear() + 1);
  return date;
}

// April 20, 2022
const date = new Date('2022-04-20T00:00:00.000Z');

const newDate = addOneYear(date);

// April 20, 2023
console.log(newDate); // 2023-04-20T00:00:00.000Z

Our addOneYear() function takes a Date object and returns the same Date with the year increased by 1.

The Date getFullYear() method returns a number that represents the year of a particular date.

The Date setFullYear() method sets the year of a date to a specified number.

Avoiding Side Effects

The setFullYear() method mutates the Date object it is called on. This introduces a side effect into our addOneYear() function. To avoid modifying the passed Date and create a pure function, make a copy of the Date and call setFullYear() on this copy, instead of the original.

function addOneYear(date) {
  // Making a copy with the Date() constructor
  const dateCopy = new Date(date);

  dateCopy.setFullYear(dateCopy.getFullYear() + 1);

  return dateCopy;
}

// April 20, 2022
const date = new Date('2022-04-20T00:00:00.000Z');

const newDate = addOneYear(date);

// April 20, 2023
console.log(newDate); // 2023-04-20T00:00:00.000Z

// Original not modified
console.log(date); // 2022-04-20T00:00:00.000Z

Functions that don’t modify external state (i.e., pure functions) tend to be more predictable and easier to reason about. This makes it a good practice to limit the number of side effects in your programs.

2. date-fns addYears() Function

Alternatively, we can use the pure addYears() function from the date-fns NPM package to quickly add 1 year to a date.

import { addYears } from 'date-fns';

// April 20, 2022
const date = new Date('2022-04-20T00:00:00.000Z');

const newDate = addYears(date, 1);

// April 20, 2023
console.log(newDate); // 2023-04-20T00:00:00.000Z

// Original not modified
console.log(date); // 2022-04-20T00:00:00.000Z

This function takes a Date object and the number of years to add as arguments, and returns a new Date object with the newly added years. It does not modify the original date passed to it.

How to Check if a String is a URL in JavaScript

In this article, we’ll be looking at multiple ways to easily check if a string is a valid URL in JavaScript.

1. Catch Exception from URL() Constructor

To check if a string is a URL, pass the string to the URL() constructor. If the string is a valid URL, a new URL object will be created successfully. Otherwise, an error will be thrown. Using a try...catch block, we can handle the error and perform the appropriate action when the URL is invalid.

For example:

function isValidUrl(string) {
  try {
    new URL(string);
    return true;
  } catch (err) {
    return false;
  }
}

console.log(isValidUrl('https://api2.codingbeautydev.com')); // true
console.log(isValidUrl('app://api2.codingbeautydev.com')); // true
console.log(isValidUrl('Coding Beauty')); // false

To check for a valid HTTP URL, we can use the protocol property of the URL object.

function isValidHttpUrl(string) {
  try {
    const url = new URL(string);
    return url.protocol === 'http:' || url.protocol === 'https:';
  } catch (err) {
    return false;
  }
}

console.log(isValidHttpUrl('https://api2.codingbeautydev.com')); // true
console.log(isValidHttpUrl('app://api2.codingbeautydev.com')); // false
console.log(isValidHttpUrl('Coding Beauty')); // false

The URL protocol property returns a string representing the protocol scheme of the URL, including the final colon (:). HTTP URLs have a protocol of either http: or https:.

2. Regex Matching

Alternatively, we can check if a string is a URL using a regular expression. We do this by calling the test() method on a RegExp object with a pattern that matches a string that is a valid URL.

function isValidUrl(str) {
  const pattern = new RegExp(
    '^([a-zA-Z]+:\\/\\/)?' + // protocol
      '((([a-z\\d]([a-z\\d-]*[a-z\\d])*)\\.)+[a-z]{2,}|' + // domain name
      '((\\d{1,3}\\.){3}\\d{1,3}))' + // OR ip (v4) address
      '(\\:\\d+)?(\\/[-a-z\\d%_.~+]*)*' + // port and path
      '(\\?[;&a-z\\d%_.~+=-]*)?' + // query string
      '(\\#[-a-z\\d_]*)?$', // fragment locator
    'i'
  );
  return pattern.test(str);
}

console.log(isValidUrl('https://api2.codingbeautydev.com')); // true
console.log(isValidUrl('app://api2.codingbeautydev.com')); // true
console.log(isValidUrl('Coding Beauty')); // false

The RegExp test() method searches for a match between a regular expression and a string. It returns true if it finds a match. Otherwise, it returns false.

To check for a valid HTTP URL, we can alter the part of the regex that matches the URL protocol:

function isValidHttpUrl(str) {
  const pattern = new RegExp(
    '^(https?:\\/\\/)?' + // protocol
      '((([a-z\\d]([a-z\\d-]*[a-z\\d])*)\\.)+[a-z]{2,}|' + // domain name
      '((\\d{1,3}\\.){3}\\d{1,3}))' + // OR ip (v4) address
      '(\\:\\d+)?(\\/[-a-z\\d%_.~+]*)*' + // port and path
      '(\\?[;&a-z\\d%_.~+=-]*)?' + // query string
      '(\\#[-a-z\\d_]*)?$', // fragment locator
    'i'
  );
  return pattern.test(str);
}

console.log(isValidHttpUrl('https://api2.codingbeautydev.com')); // true
console.log(isValidHttpUrl('app://api2.codingbeautydev.com')); // false
console.log(isValidHttpUrl('Coding Beauty')); // false

The https?: pattern will only match either http: or https:.

3. is-url and is-url-http NPM Packages

We can also use the is-url NPM package to quickly check if a string is a valid URL.

import isUrl from 'is-url';

console.log(isUrl('https://api2.codingbeautydev.com')); // true
console.log(isUrl('app://api2.codingbeautydev.com')); // true
console.log(isUrl('Coding Beauty')); // false

To quickly check if a string is a valid HTTP URL, we can use the is-url-http package from NPM.

import isUrlHttp from 'is-url-http';

console.log(isUrlHttp('https://api2.codingbeautydev.com')); // true
console.log(isUrlHttp('app://api2.codingbeautydev.com')); // false
console.log(isUrlHttp('Coding Beauty')); // false

How to Convert Hex to Decimal in JavaScript

In this article, we’re going to learn how to convert a hexadecimal number to its decimal equivalent in JavaScript. And we’ll look at some real-world scenarios where we’ll need to do this.

parseInt() function

To convert a hex to decimal, call the parseInt() function, passing the hex and 16 as the first and second arguments respectively, i.e., parseInt(hex, 16). For example:

function hexToDec(hex) {
  return parseInt(hex, 16);
}

console.log(hexToDec('f')); // 15
console.log(hexToDec('abc')); // 2748
console.log(hexToDec(345)); // 837

The parseInt() function parses a string and returns an integer of the specified radix. It has two parameters:

  1. string – the string to be parsed.
  2. radix – an integer between 2 and 36 that represents the radix/base of the string.

parseInt() ignores any leading whitespace in the string passed to it.

console.log(parseInt('   a', 16)); // 10
console.log(parseInt('   cd', 16)); // 205

If the string passed is not a valid number in the specified radix, parseInt() does not throw an error, but returns NaN.

console.log(parseInt('js', 16)); // NaN

// 'a' does not exist in base 10
console.log(parseInt('a', 10)); // NaN

// 5 does not exist in base 2
console.log(parseInt(5, 2)); // NaN

If the radix is not between 2 and 36, parseInt() will return NaN also.

console.log(parseInt(54, 1));
console.log(parseInt('aa', 37));
console.log(parseInt(10, 50));

If the radix is an invalid number or not set and the string starts with 0x or 0X, then the radix is assumed to be 16. But if the string starts with any other value, the radix is assumed to be 10.

// base 10 assumed
console.log(parseInt('45')); // 45
console.log(parseInt('36', 'invalid')); // 36

// 'f' and 'b' do NOT exist in assumed base 10
console.log(parseInt('ff')); // NaN
console.log(parseInt('bb', 'invalid')); // NaN

// 'f' and 'b' do exist in assumed base 16
console.log(parseInt('0xff')); // 255
console.log(parseInt('0Xbb', 'invalid')); // 187

Use case: convert hex codes to RGB(A)

One common use of converting hex values to decimal is to convert a color hex code to its RGB format equivalent. Here’s how we can do it:

function hexToDec(hex) {
  return parseInt(hex, 16);
}

function hexToRGB(hexColor) {
  const result = /^#?([a-f\d]{2})([a-f\d]{2})([a-f\d]{2})$/i.exec(hexColor);
  return {
    r: hexToDec(result[1]),
    g: hexToDec(result[2]),
    b: hexToDec(result[3]),
  };
}

// { r: 255, g: 128, b: 237 }
console.log(hexToRGB('#ff80ed'));

// { r: 195, g: 151, b: 151 }
console.log(hexToRGB('#c39797'));

// { r: 255, g: 255, b: 255 }
console.log(hexToRGB('#ffffff'));

We created a reusable hexToRGB() function to convert the hex color codes to their equivalent RGB format.

We use a regex to match and separate the two-letter codes representing red (R), green (G), and blue (B). We call the exec() method to find the matches of this regex in the specified hex color code.

/**
[
  '#ff80ed',
  'ff',
  '80',
  'ed',
  index: 0,
  input: '#ff80ed',
  groups: undefined
]
 */
console.log(/^#?([a-f\d]{2})([a-f\d]{2})([a-f\d]{2})$/i.exec('#ff80ed'));

After separating them, we use our hexToDec() method to convert each of them to its decimal equivalent.

We return an object with r, g and b properties containing the values for red, green, and blue respectively.

Depending on our use case, we could return an rgb() string instead of an object. This could be useful for color animation, as some animation libraries work with RGB values but not with hex color codes.

function hexToDec(hex) {
  return parseInt(hex, 16);
}

function hexToRGB(hexColor) {
  const result = /^#?([a-f\d]{2})([a-f\d]{2})([a-f\d]{2})$/i.exec(hexColor);
  const r = hexToDec(result[1]);
  const g = hexToDec(result[2]);
  const b = hexToDec(result[3]);

  return `rgb(${r}, ${g}, ${b})`;
}

// rgb(255, 128, 237)
console.log(hexToRGB('#ff80ed'));

// rgb(195, 151, 151)
console.log(hexToRGB('#c39797'));

// rgb(255, 255, 255)
console.log(hexToRGB('#ffffff'));

We could modify the function to detect alpha values in the hex code and convert the color code to an RGBA format instead. We’ll use an alpha of 1 if it is not specified.

function hexToDec(hex) {
  return parseInt(hex, 16);
}

function hexToRGBA(hexColor) {
  const regex = /^#?([a-f\d]{2})?([a-f\d]{2})([a-f\d]{2})([a-f\d]{2})$/i;
  const result = regex.exec(hexColor);

  const alphaHex = result[1];
  const a = alphaHex ? hexToDec(alphaHex) / 255 : 1;
  const r = hexToDec(result[2]);
  const g = hexToDec(result[3]);
  const b = hexToDec(result[4]);

  return { r, g, b, a };
}

// { r: 255, g: 128, b: 237, a: 1 }
console.log(hexToRGBA('#ff80ed'));

// { r: 195, g: 151, b: 151, a: 1 }
console.log(hexToRGBA('#c39797'));

// { r: 255, g: 128, b: 237, a: 0.8666666666666667 }
console.log(hexToRGBA('#ddff80ed'));

// { r: 195, g: 151, b: 151, a: 0.6901960784313725 }
console.log(hexToRGBA('#b0c39797'));

And we could also return an rgba() string instead of an object:

function hexToDec(hex) {
  return parseInt(hex, 16);
}

function hexToRGBA(hexColor) {
  const regex = /^#?([a-f\d]{2})?([a-f\d]{2})([a-f\d]{2})([a-f\d]{2})$/i;
  const result = regex.exec(hexColor);

  const alphaHex = result[1];
  const a = alphaHex ? hexToDec(alphaHex) / 255 : 1;
  const r = hexToDec(result[2]);
  const g = hexToDec(result[3]);
  const b = hexToDec(result[4]);

  return `rgba(${r}, ${g}, ${b}, ${a.toFixed(3)})`;
}

// rgba(255, 128, 237, 1.000)
console.log(hexToRGBA('#ff80ed'));

// rgba(195, 151, 151, 1.000)
console.log(hexToRGBA('#c39797'));

// rgba(255, 128, 237, 0.867)
console.log(hexToRGBA('#ddff80ed'));

// rgba(195, 151, 151, 0.690)
console.log(hexToRGBA('#b0c39797'));

How to Convert a Month Number to a Month Name in JavaScript

In this article, we’re going to learn how to get the name of a month by its position in the list of the 12 months using JavaScript.

Date toLocaleString() Method

To convert a month number to a month name, create a Date object with the given month, then call the toLocaleString() method on the Date with a specified locale and options.

For example, here is how we can get January for the number 1, February for 2, March for 3, and so on:

function getMonthName(monthNumber) {
  const date = new Date();
  date.setMonth(monthNumber - 1);

  return date.toLocaleString('en-US', { month: 'long' });
}

console.log(getMonthName(1)); // January
console.log(getMonthName(2)); // February
console.log(getMonthName(3)); // March

Our getMonthName() function takes a position and returns the name of the month with that position.

The setMonth() method sets the month of a Date object to a specified number.

Note

The value passed to setMonth() is expected to be zero-based. For example, a value of 0 represents January, 1 represents February, 2 represents March, and so on. This why we pass the value of 1 subtracted from the month number (monthNumber - 1) to setMonth().

We used the Date toLocaleString() method to get the name of the month of the date. toLocaleString() returns a string with a language-sensitive representation of a date.

This method has two parameters:

  1. locales: A string with a BCP 47 language tag, or an array of such strings. There are many locales we can specify, like en-US for US English, en-GB for UK English, and en-CA for Canadian English.
  2. options: An object used to adjust the output format of the date.

In our example, we pass en-US as the language tag to use US English, and we set a value of long to the month property of the options object to display the full month name.

We can pass an empty array ([]) as the first argument to make toLocaleString() use the browser’s default locale:

function getMonthName(monthNumber) {
  const date = new Date();
  date.setMonth(monthNumber - 1);

  // Using the browser's default locale.
  return date.toLocaleString([], { month: 'long' });
}

console.log(getMonthName(1)); // January
console.log(getMonthName(2)); // February
console.log(getMonthName(3)); // March

This is good for internationalization, as the output will vary depending on the user’s preferred language.

We can specify other values apart from long for the month property. For example, we can use short to abbreviate the month names to three letters:

function getMonthName(monthNumber) {
  const date = new Date();
  date.setMonth(monthNumber - 1);

  return date.toLocaleString('en-US', { month: 'short' });
}

console.log(getMonthName(1)); // Jan
console.log(getMonthName(2)); // Feb
console.log(getMonthName(3)); // Mar

Or we can use narrow to display only the first letter:

function getMonthName(monthNumber) {
  const date = new Date();
  date.setMonth(monthNumber - 1);

  return date.toLocaleString('en-US', { month: 'narrow' });
}

console.log(getMonthName(1)); // J
console.log(getMonthName(2)); // F
console.log(getMonthName(3)); // M

Note: Using narrow could lead to ambiguity for month names that start with the same letter in the language, e.g., January, June, and July.

For more information on the options you can set for toLocaleString(), check out this page in the MDN Docs.

Intl.DateTimeFormat Object

Using the toLocaleString() means that you have to specify a locale and options each time you want a language-sensitive string. To use the same settings to format multiple dates, we can use an object of the Intl.DateTimeFormat class instead.

For example:

function getTwoConsecutiveMonthNames(monthNumber) {
  const date1 = new Date();
  date1.setMonth(monthNumber - 1);

  const date2 = new Date();
  date2.setMonth(monthNumber);

  const formatter = new Intl.DateTimeFormat('en-US', { month: 'short' });

  // Format both dates with the same locale and options
  const firstMonth = formatter.format(date1);
  const secondMonth = formatter.format(date2);

  return `${firstMonth} & ${secondMonth}`;
}

console.log(getTwoConsecutiveMonthNames(1)); // Jan & Feb
console.log(getTwoConsecutiveMonthNames(2)); // Feb & Mar
console.log(getTwoConsecutiveMonthNames(3)); // Mar & Apr

How to Add Years to a Date in JavaScript

1. Date setFullYear() and getFullYear() Methods

To add years to a Date in JavaScript, call the getFullYear() method on the Date to get the year, then call the setFullYear() method on the Date, passing the sum of getFullYear() and the number of years to add as an argument, i.e., date.setFullYear(date.getFullYear() + years).

For example:

function addYears(date, years) {
  date.setFullYear(date.getFullYear() + years);
  return date;
}

// May 15, 2022
const date = new Date('2022-05-15T00:00:00.000Z');

const newDate = addYears(date, 3);

// May 20, 2025
console.log(newDate); // 2025-05-20T00:00:00.000Z

Our addYears() function takes a Date object and the number of years to add as arguments, and returns the same object with the newly added years.

The Date getFullYear() method returns a number that represents the year of a particular date.

The Date setFullYear() method sets the year of a date to a specified number.

Avoiding Side Effects

The setFullYear() method mutates the Date object it is called on. This introduces a side effect into our addYears() function. To avoid modifying the passed Date and create a pure function, make a copy of the Date and call setFullYear() on this copy, instead of the original.

function addYears(date, years) {
  const dateCopy = new Date(date);
  dateCopy.setFullYear(dateCopy.getFullYear() + years);
  return dateCopy;
}

// May 15, 2022
const date = new Date('2022-05-15T00:00:00.000Z');

const newDate = addYears(date, 3);

// May 20, 2025
console.log(newDate); // 2025-05-20T00:00:00.000Z

// Original not modified
console.log(date); // 2022-05-15T00:00:00.000Z

Functions that don’t modify external state (i.e., pure functions) tend to be more predictable and easier to reason about. This makes it a good practice to limit the number of side effects in your programs.

2. date-fns addYears() Function

Alternatively, we can use the pure addYears() function from the date-fns NPM package to quickly add years to a Date.

import { addYears } from 'date-fns';

// May 15, 2022
const date = new Date('2022-05-15T00:00:00.000Z');

const newDate = addYears(date, 3);

// May 20, 2025
console.log(newDate); // 2025-05-20T00:00:00.000Z

// Original not modified
console.log(date); // 2022-05-15T00:00:00.000Z

How to Remove a Class from the Body Element using JavaScript

To remove a class from the body element, call the classList.remove() method on the body element, e.g, document.body.classList.remove('the-class)'.

Here is some sample HTML:

index.html

<!DOCTYPE html>
<html>
  <head>
    <title>Coding Beauty Tutorial</title>
  </head>
  <body class="class-1 class-2">
    <div>This is a div element.</div>

    <script src="index.js"></script>
  </body>
</html>

Here’s how we can remove the class class-1 from the body using JavaScript:

index.js

document.body.classList.remove('class-1');

We use the body property of the document to access the HTMLElement object that represents the document body.

The classList property returns a DOMTokenList object that represents the list of classes an element has.

The remove() method of the classList property takes a list of classes and removes them from an element.

After removing class-1, the document markup will look like this:

<!DOCTYPE html>
<html>
  <head>
    <title>Coding Beauty Tutorial</title>
  </head>
  <body class="class-2">
    <div>This is a div element.</div>

    <script src="index.js"></script>
  </body>
</html>

We can pass multiple arguments to the remove() method to remove more than one class from the body. For example, we can remove both class-1 and class-2 from the body using a single statement:

index.js

document.body.classList.remove('class-1', 'class-2');

This will be the resulting document markup:

<!DOCTYPE html>
<html>
  <head>
    <title>Coding Beauty Tutorial</title>
  </head>
  <body>
    <div>This is a div element.</div>

    <script src="index.js"></script>
  </body>
</html>

If we pass a class that the element does not have, remove() ignores the class and does not throw an error.

Add class to body with JavaScript

To add a class to the body element instead, we can use the classList.add() method of the body object.

index.js

document.body.classList.add('class-3', 'class-4');

The add() method of the classList property takes a list of class names and adds them to an element.

This will be the resulting HTML after adding the two classes:

<!DOCTYPE html>
<html>
  <head>
    <title>Coding Beauty Tutorial</title>
  </head>
  <body class="class-1 class-2 class-3 class-4">
    <div>This is a div element.</div>

    <script src="index.js"></script>
  </body>
</html>

add() prevents the same class from being added to an element multiple times, so a specified class is ignored if the element already has it.

How to Remove a DOM Element by its ID using JavaScript

In this article, we’re going to learn how to easily remove an element in the HTML DOM by its ID using JavaScript.

The Element remove() Method

To remove a DOM element by ID, use the getElementById() method to select the element with the ID, then call the remove() method on the element.

For example:

index.html

<!DOCTYPE html>
<html>
  <head>
    <title>Coding Beauty Tutorial</title>
  </head>
  <body>
    <div class="box" id="box-1">This is a box</div>

    <script src="index.js"></script>
  </body>
</html>

Here’s how we can remove the element with the box-1 id:

index.js

const box = document.getElementById('box-1');
box.remove();

The getElementById() method takes a string and returns the element in the DOM with an ID that matches the string.

If there is no element with a matching ID, getElementByID() returns null.

index.js

const box = document.getElementById('box-5');
console.log(box); // null

We can use the optional chaining operator (?.) to call remove() to avoid causing an error if there is no DOM element with the ID.

Instead of causing an error, the optional chaining operator will prevent the method call and return undefined.

index.js

const box = document.getElementById('box-5');
box?.remove(); // no error thrown

How to Remove a DOM Element without Removing its Children

The remove() method removes a DOM element along with its children. What if want to keep the children of the element in the DOM?

index.html

<!DOCTYPE html>
<html>
  <head>
    <title>Coding Beauty Tutorial</title>
  </head>
  <body>

    <div id="parent">
      <p>Child 1</p>
      <p>Child 2</p>
    </div>

    <script src="index.js"></script>
  </body>
</html>

To remove the div element with the ID parent but keep its children, we can call the replaceWith() method on the div, passing the children of the element as arguments.

index.js

const element = document.getElementById('parent');

element.replaceWith(...element.childNodes);

Now the markup of the document will look like this:

<!DOCTYPE html>
<html>
  <head>
    <title>Coding Beauty Tutorial</title>
  </head>
  <body>
    <p>Child 1</p>
    <p>Child 2</p>

    <script src="index.js"></script>
  </body>
</html>

The childNodes property returns a list of the child nodes of an element. We use it to get the children of the element.

The replaceWith() method replaces an element in the DOM with a set of Node or string objects. We call it on the element to replace it with the children.

How to Check if a String is Empty in JavaScript

1. Comparing the String with an Empty String

To check if a string is empty in JavaScript, we can compare the string with an empty string ('') in an if statement.

For example:

function checkIfEmpty(str) {
  if (str === '') {
    console.log('String is empty');
  } else {
    console.log('String is NOT empty');
  }
}

const str1 = 'not empty';
const str2 = ''; // empty

checkIfEmpty(str1); // outputs: String is NOT empty
checkIfEmpty(str2); // outputs: String is empty

To treat a string containing only whitespace as empty, call the trim() method on the string before comparing it with an empty string.

function checkIfEmpty(str) {
  if (str.trim() === '') {
    console.log('String is empty');
  } else {
    console.log('String is NOT empty');
  }
}

const str1 = 'not empty';
const str2 = ''; // empty
const str3 = '   '; // contains only whitespace

checkIfEmpty(str1); // outputs: String is NOT empty
checkIfEmpty(str2); // outputs: String is empty
checkIfEmpty(str3); // outputs: String is empty

The String trim() method removes all whitespace from the beginning and end of a string and returns a new string, without modifying the original.

const str1 = '  bread  ';
const str2 = '   milk tea    ';

console.log(str1.trim()); // 'bread'
console.log(str2.trim()); // 'milk tea'

Tip

Trimming a string when validating required fields in a form helps ensure that the user entered actual data instead of just whitespace.

How to Check if a String is Empty, null, or undefined

Depending on your scenario, you might want to consider that the string could be a nullish value (null or undefined). To check for this, use the string if statement directly, like this:

function checkIfEmpty(str) {
  if (str) {
    console.log('String is NOT empty');
  } else {
    console.log('String is empty');
  }
}

const str1 = 'not empty';
const str2 = ''; // empty
const str3 = null;
const str4 = undefined;

checkIfEmpty(str1); // outputs: String is NOT empty
checkIfEmpty(str2); // outputs: String is empty
checkIfEmpty(str3); // outputs: String is empty
checkIfEmpty(str4); // outputs: String is empty

If the string is nullish or empty, it will be coerced to false in the if statement. Otherwise, it will be coerced to true.

To remove all whitespace and also check for a nullish value, use the optional chaining operator (?.) to call the trim() method on the string before using it in an if statement.

function checkIfEmpty(str) {
  if (str?.trim()) {
    console.log('String is NOT empty');
  } else {
    console.log('String is empty');
  }
}

const str1 = 'not empty';
const str2 = ''; // empty
const str3 = null;
const str4 = undefined;
const str5 = '    '; // contains only whitespace

checkIfEmpty(str1); // outputs: String is NOT empty
checkIfEmpty(str2); // outputs: String is empty
checkIfEmpty(str3); // outputs: String is empty
checkIfEmpty(str4); // outputs: String is empty
checkIfEmpty(str5); // outputs: String is empty

The optional chaining operator lets us call the trim() method on a null or undefined string without causing an error. Instead, it prevents the method call and returns undefined.

const str1 = null;
const str2 = undefined;

console.log(str1?.trim()); // undefined
console.log(str2?.trim()); // undefined

2. Comparing the Length of the String with 0

Alternatively, we can access the length property of a string and compare its value with 0 to check if the string is empty.

function checkIfEmpty(str) {
  if (str.length === 0) {
    console.log('String is empty');
  } else {
    console.log('String is NOT empty');
  }
}

const str1 = 'not empty';
const str2 = ''; // empty

checkIfEmpty(str1); // outputs: String is NOT empty
checkIfEmpty(str2); // outputs: String is empty

To check for strings containing only whitespace with this approach, we would also call the trim() method before comparing the length of the trimmed string with 0.

function checkIfEmpty(str) {
  if (str.trim().length === 0) {
    console.log('String is empty');
  } else {
    console.log('String is NOT empty');
  }
}

const str1 = 'not empty';
const str2 = ''; // empty
const str3 = '   '; // contains only whitespace

checkIfEmpty(str1); // outputs: String is NOT empty
checkIfEmpty(str2); // outputs: String is empty
checkIfEmpty(str3); // outputs: String is empty