By Tari Ibaba
/ Last updated on September 24, 2022
Material Design is a popular UI design system developed by Google. Apps using Material Design typically include responsive animations, attractive color combinations, and depth effects such as lighting and shadows.
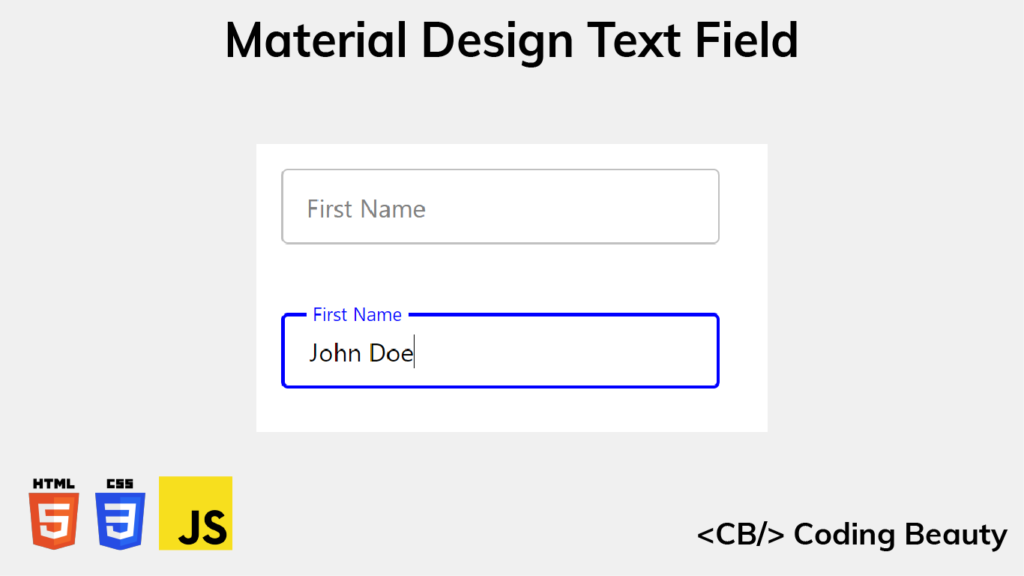
In this article, we’ll learn how to recreate the design and animation of the Material Design text field, using only HTML, CSS, and JavaScript. We’ll be cloning the outlined text field variant, but similar steps can be taken to create the filled variant.
Here’s what we’ll have when we’re done:
Create basic input and label
We’ll get started by creating the basic structure of the text field with HTML.
We create an input element to allow typing into the text field, and we use a label element as the label for the text field. The text for this label (First Name) is wrapped in a div (.text) for because of the text animation we’re going to do later.
We use another div (.input-container) to wrap both the input and label elements, so that later we’ll able to place the label on top of the input with absolute positioning.
The basic input and label.
Style input and label
Let’s add some styles for the input element and its container.
We set position: relative for the container so that the label will be positioned relative to it when we set position: absolute for the label, instead of the entire page.
Apart from the position: absolute we just talked about, we set top: 0 and bottom: 0 to make the label match the height of the input container.
The input has a 16px padding, so we set left: 16px to make the label match this padding and start from the same position as any text the user will type. Lastly, we horizontally center the contents of label in the input container using display: flex and align-items: center.
Remove pointer events
It looks like a text field now, but if you hover over the label, you’ll see the mouse pointer indicating that this is something that can be clicked. This means that it can block clicks on the input, which would create a bad user experience.
The label blocks clicks on the input.
Luckily, we can easily fix this by setting pointer-events: none for the label element.
CSS
.label {
  ...
  pointer-events: none;
}
The label no longer blocks clicks on the input.
Style input font
Let’s change the font family and font size of the input text. We’ll do the same for the label.
With this, the input border changes color and becomes thicker when the input gains focus.
Style label on input focus
Let’s also style the input label when it is focused. On gaining focus the label should shrink, move up to meet the top input border, and change color to match the input border.
Using the :not pseudo-class, we make the input when focused have the same style as when it is unfocused and non-empty. The only difference will be the color of the input border and label.
We’re not done yet. Even though the value DOM property of the input changes according to what is entered, the value HTML attribute stays the same. We need a way to keep it in sync with the value property.
We can do this by adding a listener for the input event, which fires whenever the text in the input field changes. In the listener, we’ll use the setAttribute() method to update the value attribute with the current value of the value property.
As programmers, we’re always looking to improve. We want to write cleaner, more maintainable code, learn advanced language features for elegant and concise code, make our code easier for others to read and understand, and create more reusable and effective test cases.
If you’re looking to improve your skills, there are tons of resources available to help you out. From YouTube videos to seminars to answers on Stack Overflow, there’s no shortage of information out there. However, if you really want to delve deep into a particular subject, it’s hard to beat a good book. Specifically, books written for that specific field will provide a detailed explanation of all the important concepts, along with insights from experienced authors.
Check out these top JavaScript books to boost your skills! Whether you’re new to JavaScript or a seasoned pro, these books are comprehensive guides that can take you from beginner to expert. Plus, you can use them as a reference to brush up on concepts you may have forgotten or aren’t quite sure about in the future.
This has been a top-selling book for almost 25 years. The seventh edition is fully updated to cover the 2020 version of JavaScript (ES2020), including new chapters that cover classes, modules, iterators, generators, Promises, async/await, and metaprogramming. The book is meant for programmers interested in learning JavaScript and for web developers that want to improve their knowledge and understanding of the language.
Topics covered include: types, values, variables, expressions, operators, statements, objects, arrays, functions, classes, modules, iterators, generators, Promises, async/await, data structures, regular expressions, JSON, buffers, files, streams, and more.
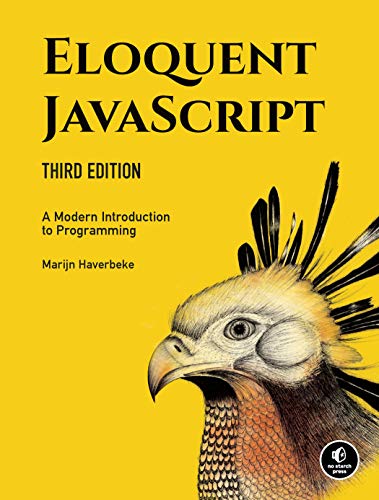
Newly updated only a few years back, Eloquent JavaScript gives you a closer look at essential JavaScript language features to help you quickly start writing beautiful and effective code.
It has been updated to reflect a more recent state of JavaScript and web browsers and includes brand-new material on features like class notation, arrow functions, iterators, async functions, template strings, and block scope.
A great read for beginners and experts alike, the book is packed with plenty of extensive examples that let you have a practical understanding of the concepts, as well as exercises and full-chapter projects that give you hands-on experience with writing your own programs.
Here are some of the things you’ll learn:
Essential elements of programming in general, like syntax, control flow, and data.
How to organize and clarify your code with object-oriented and functional programming language techniques.
How to write browser scripts and make basic web applications.
How to use the DOM effectively to interact with webpages.
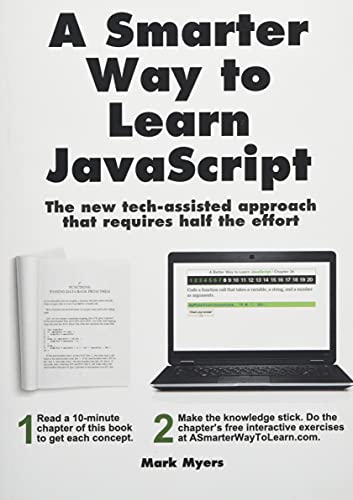
If you’re new to programming, this will be a great book. It explains basic coding concepts with simple English and no assumptions about what you already know. If you’re an intermediate JavaScript developer, you will also benefit from the book, as it comes with a variety of exercises that will give you extra practice and sharpen your skills in any weak areas.
Topics covered include:
Fundamentals of JavaScript such as variables, math expressions, strings, if statements, arrays, loops, functions, etc.
Advanced JavaScript concepts such as constructors, prototypes, and exception handling.
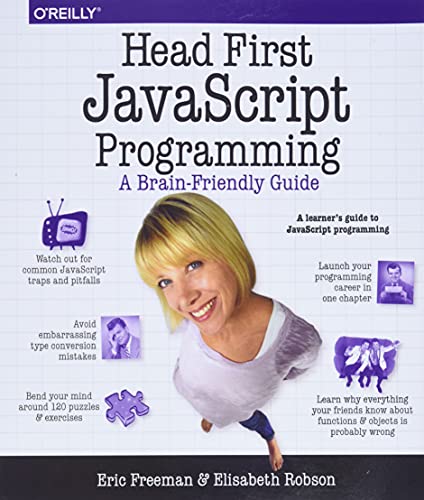
Head First is series known for its highly visual and interactive approach to teaching. This is a great read if you’re just getting started with JavaScript and want a less formal approach to learning the language that doesn’t use only text and all kinds of technical jargon. You’ll be playing games, solving puzzles, studying riddles, and interacting with JavaScript in many unconventional ways. You’ll also create a lot of real code so that you can start creating your own web applications.
It covers important topics such as: the inner details of JavaScript, how JavaScript works with the browser, data types in JavaScript, arrays, the power of functions, how to use objects, closures, writing and testing applications, etc.
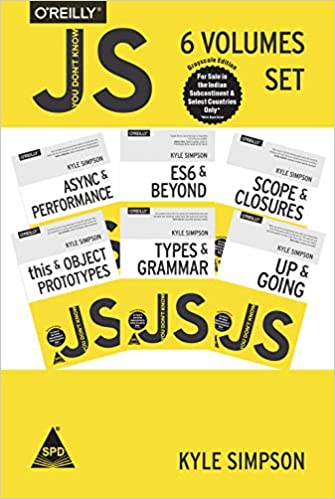
You Don’t Know JS is not a single book but is a collection of six well-written books for mastering JavaScript that can be read independently. Each book in the series gives a you thorough exploration of the core mechanisms of JavaScript to help you gain a deeper understanding of how the language works. The author takes a practical and thorough approach to explain the concepts in a way that will quickly bring you up to speed with the unique language features.
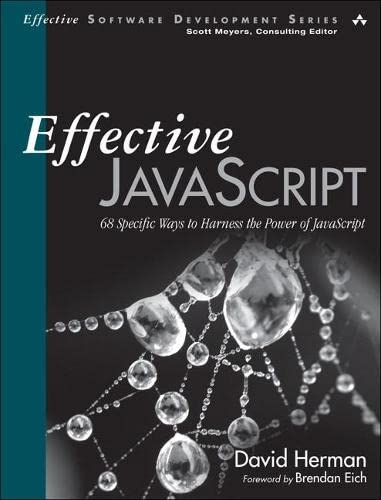
Effective JavaScript is organized around 68 proven ways to write better JavaScript, demonstrated with concrete examples. With this book, you’ll learn how to work effectively with flexible and expressive features of the language, and how to avoid pitfalls. No matter how long you’ve been writing JavaScript, Effective JavaScript will strengthen your understanding of this powerful language, so that you can build more predictable, reliable, and maintainable programs. Topics covered include: better ways to use prototype-based object-oriented programming, subtleties, and solutions for working with arrays and dictionary objects, precise and practical explanations of JavaScript functions and variable scoping semantics, etc.
Douglas Crockford is a highly renowned JavaScript expert in the development community, and in this book, he highlights the beautiful parts of the language that lets you create effective code. JavaScript was developed and released in a hurry before it could be refined, and this led to a lot of unrefined and error-prone features in the language. In JavaScript: The Good Parts, Crockford filters out the language blunders to offer you a detailed look at the genuinely elegant parts of the language in areas like syntax, objects, functions, inheritance, arrays, regular expressions, and methods.
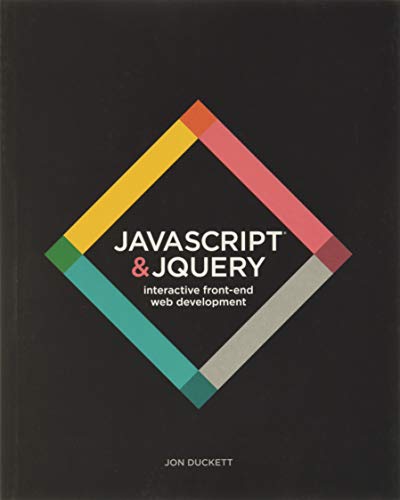
This book delivers a fully illustrated guide to making your websites more interactive and your interfaces more interesting and intuitive. You’ll explore basic programming language concepts that assume no prior knowledge of programming, beyond an ability to create a web page using HTML & CSS.
There is little reason to learn jQuery in 2022, but the book also teaches you how to use the library to simplify the process of writing scripts, after you’ve gained a solid understanding of JavaScript.
Professional JavaScript for Web Developers is a book written to help intermediate and advanced programmers improve the quality of their code. It looks into modern language features that will help you write cleaner code and become a more polished JavaScript developer. It explains fundamental web development concepts such as the document object model (DOM), the browser object model (BOM), events, forms, JSON, error handling, and web animation. It also covers advanced browser APIs such as geolocation, web workers, service workers and fetch. There are hundreds of working code examples that you can practice with to get familiar with the new concepts.
In this book, you’ll master key JavaScript concepts such as functions, closures, objects, prototypes, and promises, using practical examples that clearly illustrate each concept and technique. You’ll discover best practice techniques like testing and cross-browser development, and look into regular expressions and asynchronous programming.
JavaScript for Kids will be a gentle introduction to programming for aspiring developers. It teaches programming essentials through patient, step-by-step examples with lighthearted illustrations. The book has three parts; you’ll start with the basics like strings, conditional statements, and loops in part 1, then you’ll move on to more advanced topics like object-oriented programming, timers, and browser events in part 2. In part 3, you’ll learn how to use the HTML5 canvas to create drawings and animate them with JavaScript. After each part, you’ll write a cool game to gain a practical understanding of the lessons covered.
You can always improve your skills, no matter how long you’ve been programming. Whether you’re just getting started with JavaScript or you’re a seasoned expert, the knowledge from these books will refresh your memory on various language features, and help you write cleaner and more polished code.
This post contains affiliate links. We may earn a commission if you make a purchase through them, at no additional cost to you.
Visual Studio Code has thousands of extensions you can install to ramp up your developer productivity and save yourself from mundane tasks. They are all available in the Visual Studio Code marketplace and the vast majority of them are completely free.
Let’s have a detailed look at 10 powerful Visual Studio Code extensions that significantly improve the web development experience.
Prettier is a useful tool that automatically formats your code using opinionated and customizable rules. It ensures that all your code has a consistent format and can help enforce a specific styling convention in a collaborative project involving multiple developers.
The Prettier extension for Visual Studio Code brings about a seamless integration between the code editor and Prettier, allowing you to easily format code using a keyboard shortcut, or immediately after saving the file.
Watch Prettier in action:
Pretter instantly formats the code after the file is saved.
ESLint is a tool that finds and fixes problems in your JavaScript code. It deals with both code quality and coding style issues, helping to identify programming patterns that are likely to produce tricky bugs.
The ESLint extension for Visual Studio Code enables integration between ESLint and the code editor. This integration allows ESLint to notify you of problems right in the editor.
For instance, it can use a red wavy line to notify of errors:
We can view details on the error by hovering over the red line:
We can also use the Problems tab to view all errors in every file in the current VS Code workspace.
The Live Server extension for VS Code starts a local server that serves pages using the contents of files in the workspace. The server will automatically reload when an associated file is changed.
In the demo below, a new server is launched quickly to display the contents of the index.html file. Modifying index.html and saving the file reloads the server instantly. This saves you from having to manually reload the page in the browser every time you make a change.
As you saw in the demo, you can easily launch a new server using the Open with Live Server item in the right-click context menu for a file in the VS Code Explorer.
This extension can work hand in hand with CSS Peek, it provides code completion for the HTML class attribute from existing CSS definitions found in the current Visual Studio Code workspace.
You’ll appreciate the benefits of this extension when using third-party CSS libraries containing hundreds of classes.
Artificial Intelligence continues to increase worker productivity in various jobs, and developers are not left out. IntelliCode is a tool that produces smart code completion recommendations that make sense in the current code context. It does this using an AI model that has been trained on thousands of popular open-source projects on GitHub.
When you type the . character to access an object method or fields, IntelliCode will suggest a list of members that are likely to be used in the present scenario. The items in the list are denoted using a star symbol, as shown in the following demo.
IntelliCode is available for JavaScript, TypeScript, Python, and a number of other languages.
Icon packs are available to customize the look of files of different types in Visual Studio Code. They enhance the look of the application and make it easier to identify and distinguish files of various sorts.
VSCode Icons is one the most popular icon pack extensions, boasting a highly comprehensive set of icons and over 11 million downloads.
It goes beyond file extension differentiation, to provide distinct icons for files and folders with specific names, including package.json, node_modules and .prettierrc.
Final thoughts
These are 10 essential extensions that aid web development in Visual Studio Code. Install them now to boost your developer productivity and raise your quality of life as a web developer.
Timer apps are everywhere, and they each have their unique appearance and design. Some opt for a minimalistic design, using only text to indicate the time left, while others try to be more visual by displaying a slowly decreasing pie shape or even playing audio at regular intervals to notify of the time remaining.
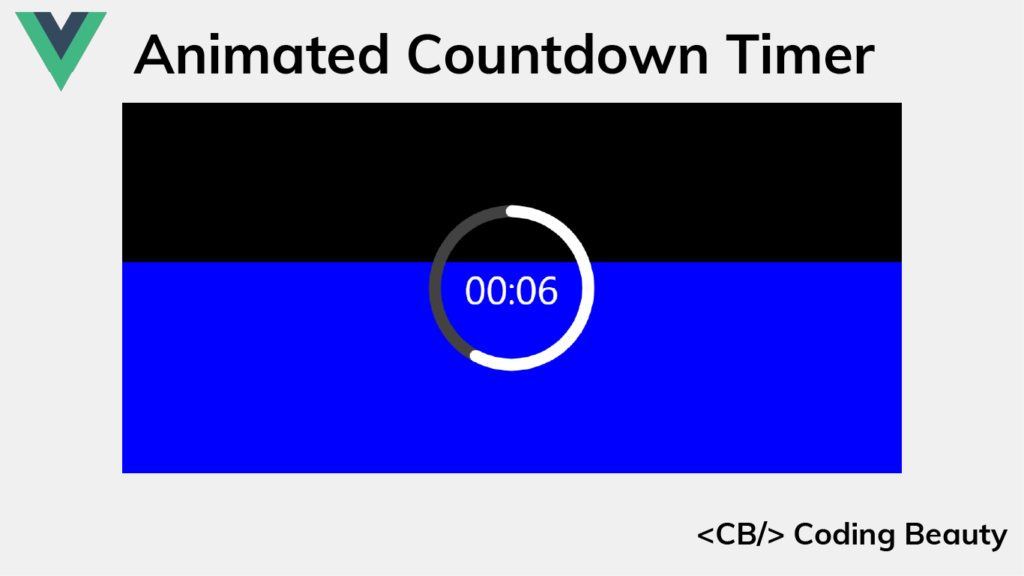
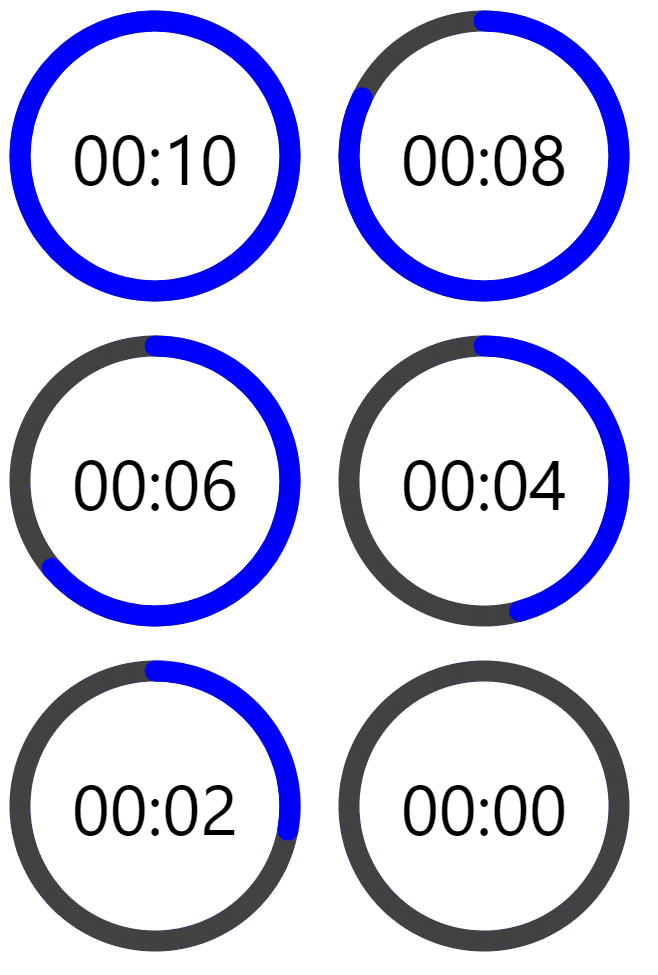
Well here’s the sort of timer we’ll be building in this article:
It indicates the time left with length, text, and color, which makes it very demonstrative.
We’ll be using Vue, so set up your project and let’s get started!
Creating the Timer Ring
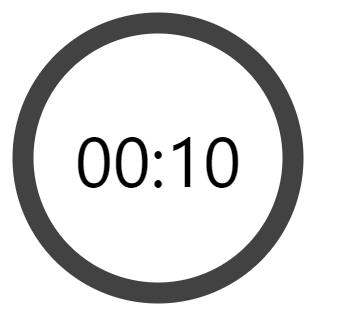
We’ll start by creating the timer ring using an svg element. It will contain a circle element that we’ll use to create the timer ring. The circle will be drawn at the center of the svg container, with a radius of 45 pixels.
The AppTimer now has two props. The elapsed prop will be used to set how much time has elapsed, and the limit prop will specify the total time.
timeLeft() is a computed property that will be automatically updated when elapsed changes.
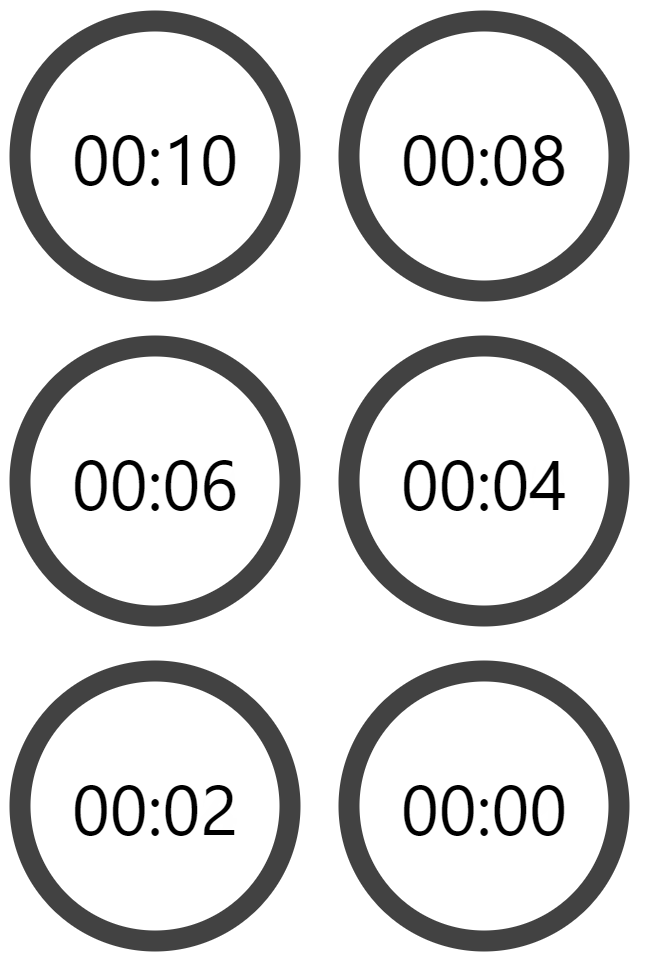
timeLeftString() is another computed property that will return a string in the MM:SS format indicating the timer left. Its values will be updated whenever timeLeft() changes.
Let’s add the following CSS to AppTimer.vue, which will style the label and overlay it on top of the timer ring:
src/components/AppTimer.vue
...
<style>
...
.time-left-container {
  /* Size should be the same as that of parent container */
  height: inherit;
  width: inherit;

  /* Place container on top of circle ring */
  position: absolute;
  top: 0;

  /* Center content (label) vertically and horizontally  */
  display: flex;
  align-items: center;
  justify-content: center;
}

.time-left-label {
  font-size: 70px;
  font-family: 'Segoe UI';
  color: black;
}
</style>
Let’s set the AppTimer props we created, from App.vue:
A timer has no use if it can’t count down, let’s add some logic to enable this functionality.
We’ll use a state variable (timeElapsed) to keep track of the total time elapsed so far in seconds. Using the setInterval() method, we will increment this variable by 1 every 1000 milliseconds (1 second). We’ll also ensure that we stop the regular increments once all the timer has elapsed, using the clearInterval() method.
All this logic will be contained in the startTimer() method. We’ll call startTimer() in the mounted() hook, so that the countdown starts immediately after the page loads.
src/App.vue
<template>
  <AppTimer
    :elapsed="timeElapsed"
    :limit="timeLimit"
  />
</template>

<script>
import AppTimer from './components/AppTimer.vue';

export default {
  name: 'App',
  data() {
    return {
      timeElapsed: 0,
      timerInterval: undefined,
      timeLimit: 10,
    };
  },
  methods: {
    startTimer() {
      this.timerInterval = setInterval(() => {
        // Stop counting when there is no more time left
        if (++this.timeElapsed === this.timeLimit) {
          clearInterval(this.timerInterval);
        }
      }, 1000);
    },
  },
  // Start timer immediately
  mounted() {
    this.startTimer();
  },
  components: {
    AppTimer,
  },
};
</script>
And now we have a functional timer.
Creating the Timer Progress Ring
Now we need to add a ring that will be animated to visualize the time remaining. We’ll give this ring a distinctive color and place it on the gray ring. As time passes it will animate to reveal more and more of the gray ring until only the gray ring is visible when no time is remaining.
We’ll create the ring using a path element and style it with CSS:
src/components/AppTimer.vue
<template>
  <div class="root">
    <svg
      class="svg"
      viewBox="0 0 100 100"
      xmlns="http://www.w3.org/2000/svg"
    >
      <g class="circle">
        ...
        <path
          class="time-left-path"
          d="
            M 50, 50
            m -45, 0
            a 45,45 0 1,0 90,0
            a 45,45 0 1,0 -90,0
          "
        ></path>
      </g>
    </svg>
    ...
  </div>
</template>

<script>
...
</script>

<style>
...
.time-left-path {
  /* Same thickness as the original ring */
  stroke-width: 7px;

  /* Rounds the path endings  */
  stroke-linecap: round;

  /* Makes sure the animation starts at the top of the circle */
  transform: rotate(90deg);
  transform-origin: center;

  /* One second aligns with the speed of the countdown timer */
  transition: 1s linear all;

  /* Colors the ring */
  stroke: blue;
}

.svg {
  /* Flips the svg and makes the animation to move left-to-right */
  transform: scaleX(-1);
}
</style>
So now this blue ring covers the gray ring.
Animating the Timer Progress Ring
To animate the ring, we are going to use the stroke-dasharray attribute of the path.
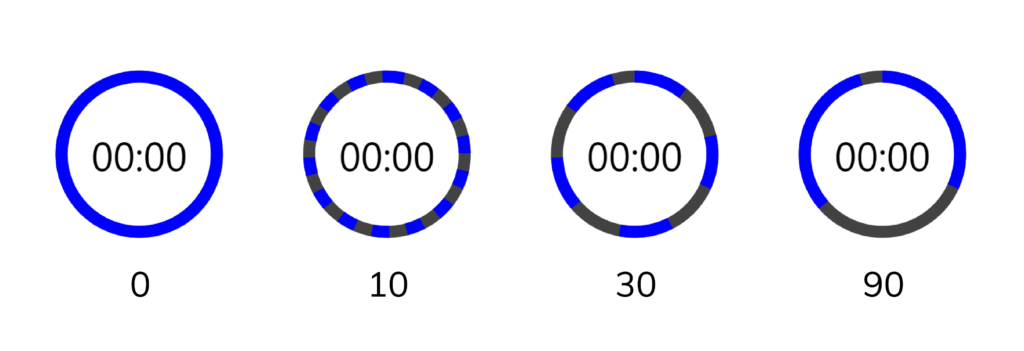
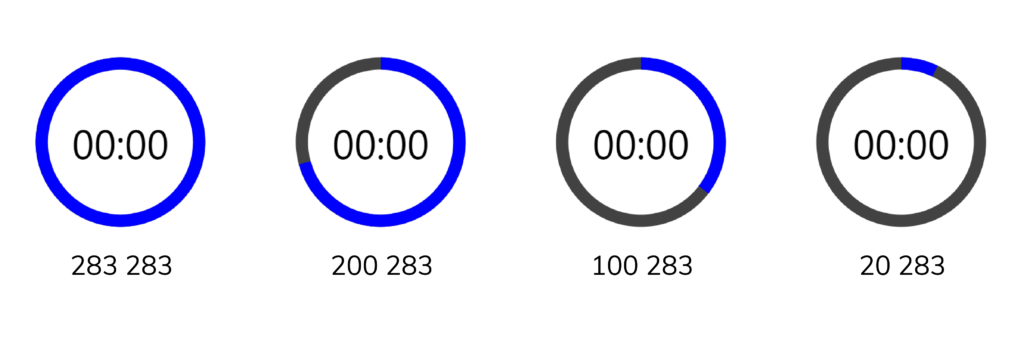
Here’s how the ring will look with different stroke-dasharray values:
We can see that setting stroke-dasharray to a single value creates a pattern of dashes (the blue arcs) and gaps (spaces between the dashes) that have the same length. stroke-dasharray adds as many dashes as possible to fill up the entire length of the path.
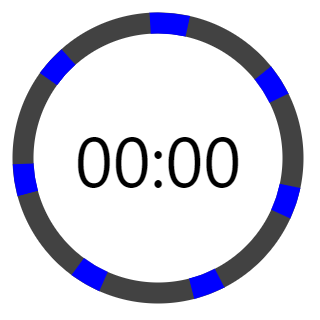
As the name suggests, stroke-dasharray can also take multiple values. Let’s see what happens when we specify two:
stroke-dasharray: 10 30
When two values are specified, the first value will determine the length of the dashes, and the second value will determine the length of the gaps.
We can use this behavior to make the blue path visualize the time left. To do this, first, let us calculate the total length of the circle made by the blue path using the circle circumference formula (2πr):
Full path length = 2 x π x r = 2 x π x 45 = 282.6 ≈ 283
So to display the time left with the path, we’ll specify two values, the first value will start at 283 and gradually reduce to 0, while the second value will be constant at 283. This ensures that there is only one dash and one gap at all times, since 283 is as long as the entire path.
Here’s how the path will change in length as the first value changes:
We use a computed property (strokeDasharray) to calculate the new value for the stroke-dasharray attribute whenever the time left changes.
We use v-if to stop showing the blue ring entirely when there is no more time remaining.
And now the blue ring animates in line with the label to indicate the time left.
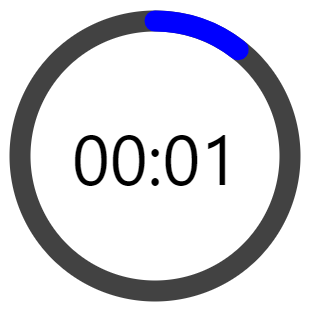
There’s one issue though: if you watch closely, the blue ring suddenly disappears when the timer reaches zero.
The blue path suddenly disappears at this length as the timer reaches zero.
This happens because the animation duration is set to one second. When the value of the remaining time is set to zero, it still takes one second to actually animate the blue ring to zero.
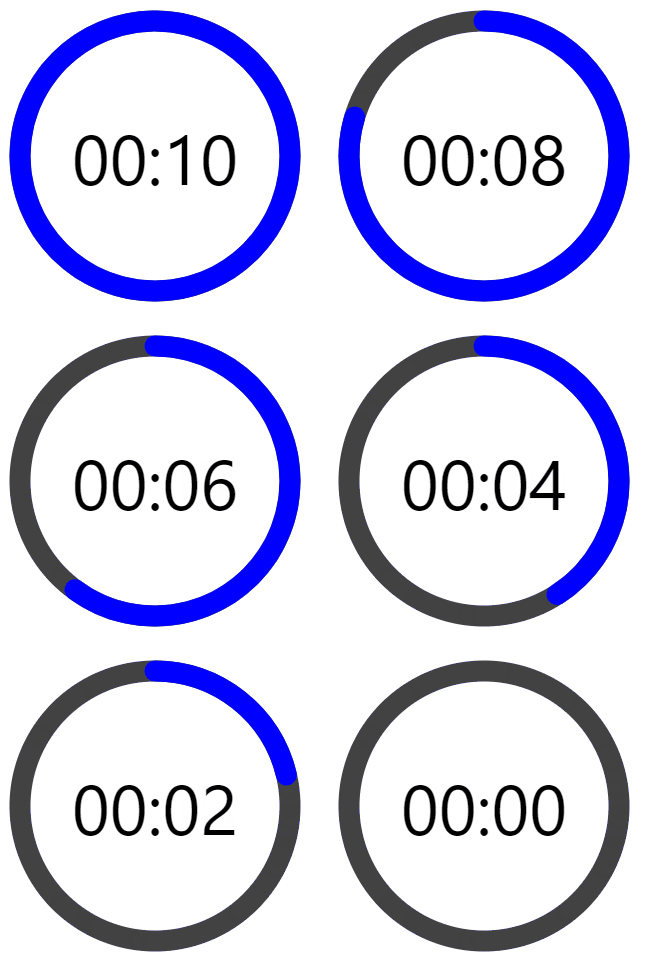
To fix this, we can use a formula that will reduce the length of a ring by an additional amount (separate from the animation) every time one second passes. Let’s modify AppTimer.vue to do this:
The background is nice, but it’s just static. Let’s add some code to animate its height as time passes.
src/App.vue
<template>
  <div class="background">
    <div
      class="elapsed"
      :style="{ height: backgroundHeight, backgroundColor: 'blue' }"
      v-if="timeLeft > 0"
    ></div>
  </div>
  <AppTimer
    :elapsed="timeElapsed"
    :limit="timeLimit"
  />
</template>

<script>
...
export default {
  ...
  computed: {
    timeLeft() {
      return this.timeLimit - this.timeElapsed;
    },
    timeFraction() {
      return this.timeLeft / this.timeLimit;
    },
    backgroundHeight() {
      const timeFraction = this.timeFraction;

      // Adjust time fraction to prevent lag when the time left
      // is 0, like we did for the time left progress ring
      const adjTimeFraction =
        timeFraction - (1 - timeFraction) / this.timeLimit;

      const height = Math.floor(adjTimeFraction * 100);

      return `${height}%`;
    },
  },
  ...
};
</script>
...
And now we have a background animation, which serves as another indicator of the time left.
Changing the Background Color at Certain Points in Time
It would be great if we could also use color to indicate the time left.
We’ll define certain points in time at which the background color will change, using a thresholds array. The background color will be blue at the start of the countdown. It will change to orange at 50% percent of the total time, and red at 20% of the total time.
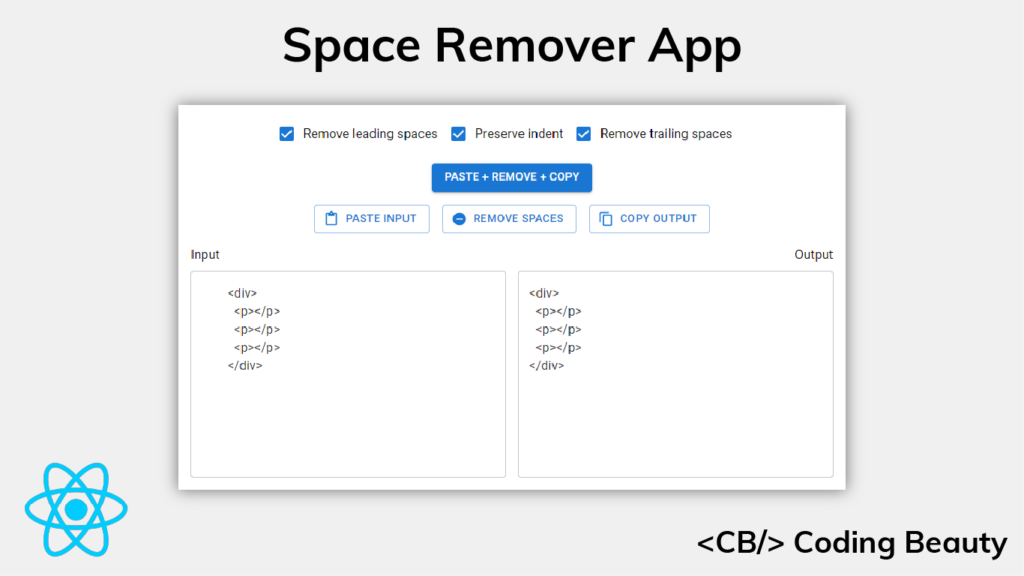
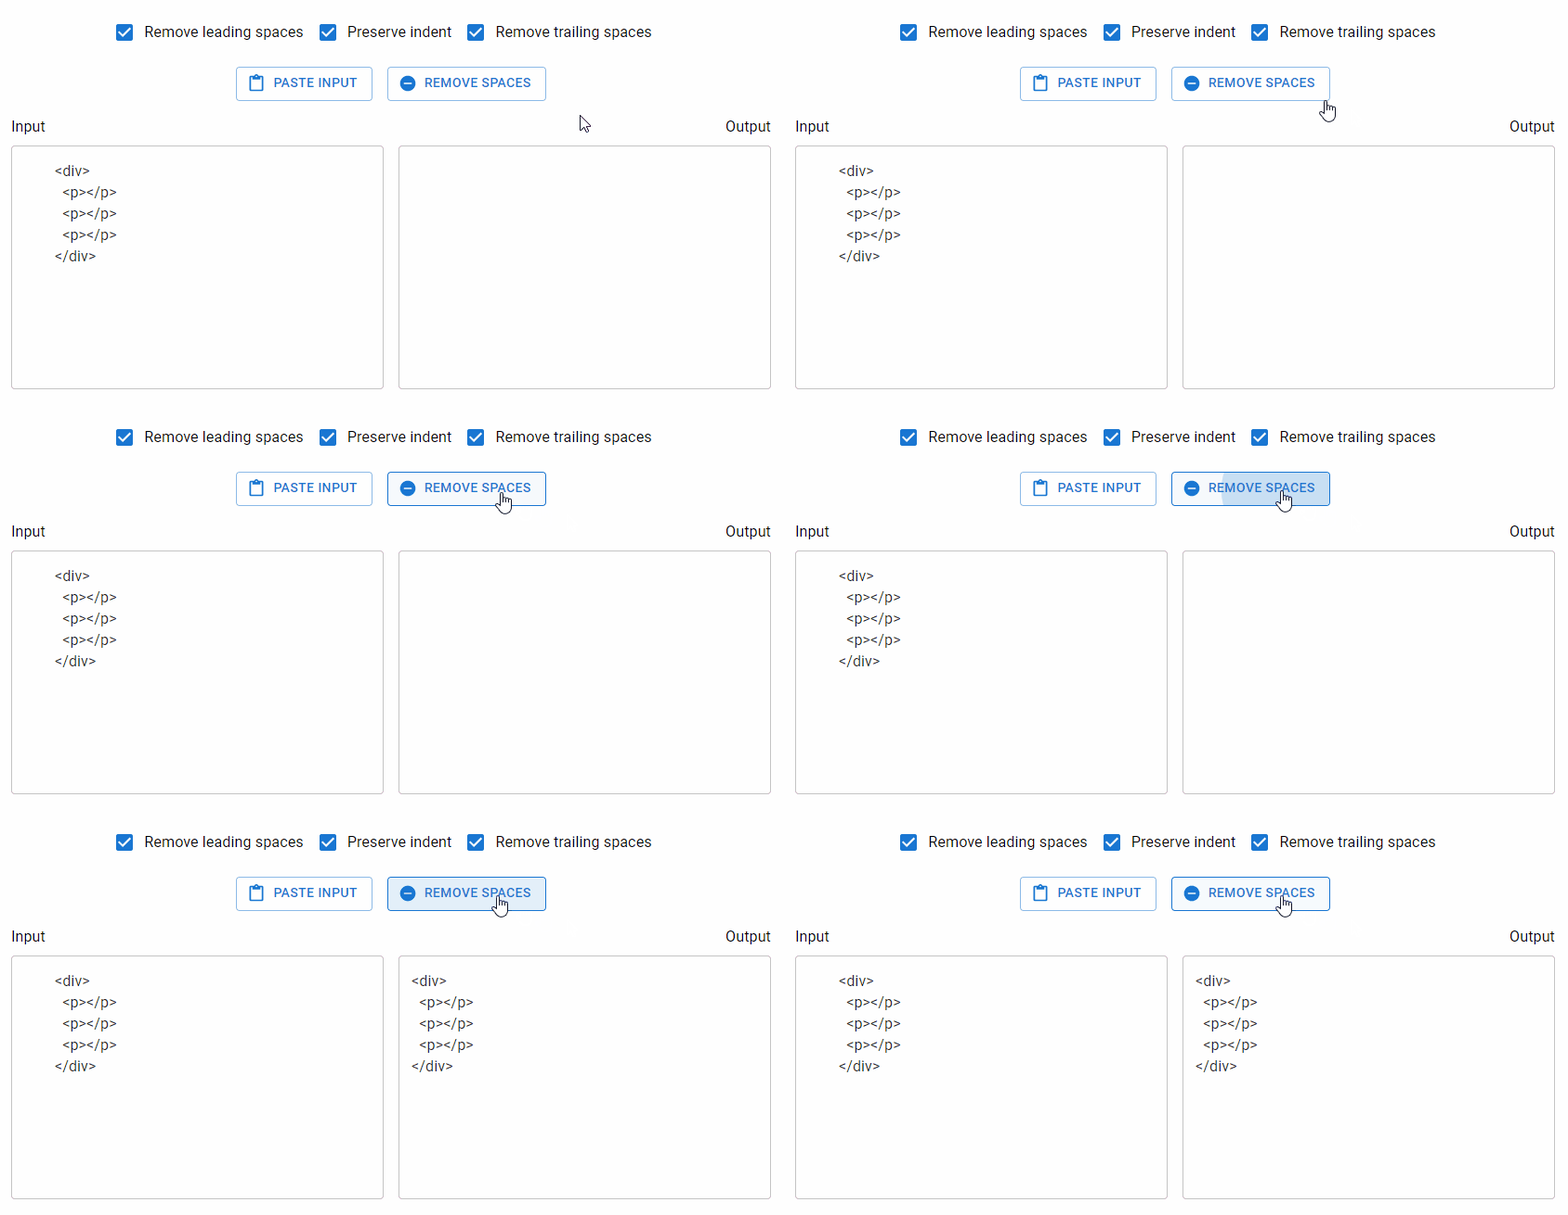
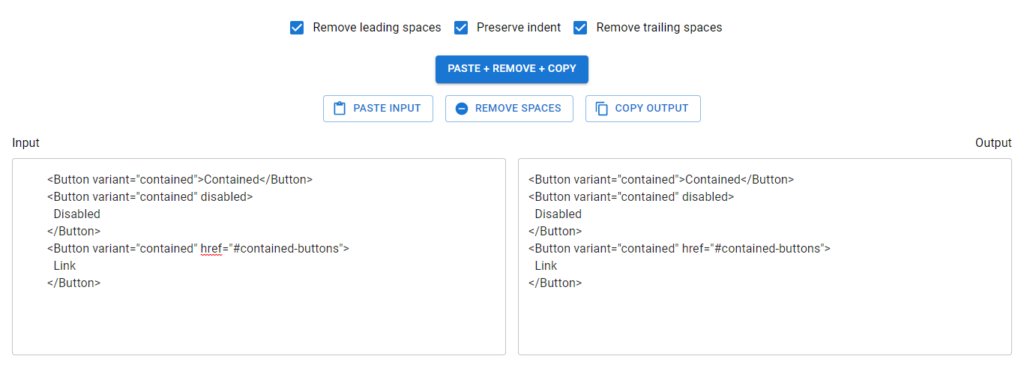
In this article, we’re going to learn how to build a web app that will let us easily remove leading and trailing spaces from any text, with the ability to optionally preserve the indentation of the text. We’ll be using the React.js library to build this tool, let’s get started.
Let’s begin by creating a new React app using Create React App. We’ll be using Yarn.
yarn create-react-app remove-spaces
We’ll also be using a bit of TypeScript, you can set it up using the instructions here.
Writing the removeSpaces() Function
The core part of the app will be a removeSpaces() function that takes a string as input and returns a new string with the spaces removed. Let’s write this function in a new remove-spaces.ts file.
Apart from the input string, the function accepts options that will allow the user to customize how the spaces are removed.
When leading is true and preserveIndent is false, the leading spaces are removed from the text, apart from the spaces that add indentation.
When leading is true and preserveIndent is false, all the leading spaces are removed from the text.
When trailing is true, all the trailing spaces are removed from the text.
The function creates a regular expression from the combination of these options. It uses the String replace() method to replace each line of the text with captured groups from the regex.
Testing the removeSpaces() function
We can test this function to be sure it works as intended. Let’s install the Jest testing framework to do this.
yarn add --dev jest ts-jest @types/jest
Initialize ts-jest with the following command:
yarn ts-jest config:init
Let’s write some tests for the function in a new remove-spaces.test.ts file:
The function should pass all these tests if it was written correctly.
Creating the Text Inputs
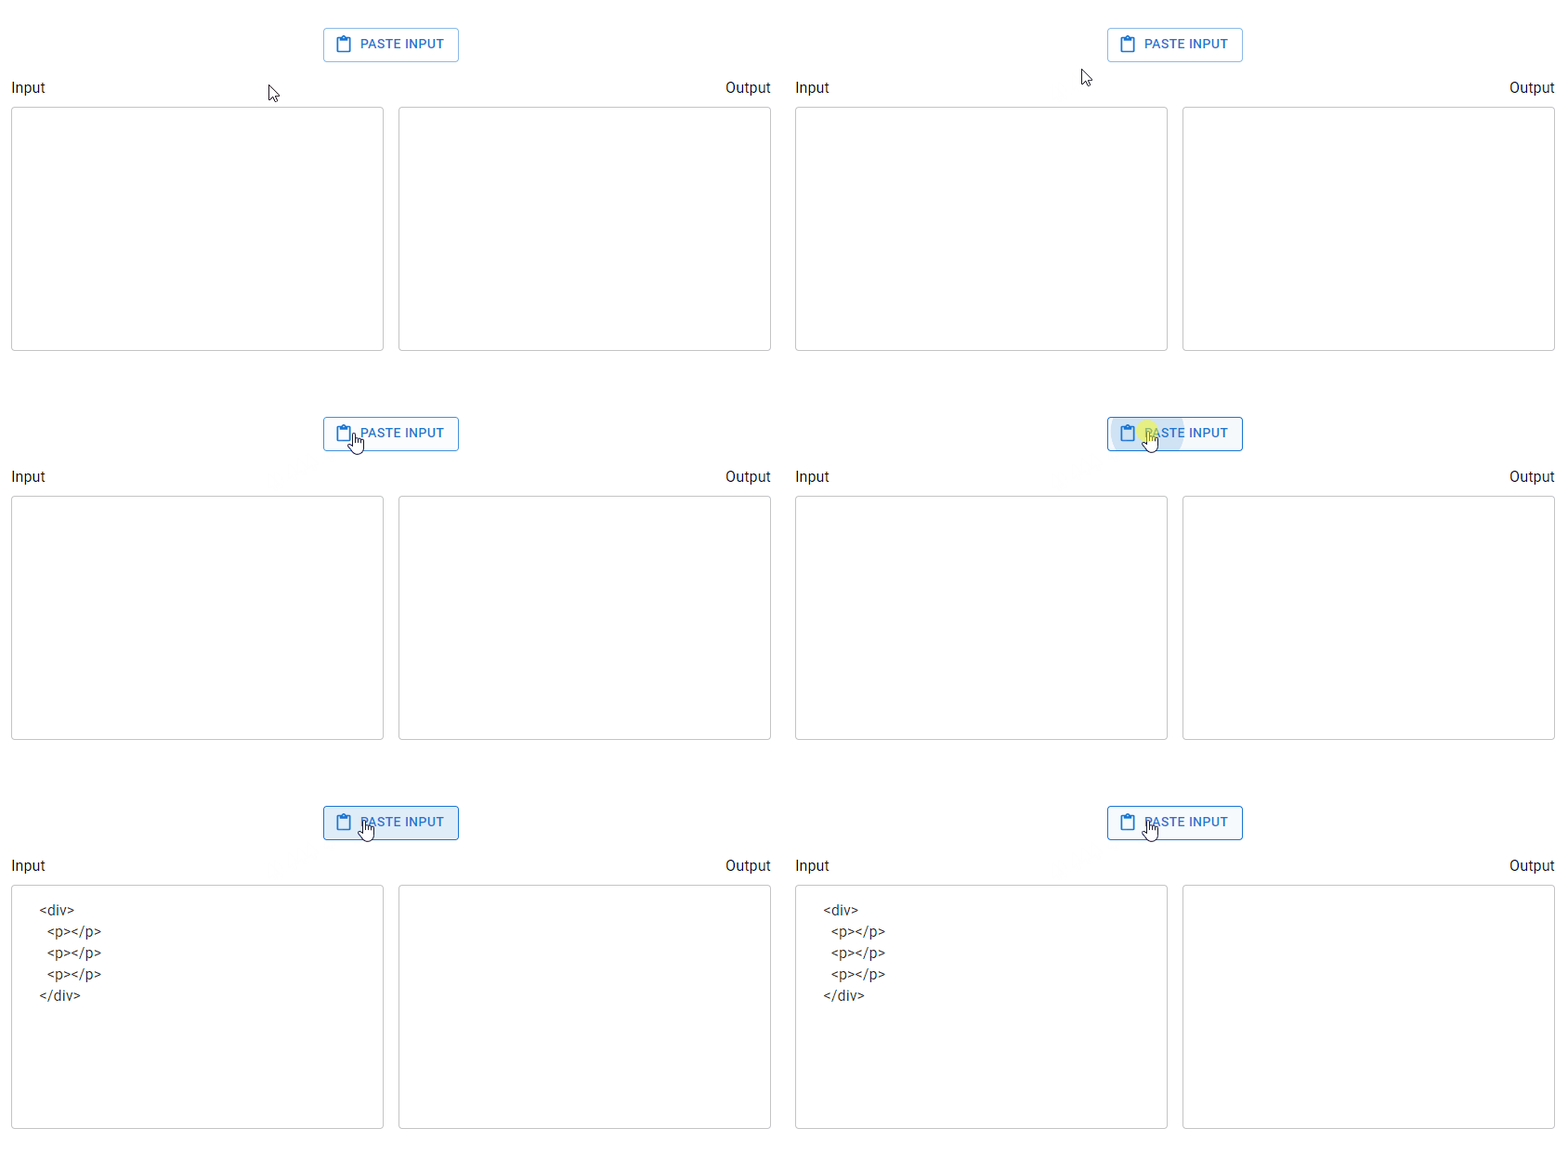
It’s time for us to start creating the user interface with React. We’ll begin with the text inputs. We’ll create two – one will take will user input, and the other will be readonly and display the output.
We’ll be using the Material UI framework to make the app look great, you can set it up using the instructions here.
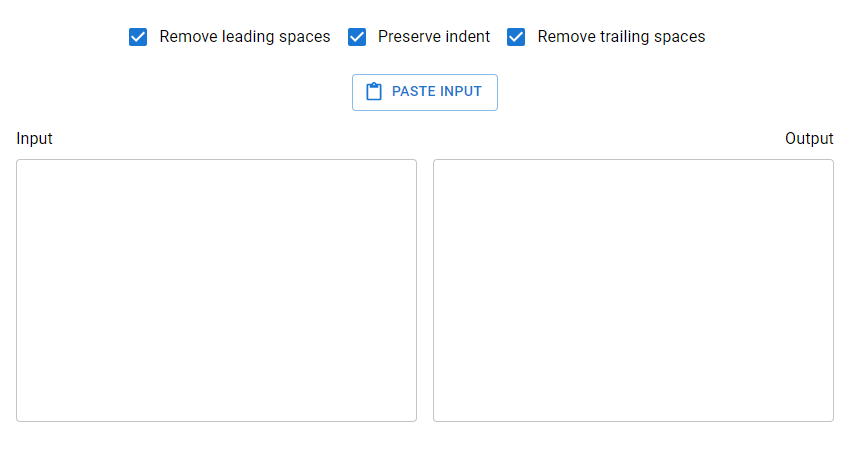
Let’s create the options that will let the user decide how the spaces will be removed from the text. There will be three boolean options, each represented with a checkbox:
Remove leading spaces
Remove trailing spaces
Preserve indent
We’ll pass the options directly to the removeSpaces() function when the user decides to remove the spaces.
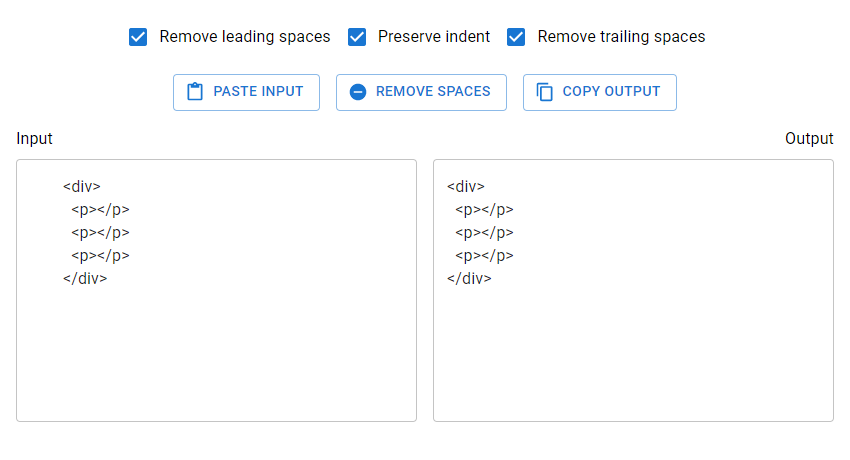
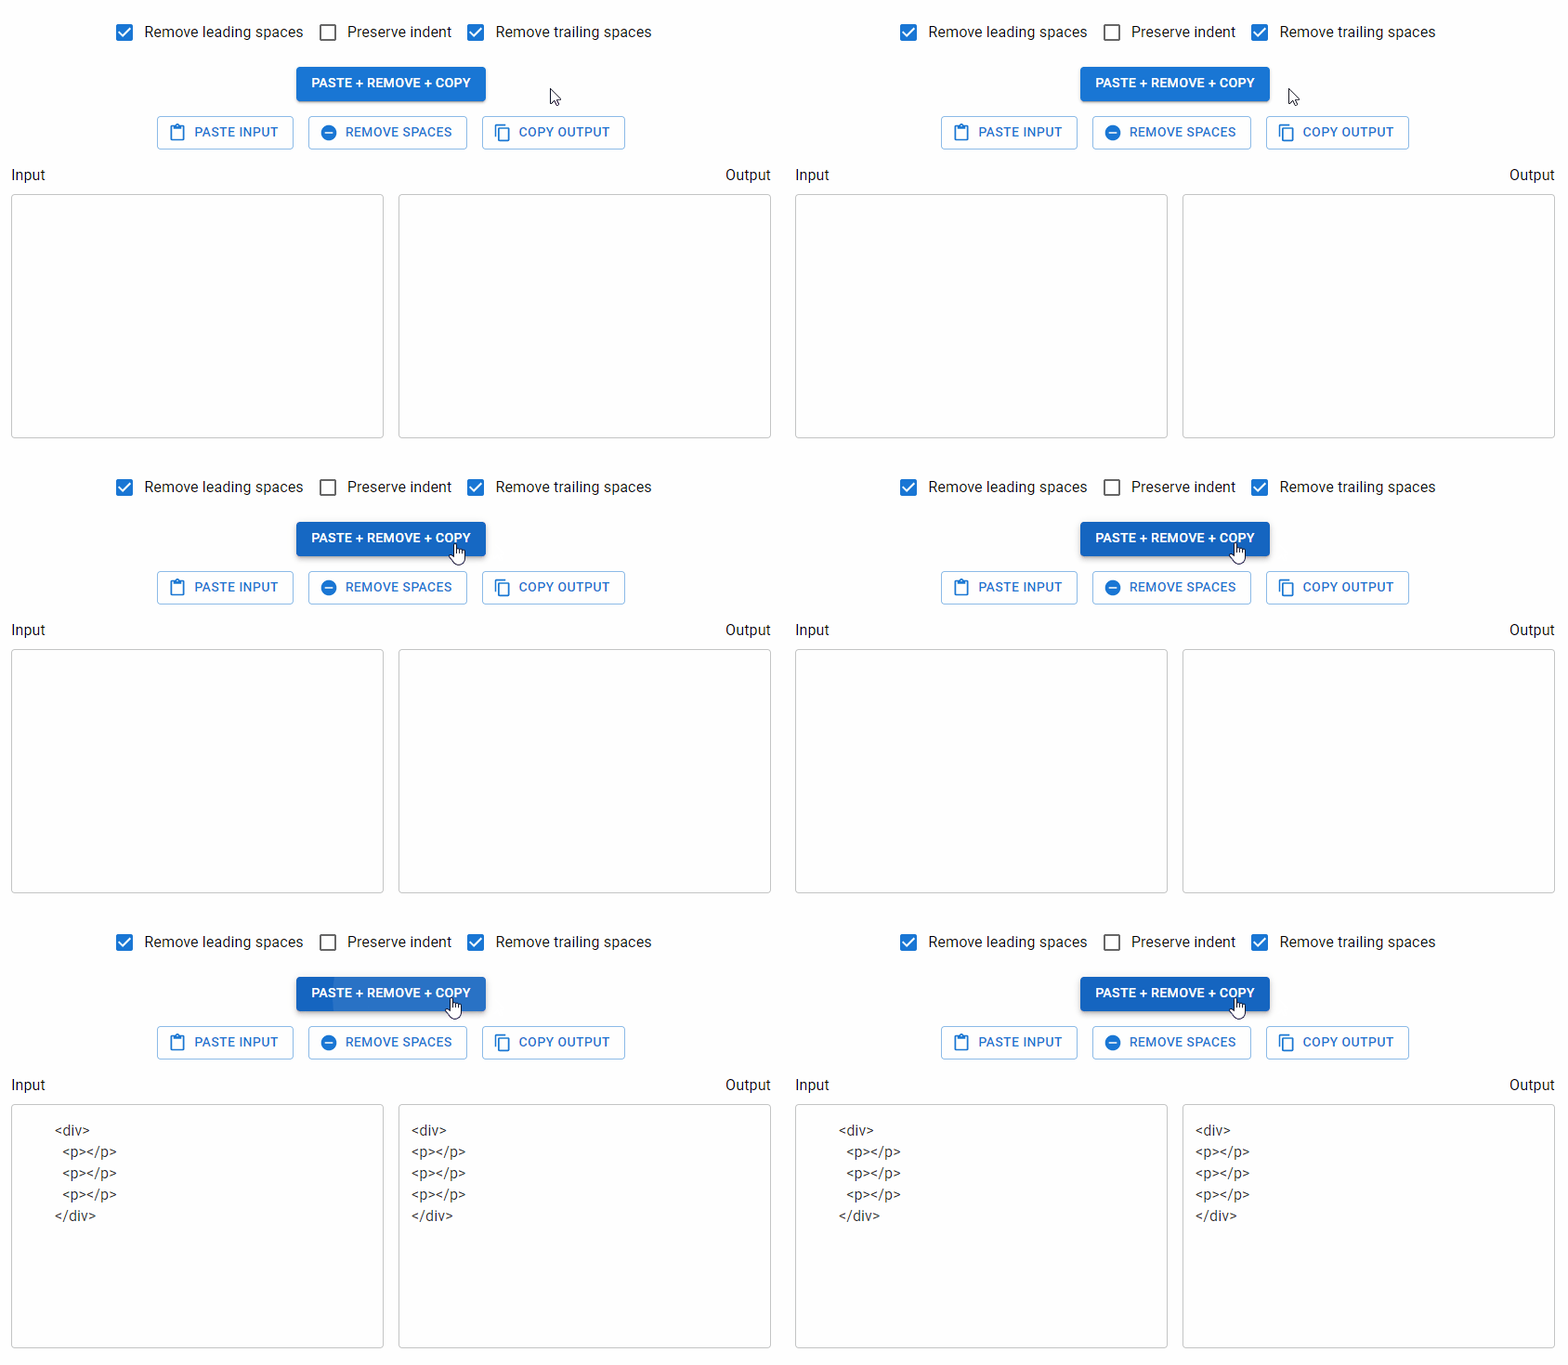
Our space remover app is complete! We’ve been able to build a handy utility for removing leading and trailing spaces from any text and preserving indentation if necessary.
What Can This Tool Be Used for?
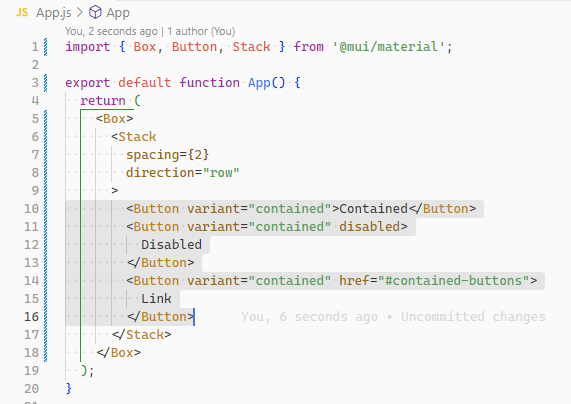
At Coding Beauty, we found this tool useful when creating code snippets displaying a portion of code from an HTML or JSX markup that was indented by some amount. For example, in our Material UI button tutorial, there were times when the file for an example contained markup like this:
The complete source code for an example in the tutorial.
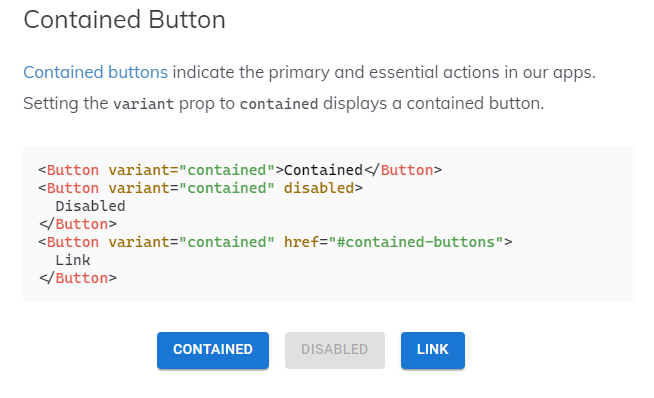
But we would only want to show the section of the file relevant to the example:
Explaining contained buttons in the Material UI button tutorial.
This tool helped format the relevant section properly by removing the spaces.
What about String trim()?
We couldn’t use the trim() or trimStart() string methods because then it wouldn’t be possible to preserve the indent of the entire text. These methods can only remove all the leading spaces in a given string.
Like a lot of other programming languages, JavaScript is constantly evolving. Every year, the language is made more powerful with new capabilities that let developers write more expressive and concise code.
Let’s explore the most recent features added in ECMAScript 2022 (ES13), and see examples of their usage to understand them better.
1. Class Field Declarations
Before ES13, class fields could only be declared in the constructor. Unlike in many other languages, we could not declare or define them in the outermost scope of the class.
class Car {
  constructor() {
    this.color = 'blue';
    this.age = 2;
  }
}

const car = new Car();
console.log(car.color); // blue
console.log(car.age); // 2
ES2022 removes this limitation. Now we can write code like this:
class Car {
  color = 'blue';
  age = 2;
}

const car = new Car();
console.log(car.color); // blue
console.log(car.age); // 2
2. Private Methods and Fields
Previously, it was not possible to declare private members in a class. A member was traditionally prefixed with an underscore (_) to indicate that it was meant to be private, but it could still be accessed and modified from outside the class.
class Person {
  _firstName = 'Joseph';
  _lastName = 'Stevens';

  get name() {
    return `${this._firstName} ${this._lastName}`;
  }
}

const person = new Person();
console.log(person.name); // Joseph Stevens

// Members intended to be private can still be accessed
// from outside the class
console.log(person._firstName); // Joseph
console.log(person._lastName); // Stevens

// They can also be modified
person._firstName = 'Robert';
person._lastName = 'Becker';

console.log(person.name); // Robert Becker
With ES13, we can now add private fields and members to a class, by prefixing it with a hashtag (#). Trying to access them from outside the class will cause an error:
class Person {
  #firstName = 'Joseph';
  #lastName = 'Stevens';

  get name() {
    return `${this.#firstName} ${this.#lastName}`;
  }
}

const person = new Person();
console.log(person.name);

// SyntaxError: Private field '#firstName' must be
// declared in an enclosing class
console.log(person.#firstName);
console.log(person.#lastName);
Note that the error thrown here is a syntax error, which happens at compile time, so no part of the code runs. The compiler doesn’t expect you to even try to access private fields from outside a class, so it assumes you’re trying to declare one.
3. await Operator at the Top Level
In JavaScript, the await operator is used to pause execution until a Promise is settled (fulfilled or rejected).
Previously, we could only use this operator in an async function – a function declared with the async keyword. We could not do so in the global scope.
function setTimeoutAsync(timeout) {
  return new Promise((resolve) => {
    setTimeout(() => {
      resolve();
    }, timeout);
  });
}

// SyntaxError: await is only valid in async functions
await setTimeoutAsync(3000);
With ES2022, now we can:
function setTimeoutAsync(timeout) {
  return new Promise((resolve) => {
    setTimeout(() => {
      resolve();
    }, timeout);
  });
}

// Waits for timeout - no error thrown
await setTimeoutAsync(3000);
4. Static Class Fields and Static Private Methods
We can now declare static fields and static private methods for a class in ES13. Static methods can access other private/public static members in the class using the this keyword, and instance methods can access them using this.constructor.
class Person {
  static #count = 0;

  static getCount() {
    return this.#count;
  }

  constructor() {
    this.constructor.#incrementCount();
  }

  static #incrementCount() {
    this.#count++;
  }
}

const person1 = new Person();
const person2 = new Person();

console.log(Person.getCount()); // 2
5. Class static Block
ES13 allows the definition of static blocks that will be executed only once, at the creation of the class. This is similar to static constructors in other languages with support for object-oriented programming, like C# and Java.
A class can have any number of static {} initialization blocks in its class body. They will be executed, along with any interleaved static field initializers, in the order they are declared. We can use the super property in a static block to access properties of the super class.
We can use this new ES2022 feature to check if an object has a particular private field in it, using the in operator.
class Car {
  #color;

  hasColor() {
    return #color in this;
  }
}

const car = new Car();
console.log(car.hasColor()); // true;
The in operator is able to correctly distinguish private fields with the same names from different classes:
class Car {
  #color;

  hasColor() {
    return #color in this;
  }
}

class House {
  #color;

  hasColor() {
    return #color in this;
  }
}

const car = new Car();
const house = new House();

console.log(car.hasColor()); // true;
console.log(car.hasColor.call(house)); // false
console.log(house.hasColor()); // true
console.log(house.hasColor.call(car)); // false
7. at() Method for Indexing
We typically use square brackets ([]) in JavaScript to access the Nth element of an array, which is usually a simple process. We just access the N - 1 property of the array.
const arr = ['a', 'b', 'c', 'd'];
console.log(arr[1]); // b
However, we have to use an index of arr.length - N if we want to access the Nth item from the end of the array with square brackets.
const arr = ['a', 'b', 'c', 'd'];

// 1st element from the end
console.log(arr[arr.length - 1]); // d

// 2nd element from the end
console.log(arr[arr.length - 2]); // c
The new at() method added in ES2022 lets us do this in a more concise and expressive way. To access the Nth element from the end of the array, we simply pass a negative value of -N to at().
const arr = ['a', 'b', 'c', 'd'];

// 1st element from the end
console.log(arr.at(-1)); // d

// 2nd element from the end
console.log(arr.at(-2)); // c
Apart from arrays, strings and TypedArray objects also now have at() methods.
const str = 'Coding Beauty';
console.log(str.at(-1)); // y
console.log(str.at(-2)); // t

const typedArray = new Uint8Array([16, 32, 48, 64]);
console.log(typedArray.at(-1)); // 64
console.log(typedArray.at(-2)); // 48
8. RegExp Match Indices
This new feature allows us to specify that we want the get both the starting and ending indices of the matches of a RegExp object in a given string.
Previously, we could only get the starting index of a regex match in a string.
With the d flag set, the object returned will have an indices property that contains the starting and ending indices.
9. Object.hasOwn() Method
In JavaScript, we can use the Object.prototype.hasOwnProperty() method to check if an object has a given property.
class Car {
  color = 'green';
  age = 2;
}

const car = new Car();

console.log(car.hasOwnProperty('age')); // true
console.log(car.hasOwnProperty('name')); // false
But there are certain problems with this approach. For one, the Object.prototype.hasOwnProperty() method is not protected – it can be overridden by defining a custom hasOwnProperty() method for a class, which could have completely different behavior from Object.prototype.hasOwnProperty().
class Car {
  color = 'green';
  age = 2;

  // This method does not tell us whether an object of
  // this class has a given property.
  hasOwnProperty() {
    return false;
  }
}

const car = new Car();

console.log(car.hasOwnProperty('age')); // false
console.log(car.hasOwnProperty('name')); // false
Another issue is that for objects created with a null prototype (using Object.create(null)), trying to call this method on them will cause an error.
const obj = Object.create(null);
obj.color = 'green';
obj.age = 2;

// TypeError: obj.hasOwnProperty is not a function
console.log(obj.hasOwnProperty('color'));
One way to solve these issues is to use to call the call() method on the Object.prototype.hasOwnPropertyFunction property, like this:
No need for that though, as we can use the new built-in Object.hasOwn() method added in ES2022. Like our reusable function, it takes an object and property as arguments and returns true if the specified property is a direct property of the object. Otherwise, it returns false.
Error objects now have a cause property for specifying the original error that caused the error about to be thrown. This adds additional contextual information to the error and assists in the diagnosis of unexpected behavior. We can specify the cause of an error by setting a cause property on an object passed as the second argument to the Error() constructor.
In JavaScript, we can already use the Arrayfind() method to find an element in an array that passes a specified test condition. Similarly, we can use findIndex() to find the index of such an element. While find() and findIndex() both start searching from the first element of the array, there are instances where it would be preferable to start the search from the last element instead.
There are scenarios where we know that finding from the last element might achieve better performance. For example, here we’re trying to get the item in the array with the value prop equal to y. With find() and findIndex():
This works, but as the target object is closer to the tail of the array, we might be able to make this program run faster if we use the new ES2022 findLast() and findLastIndex() methods to search the array from the end.
Another use case might require that we specifically search the array from the end to get the correct item. For example, if we want to find the last even number in a list of numbers, find() and findIndex() would produce a totally wrong result:
We could call the reverse() method on the array to reverse the order of the elements before calling find() and findIndex(). But this approach would cause unnecessary mutation of the array, as reverse() reverses the elements of an array in place. The only way to avoid this mutation would be to make a new copy of the entire array, which could cause performance problems for large arrays.
Also, findIndex() would still not work on the reversed array, as reversing the elements would also mean changing the indexes they had in the original array. To get the original index, we would need to perform an additional calculation, which means writing more code.
const nums = [7, 14, 3, 8, 10, 9];

// Copying the entire array with the spread syntax before
// calling reverse()
const reversed = [...nums].reverse();

// correctly gives 10
const lastEven = reversed.find((value) => value % 2 === 0);

// gives 1, instead of 4
const reversedIndex = reversed.findIndex((value) => value % 2 === 0);

// Need to re-calculate to get original index
const lastEvenIndex = reversed.length - 1 - reversedIndex;

console.log(lastEven); // 10
console.log(reversedIndex); // 1
console.log(lastEvenIndex); // 4
It’s in cases like where the findLast() and findLastIndex() methods come in handy.
This code is shorter and more readable. Most importantly, it produces the correct result.
Conclusion
So we’ve seen the newest features ES13 (ES2022) brings to JavaScript. Use them to boost your productivity as a developer and write cleaner code with greater conciseness and clarity.
Authentication is critical for verifying the identity of your users in order to know what data they should have access to and what privileged actions they should be able to perform. The Firebase platform provides powerful libraries that let us easily integrate authentication into our projects.
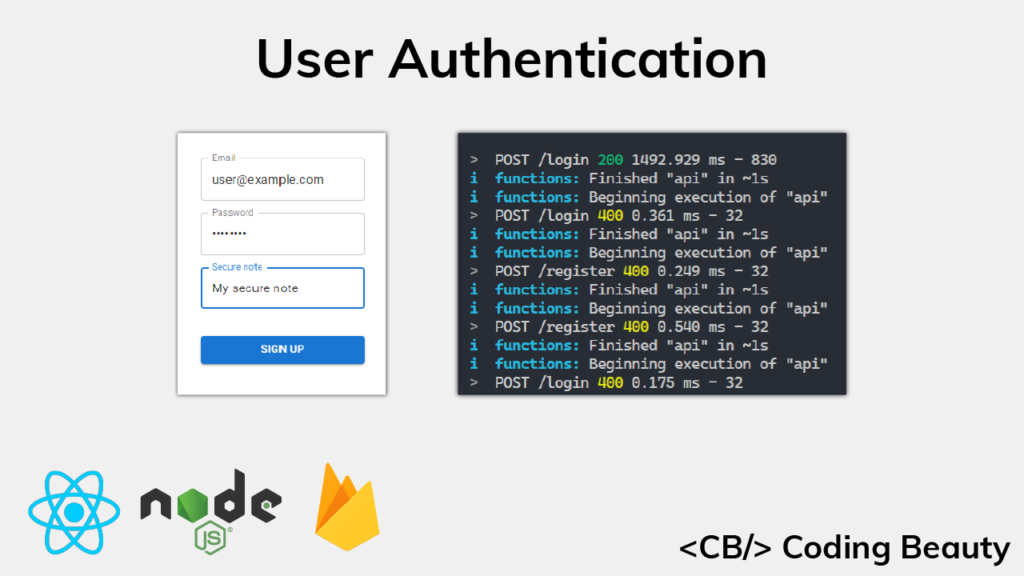
In this article, we are going to implement authentication by building a RESTful API and a web app that allows a user to sign up with a secure note that will be accessible only to the user. We’ll be using Node.js and Express to build the API, and React.js to create the single-page web app.
The complete source code for the app is available here on GitHub.
What You’ll Need
Node.js installed
A Google account – to use Firebase
Basic knowledge of React.js and Node.js
A code editor – like Visual Studio Code
Setting up Firebase
Before we start coding, let’s head over to the Firebase console and create a new project, so that we can access Firebase services. I’m naming mine cb-auth-tutorial, but you can name yours whatever you like.
Creating a new Firebase project
After giving it a name, you’ll be asked whether you want to enable Google Analytics. We won’t be using the service for this tutorial, but you can turn it on if you like.
After completing all the steps, you’ll be taken to the dashboard, where you can see an overview of your Firebase project. It should look something like this:
The Firebase dashboard
Let’s create a web app. Click this icon button to get started:
You’ll be asked to enter a nickname for the app. This can also be anything you like. I’m naming mine CB Auth Tutorial, for symmetry with the project name.
Completing the steps to create the web app
After registering the app, you’ll be provided with a configuration that you’ll need to initialize your app with to be able to access the various Firebase APIs and services.
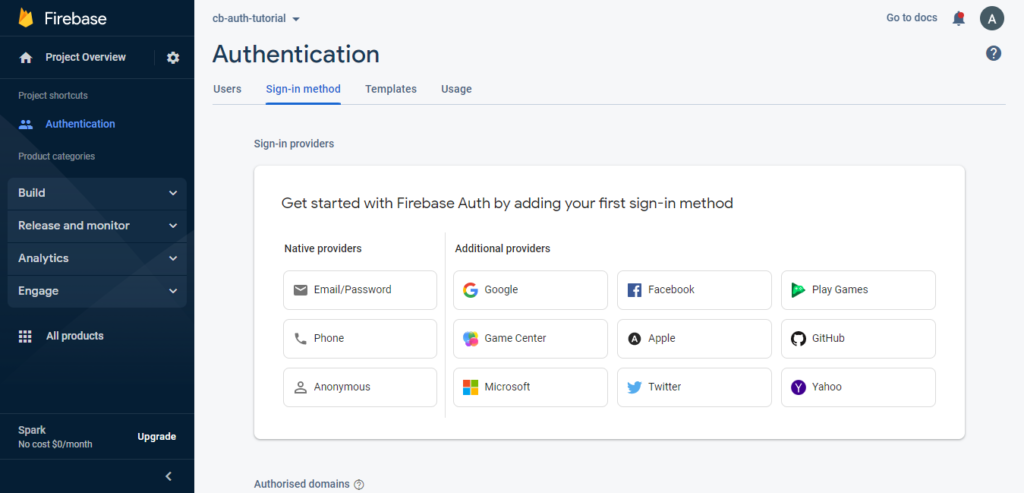
From the dashboard sidebar, click on Build > Authentication, then click on Get started on the screen that shows to enable Firebase Authentication. You’ll be asked to add an initial sign-in method.
Adding a sign-in method
Click on Email/Password and turn on the switch to enable it.
Enabling sign-in with email/password
Next, we’ll set up Firebase Firestore.
Click on Build > Firestore Database in the sidebar, then click the Create database button on the page that shows to enable Firestore.
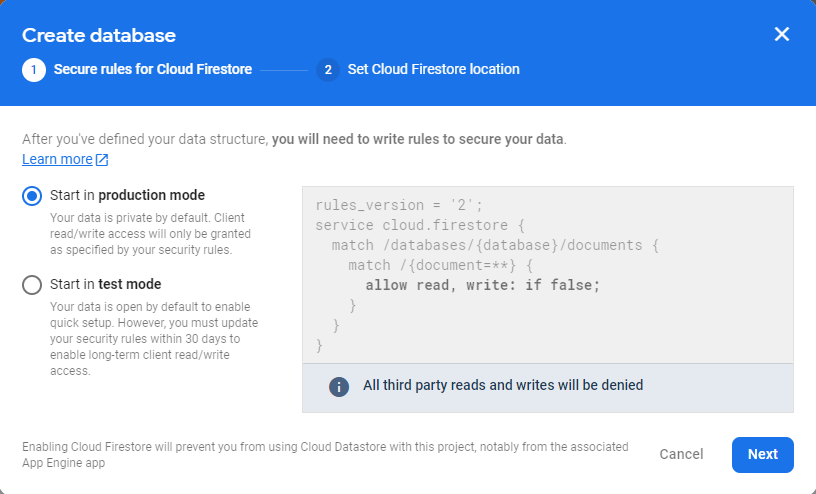
You’ll be presented with a dialog that will take you through the steps to create the database.
The dialog used to create the Firestore database
We won’t be accessing Firestore from the client-side, so we can create the database in production mode. Firebase Admin ignores security rules when interacting with Firestore.
Next, we’ll need to generate a service account key, which is a JSON file containing information we’ll initialize our admin app with to be able to create the custom web tokens that we’ll send to the client. Follow these instructions in the Firebase Documentation to do this.
Let’s install the Firebase CLI tools with NPM. Run the following command in a terminal to do so:
npm i -g firebase-tools
Let’s create a new folder for the project. I’m naming mine auth-tutorial for symmetry with the Firebase project, but you can name it whatever you like.
Initialize Firebase in the project directory with the following command:
firebase init
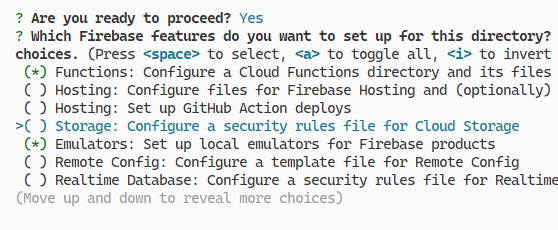
We’ll be using Firebase Functions and Firebase Emulators, so select these when asked to choose the features you want to set up for the project directory.
Setting up Firebase features in the project directory
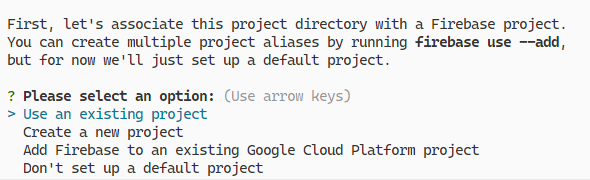
The next prompt is for you to associate the project directory with a Firebase project. Select Use an existing projectand choose the project you created earlier.
Associating the project directory with a Firebase project
We’ll be using plain JavaScript to write the functions, so choose that when asked about the language you want to use.
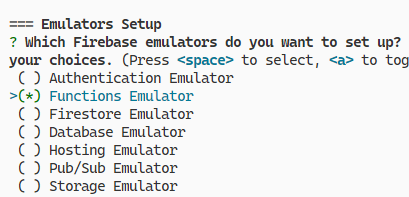
We’ll be using the Firebase Functions emulator to test our functions, so select it when asked to set up the emulators.
Setting up Firebase emulators
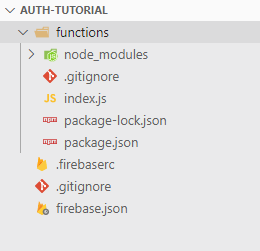
After you’ve initialized Firebase, your project directory structure should look like this:
Our project directory structure after initializing Firebase
Creating the REST API
We’ll need the following NPM packages to write our function:
express: Node.js web framework to speed up development.
cors: Express middleware to enable CORS (Cross-Origin Resource Sharing).
morgan: Logger middleware for Express.
is-email: For server-side email validation.
firebase: To authenticate users with the Firebase Web SDK.
Let’s install them all with one command:
npm i express cors morgan is-email firebase
Let’s write the handler function for the /register endpoint. Create a new folder named express in the functions directory, containing a sub-folder named routes, and create a new register.js file in routes with the following code:
If all validation is successful, the secure note of the new user will be saved in the Firestore database. Let’s create the function that will handle POST requests to the /login endpoint in a new login.js file, also saved in the routes directory.
Notice that the /login and /register route handlers don’t perform validation on the email or password sent in a request. This is because we’ll be creating custom Express middleware to do this instead. Create a new middleware sub-folder in the express folder, and create a new validate-email-and-password.js file in it, containing the following code:
Here we check that a password and a valid email are specified in the request body. If they are, the request is passed on to the next middleware. Otherwise, we end the request with an error.
Let’s create the endpoint that will allow the fetching of the secure note of a logged-in user. We’ll do this in a new get-user.js file saved in the routes folder.
We respond with an error if a user is not specified, or the user making the request for the data is not the owner.
req.token.uid is supplied by another middleware that verifies the token sent along when making an authenticated request to the API. Let’s create this middleware in a firebase-auth.js file located in the express/middleware folder.
We verify that the JSON web token sent is a valid token and assign it to the req.token property if so. Otherwise, we send a 401 error.
Now it’s time to integrate all these modules together in an Express app that will respond to any request made to the api cloud function. Replace the index.js file in the functions folder with the following code:
This file will be run to start Firebase Functions. We used the initializeApp() method from the firebase-admin module to initialize the Firebase Admin SDK with the service account key file you should have created earlier.
We also used the initalizeApp() method from the firebase/app module to initialize Firebase Web with a configuration stored in a firebase.config.js file. You were given this configuration earlier when you created the web app in the Firebase console.
functions/firebase.config.js
/**
  Enter the configuration for your Firebase web app
  module.exports = {
  apiKey: ...,
  authDomain: ...,
  projectId: ...,
  storageBucket: ...,
  messagingSenderId: ...,
  appId: ...,
  measurementId: ...
}; */
We can now start Firebase Functions in the emulator, by running the following command in the project directory.
firebase emulators:start --only functions
Testing the API
We haven’t written client code yet but we can test our API with a tool like Postman, or we can use one of the methods described here in the Firebase documentation.
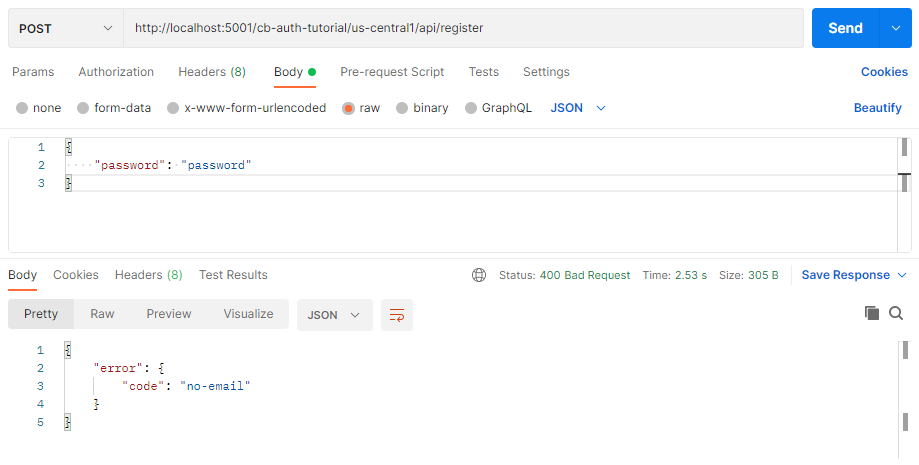
Here we’re test the /register endpoint with Postman:
Testing the /register endpoint with Postman
Creating the Client App with React
Let’s write the client app that will interact with our RESTful API. Create a new React app with Create React App.
npx create-react-app client
We’ll be using the following NPM packages in the React app:
Material UI (@mui/material, @emotion/react, @emotion/styled): To style our client UI and make it attractive.
axios: To make HTTP requests to the API we’ve created.
react-router-dom: For single-page app routing.
react-hook-form: For easier React form validation.
firebase: The Firebase Web SDK library.
react-firebase-hooks: Provides a set of reusable React hooks for Firebase.
Test that the app is up and running by opening localhost:3000 in your browser. You’ll see the results of the standard React.js boilerplate in your client/src/App.js file. We’ll edit this file later.
Testing the newly created React app
The URL origin of the cloud functions running in an emulator is different from the one it has when running in a production environment. Let’s create a .env file to specify the different origins. The values you’ll need to specify will depend on the name you gave your Firebase project.
Let’s create a module that would be responsible for making the HTTP requests to our RESTful API using axios. Create this module in an api-service.js file.
Wrapping a route component in the RequireAuth component will ensure that only authenticated users will be able to view it. If not signed in, the user will be taken to the /signin route and then redirected back to the route that they trying to view after a successful sign-in.
The AuthProvider component allows its children to access important authentication-related data and methods using a React context and its provider. The useAuth() hook will provide the context values to the child components with the useContext() hook.
The signIn() and signUp() methods make requests to the API. If successful, a token will be received and passed the signInWithCustomToken() method from the firebase/auth module to authenticate the user in the browser.
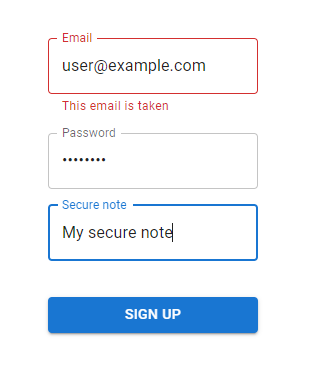
Now it’s time to create the sign-up page. Users sign up with an email, a password, and a secure note. We’ll do this in a SignUp.jsx file in a new routes folder.
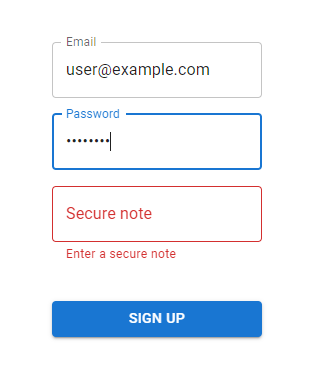
We use the Controller component from react-hook-form to register the Material UI TextField component with react-hook-form. We set validation rules with the Controllerrules prop to ensure that the user enters a valid email, a password, and a secure note.
Form validation on the sign-up page
react-hook-form ensures that the onSubmit() function is only called when all the validation rules have been satisfied. In this function, we register the user with the signUp() method from the useAuth() hook we created earlier. If successful, we take the user to the index route (/). Otherwise, we display the appropriate error message.
Displaying an error message after receiving an API response
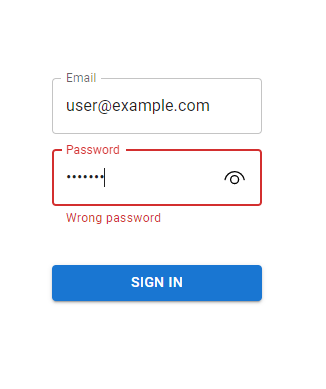
Let’s also create the sign-in page in a SignIn.jsx file in the same routes folder.
Unlike in the SignUp component, here we use the signIn() method from the useAuth() hook to sign the user in.
The HTTP errors we handle here are different from the ones we handle in SignUp. In SignUp, we display an error if the email the user attempted to sign up with has already been used. But here we display errors for a non-existent email or a wrong password.
Displaying an error message for a wrong password after receiving an API response
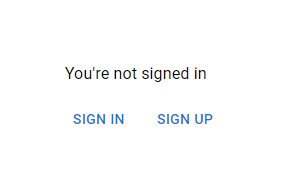
Now let’s create the component that will be shown for our index route. Replace the contents of App.js with the following:
If the user hasn’t been authenticated, we let them know they’re not signed in and include the relevant links to do so.
The view displayed to a user that is yet to be authenticated
If they’ve signed in, we make a request to the API to get the secure note and display it.
Displaying the private secure note to the user
We used a dataState variable to keep track of the current state of the API request and display an appropriate view to the user based on this.
We set dataState to loading just before making the request to let the user know that their data is in the process of being retrieved.
The view displayed when dataState is loading.
If an error occurs in this process, we let them know by setting dataState to error:
The view displayed when dataState is error.
Finally, let’s initialize Firebase and set up the routing logic in our index.js file.
client/src/index.js
import React from 'react';
import ReactDOM from 'react-dom/client';
import './index.css';
import App from './App';
import reportWebVitals from './reportWebVitals';
import {
  BrowserRouter,
  Route,
  Routes,
} from 'react-router-dom';
import SignIn from './routes/SignIn';
import { AuthProvider } from './auth';
import { initializeApp } from 'firebase/app';
import firebaseConfig from './firebase.config';
import SignUp from './routes/SignUp';

initializeApp(firebaseConfig);

const root = ReactDOM.createRoot(
  document.getElementById('root')
);
root.render(
  <React.StrictMode>
    <AuthProvider>
      <BrowserRouter>
        <Routes>
          <Route path="/" element={<App />} />
          <Route path="/signin" element={<SignIn />} />
          <Route path="/signup" element={<SignUp />} />
        </Routes>
      </BrowserRouter>
    </AuthProvider>
  </React.StrictMode>
);

reportWebVitals();
There should be a firebase.config.js file in your src directory that contains the config you received when setting up the web app in the Firebase console. This is the same config we used to initialize the Web SDK in the Admin environment when we were writing the API.
client/src/firebase.config.js
/**
  Enter the configuration for your Firebase web app
  module.exports = {
  apiKey: ...,
  authDomain: ...,
  projectId: ...,
  storageBucket: ...,
  messagingSenderId: ...,
  appId: ...,
  measurementId: ...
}; */
The app should be fully functional now!
Conclusion
In this article, we learned how to easily set up authentication in our web apps using Firebase. We created a RESTful API with Node.js and the Express framework to handle requests from a client app that we built using React.js and Material UI.