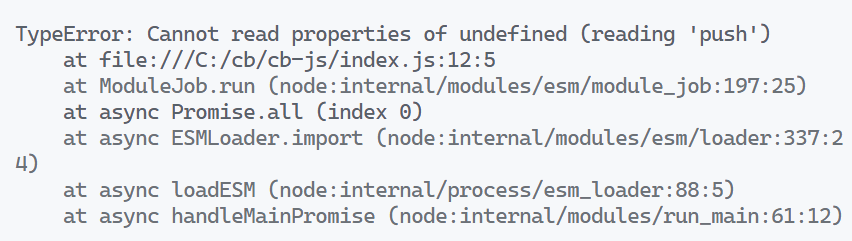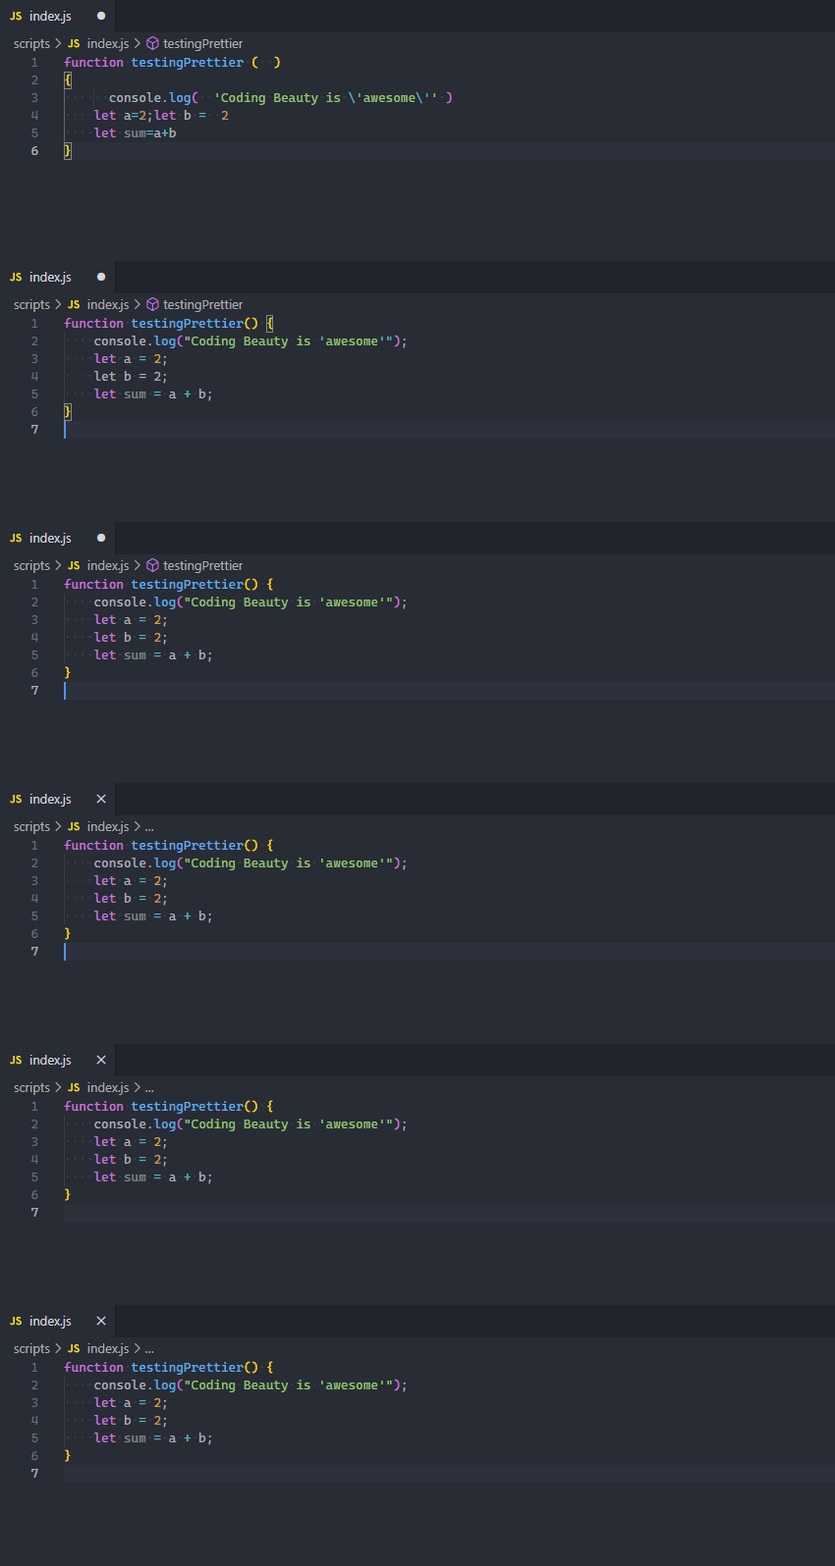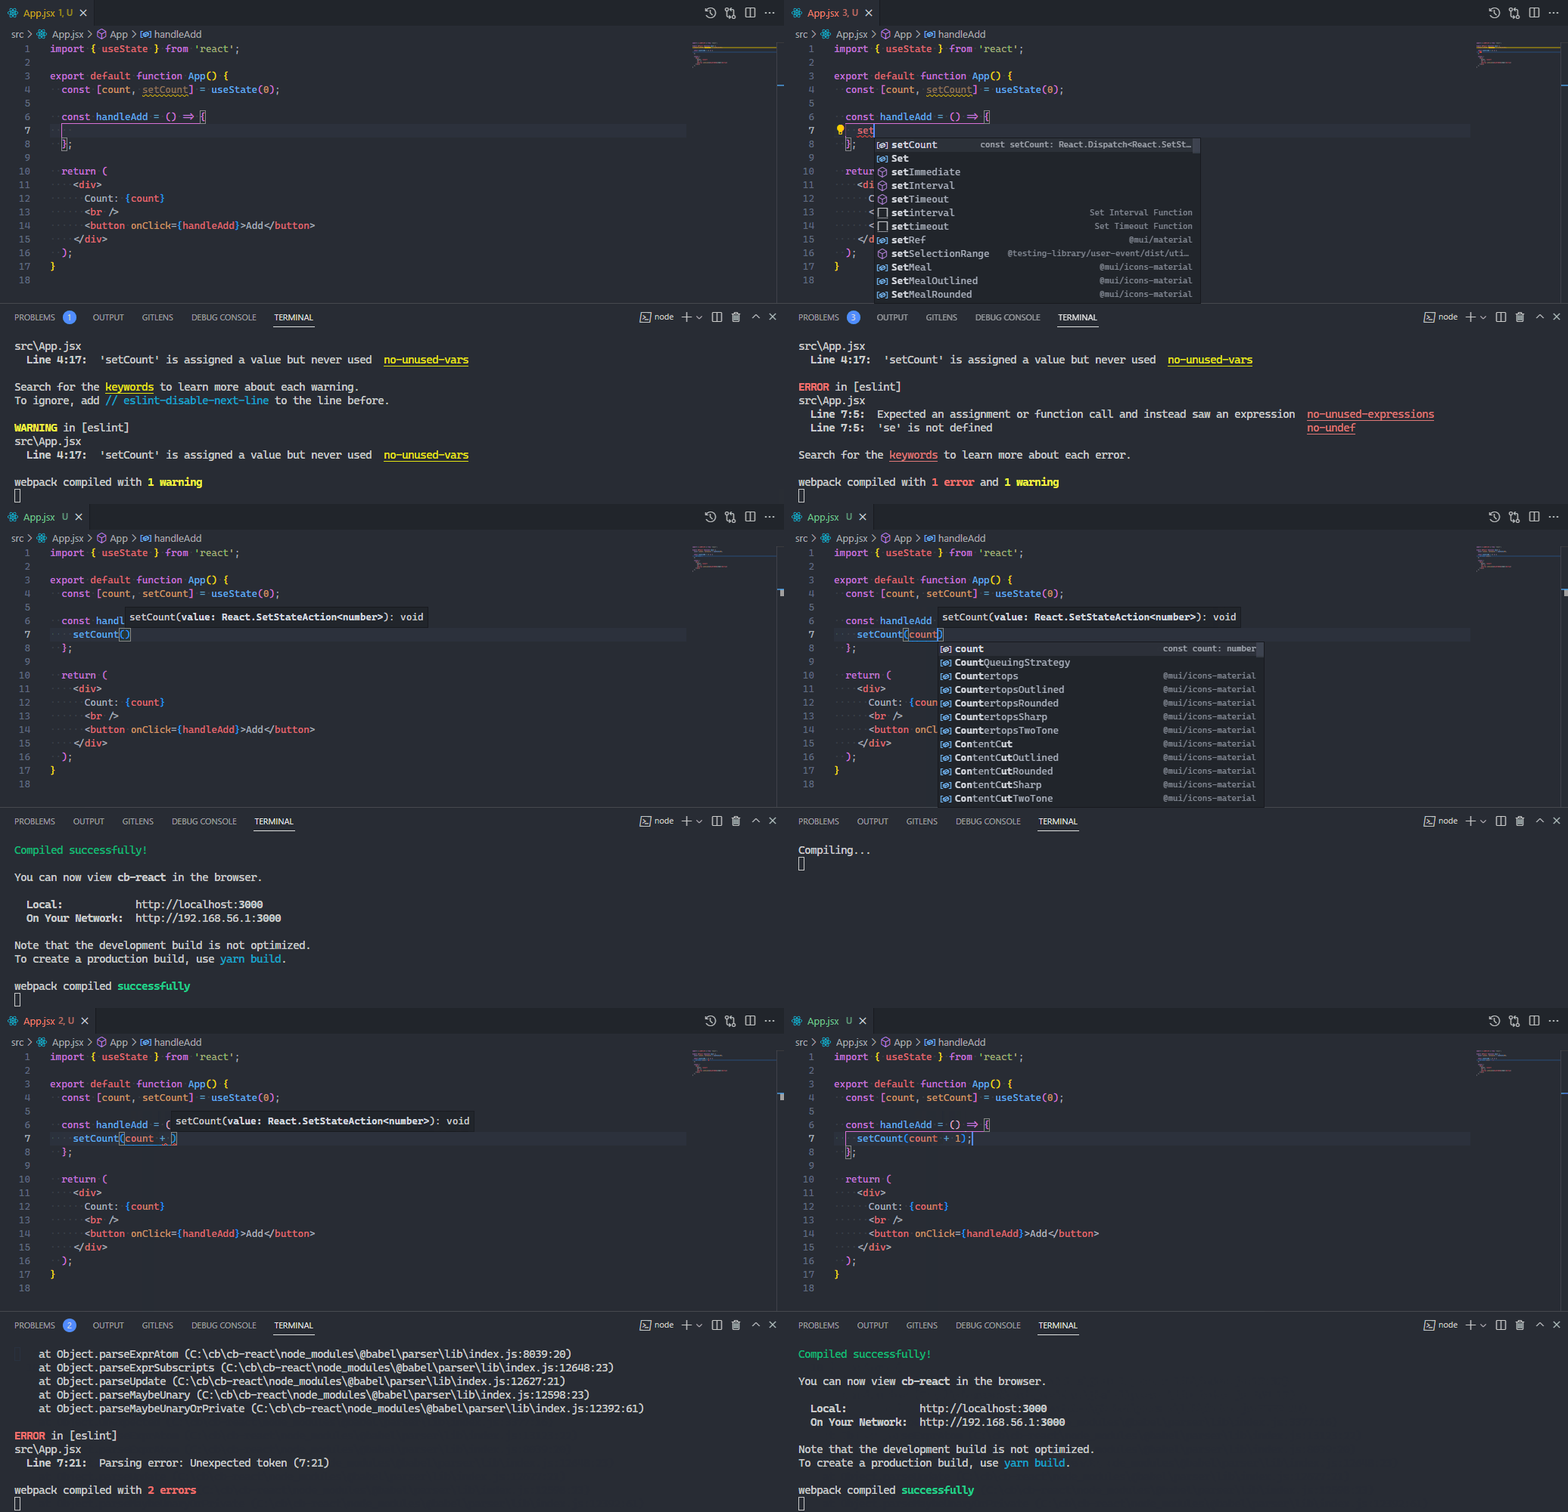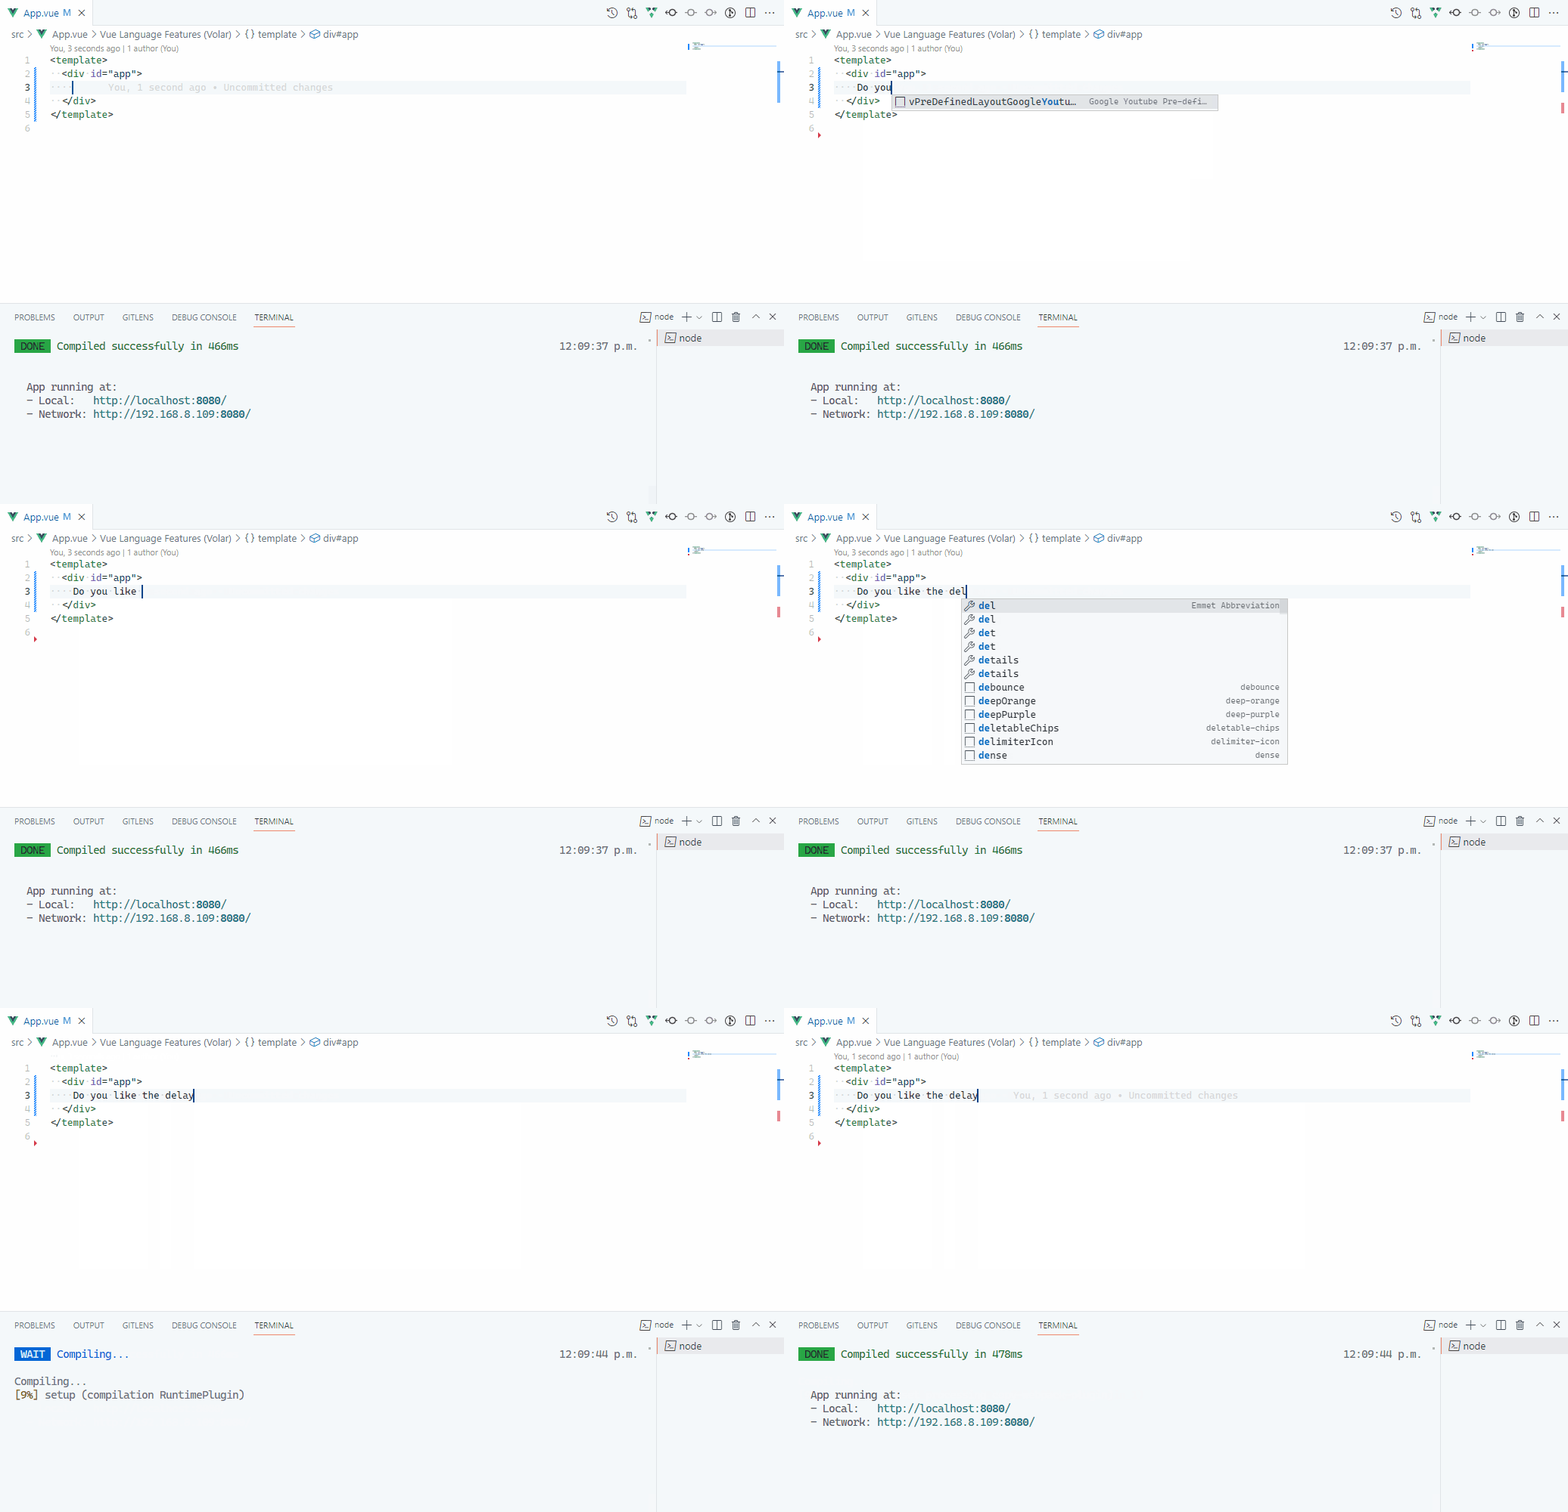
featured

structuredClone(): The Easiest Way to Copy Objects in JavaScript

Cloning objects is a regular programming task for storing or passing data. Until recently, developers have had to rely on third-party libraries to perform this operation because of advanced needs like deep-copying or keeping circular references.

Fortunately, that’s no longer necessary, thanks to the new built-in method called structuredClone(). This feature provides an easy and efficient way to deep-clone objects without external libraries. It works in most modern browsers (as of 2022) and Node.js (as of v17).

In this article, we will explore the benefits and downsides of using structuredClone() function to clone objects in JavaScript.

How to use structuredClone()

structuredClone() works very intuitively; pass the original object to the function, and it will return a deep copy with a different reference and object property references.

JavaScript
const obj = { name: 'Mike', friends: [{ name: 'Sam' }] }; const clonedObj = structuredClone(obj); console.log(obj.name === clonedObj); // false console.log(obj.friends === clonedObj.friends); // false

Unlike the well-known JSON stringify/parse “hack”, structuredClone() lets you clone circular references.

JavaScript
const car = { make: 'Toyota', }; car.basedOn = car; const cloned = structuredClone(car); console.log(car.basedOn === cloned.basedOn); // false // ๐Ÿ‘‡ Circular reference is cloned console.log(car === car.basedOn); // true

Advantages of structuredClone()

So, what makes structuredClone() so great? Well, we’ve been saying it right from the intro; it allows you to make deep copies of objects without difficulty. You don’t need to install any third-party libraries or use JSON.stringify/parse to do so.

With structuredClone(), you can clone objects that have circular references, which is something that’s not possible with the JSON approach. You can clone complex objects and data structures with ease.

structuredClone() can deep copy for as many levels as you need; it creates a completely new copy of the original object with no shared references or properties. This means that any changes made to the cloned object won’t affect the original, and vice versa.

Limitations of structuredClone()

While structuredClone() is a powerful function for cloning objects and data structures, it does have some limitations that are worth noting.

Can’t clone functions or methods

Yes, structuredClone() cannot clone functions or methods. This is because of the structured clone algorithm that the function uses. The algorithm can’t duplicate function objects and throws a DataCloneError exception.

JavaScript
function func() {} // Error: func could not be cloned const funcClone = structuredClone(func);
JavaScript
const car = { make: 'BMW', move() { console.log('vroom vroom..'); }, }; car.basedOn = car; // โŒ Error: move() could not be cloned const cloned = structuredClone(car);

As you can see from the above example, trying to use structuredClone() on a function or an object with a method will cause an error.

Can’t clone DOM elements

Similarly, the structured clone algorithm used by structuredClone() can’t clone DOM elements. Passing an HTMLElement object to structuredClone() will cause an error like the one above.

JavaScript
const input = document.querySelector('#text-field'); // โŒ Failed: HTMLInputElement object could not be cloned. const clone = structuredClone(input);

Doesn’t preserve RegExp lastIndex property

When you clone a RegExp object with structuredClone() the lastIndex property of a RegExp is not preserved in the clone:

JavaScript
const regex = /beauty/g; const str = 'Coding Beauty: JS problems are solved at Coding Beauty'; console.log(regex.index); console.log(regex.lastIndex); // 7 const regexClone = structuredClone(regex); console.log(regexClone.lastIndex); // 0

Other limitations of structuredClone()

  • It doesn’t preserve property metadata or descriptors. For example, If a property descriptor marks an object as readonly, the clone of the object will be read/write by default.
  • It doesn’t preserve non-enumerable properties in the clone.

These limitations shouldn’t be much of a drawback for most use cases, but still, it’s important to be aware of them to avoid unexpected behavior when using the function.

Transfer value with structuredClone()

When you clone an object, you can transfer particular objects instead of making copies by using the transfer property in the second options parameter that structuredClone() has. This means you can move objects between the original and cloned objects without creating duplicates. The original object can’t be used after the transfer.

Let’s say you have some data in a buffer that you need to validate before saving. By cloning the buffer and validating the cloned data instead, you can avoid any unwanted changes to the original buffer. Plus, if you transfer the validated data back to the original buffer, it will become immutable, and any accidental attempts to change it will be blocked. This can give you extra peace of mind when working with important data.

Let’s look at an example:

JavaScript
const uInt8Array = Uint8Array.from({ length: 1024 * 1024 * 16 }, (v, i) => i); const transferred = structuredClone(uInt8Array, { transfer: [uInt8Array.buffer], }); console.log(uInt8Array.byteLength); // 0

In this example, we created a UInt8Array buffer and fill it with data. Then, we clone it using structuredClone() and transfer the original buffer to the cloned object. This makes the original array unusable, ensuring it will be kept from being accidentally modified.

Key takeaways

structuredClone() is a useful built-in feature in JavaScript for creating deep copies of objects without external libraries. It has some limitations, like not being able to clone functions, methods, or DOM elements and not preserving some type of properties in the clone. You can use the transfer option to move objects between the original and cloned objects without creating duplicates, which can be helpful for validating data or ensuring immutability. Overall, structuredClone() is a valuable addition to a developer’s toolkit and makes object cloning in JavaScript easier than ever.

JavaScript: ?? and || Are Not the Same

Have you ever wondered about the differences between the ?? and || operators in JavaScript? These two operators may seem similar, but they have one key difference that set them apart, and that’s what we’ll be talking about in this article.

How ?? and || differ

The || operator returns the first truthy value it encounters, or the last value in the expression if all values are falsy. For example:

JavaScript
const x = undefined || null || '' || 'hello'; console.log(x); // Output: 'hello'

In this example, the || operator returns 'hello' because it is the first truthy value in the expression.

On the other hand, the ?? operator only returns the second operand if the first operand is null or undefined. For example:

JavaScript
const x = undefined ?? null ?? '' ?? 'hello'; console.log(x); // Output: ''

In this example, the ?? operator returns "" because it is the first defined value in the expression.

Tip: Falsy values in JavaScript are null, undefined, false, 0, NaN, and '' (empty string). Every other value is truthy, and will be coerced to true in a Boolean() constructor.

In this example, the ?? operator returns '' because it is the first value that is not null/undefined in the expression.

When to use the null coalescing (??) operator

One common use case for ?? is when you want to treat certain values, such as 0 or empty strings (''), as literal values instead of the absence of a value. In these cases, ?? can be used to provide a fallback value only when a value is strictly null or undefined.

For example, let’s say we have a function paginate that takes an options object as an argument, and returns an array of numbers up to a certain limit. We want to provide a default limit of 3 if no limit is provided, and return an empty array if the limit is set to 0. We can use the ?? operator to achieve this:

JavaScript
function paginate(options = {}) { return ['a', 'b', 'c', 'd', 'e'].splice(0, options.limit ?? 3); } paginate(1); // Output: ['a'] paginate(); // Output: ['a', 'b', 'c'] paginate(0); // Output: []

In this example, if options.limit is null or undefined, the ?? operator falls back to the default value of 3. However, if options.limit is 0, the ?? operator returns 0 instead of the default value. This is because 0 is a literal value, meant to indicate that no pages should be returned in the result. In constrast, if we had used the || operator, paginate would have used the default value of 3 for the pagination.

When to use the logical OR (||) operator

Now that we’ve covered the use cases for the ?? operator, let’s take a look at when to use the || operator instead.

The || operator is useful when we want to provide a default value for a variable or function parameter that is falsy. For example, let’s say we have a function called getUsername that takes in a userInput parameter. If userInput is falsy, we want to return a default value of “Guest”. We can use the || operator to achieve this in a concise way, like so:

JavaScript
function getUsername(userInput) { return userInput || 'Guest'; }

Key takeways

Both the ?? and || operators are useful in providing default values and handling falsy values in JavaScript. However, the ?? operator is better suited for cases where values like 0 and empty strings should be treated literally instead of being treated as an indication of an absent value. On the other hand, the || operator is useful for providing fallback values when a value is missing or falsy. By understanding the differences and appropriate use cases of each operator, you can avoid unexpected bugs in your code.

How to Simulate a Mouse Click in JavaScript

In this article, we’ll learn multiple ways to easily simulate a mouse click or tap on an element in the HTML DOM, using JavaScript.

Use click() method

This is the easiest and most basic method to simulate a mouse click on an element. Every HTMLElement has a click() method that can be used to simulate clicks on it. It fires the click event on the element when it is called. The click event bubbles up to elements higher in the document tree and fires their click events.

JavaScript
const target = document.querySelector('#target'); target.click();

To use the click() method, you first need to select the element in JavaScript, using a method like querySelector() or getElementById(). You’ll be able to access the HTMLElement object from the method’s return value, and call the click() method on it to simulate the click.

Let’s see an example, where we simulate a button click every second, by calling click() in setInterval().

JavaScript
const target = document.querySelector('#target'); let clickCount = 0; const clickCountEl = document.getElementById('click-count'); clickCountEl.innerText = clickCount; // Programmatically click button every 1 second setInterval(() => { target.click(); clickCount++; clickCountEl.innerText = clickCount; }, 1000);
HTML
<button id="target">Target</button> <br /><br /> Clicks: <span id="click-count"></span>

Result

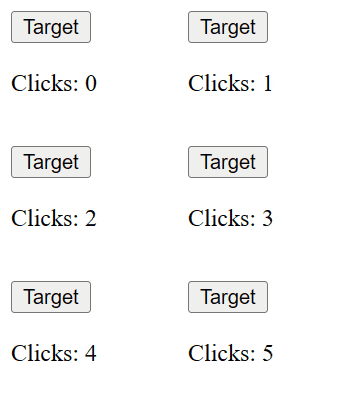
The button is clicked programmatically every 1 second.

Notice how there are no visual indicators of a click occurring because it’s a programmatic click.

Since click() causes the click event to fire on the element, any click event listeners you attach to the element will be invoked from a click() call.

In the following example, we use a click event listener (instead of setInterval) to increase the click count, and another listener to toggle the button’s style when clicked.

JavaScript
const target = document.querySelector('#target'); let clickCount = 0; const clickCountEl = document.getElementById('click-count'); clickCountEl.innerText = clickCount; target.addEventListener('click', () => { clickCount++; clickCountEl.innerText = clickCount; }); target.addEventListener('click', () => { target.classList.toggle('btn-style'); }); setInterval(() => { target.click(); }, 1000);
HTML
<button id="target">Target</button> <br /><br /> Count: <span id="click-count"></span>
CSS
.btn-style { color: white; background-color: blue; border-radius: 2px; }
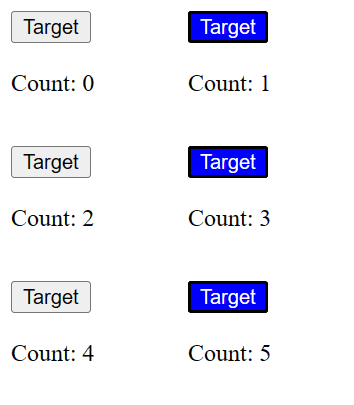
The click count is incremented and the button’s style is toggled from the simulated click.

Simulate mouse click with MouseEvent object

Alternatively, we can use a custom MouseEvent object to simulate a mouse click in JavaScript.

JavaScript
const targetButton = document.getElementById('target'); const clickEvent = new MouseEvent('click'); targetButton.dispatchEvent(clickEvent);

The MouseEvent interface represents events that occur from the user interacting with a pointing device like the mouse. It can represent common events like click, dblclick, mouseup, and mousedown.

After selecting the HTMLElement and creating a MouseEvent, we call the dispatchEvent() method on the element to fire the event on the element.

For example:

JavaScript
const clickEvent = new MouseEvent('click'); const targetButton = document.getElementById('target'); let clickCount = 0; const clickCountEl = document.getElementById('click-count'); clickCountEl.innerText = clickCount; targetButton.addEventListener('click', () => { clickCount++; clickCountEl.innerText = clickCount; }); setInterval(() => { const clickEvent = new MouseEvent('click'); targetButton.dispatchEvent(clickEvent); }, 1000);
HTML
<button id="target">Target</button> <br /><br /> Clicks: <span id="click-count"></span>
The button is clicked programmatically every 1 second.
The button is clicked programmatically every second with MouseEvent.

Any click event listener attached to the element is called with the MouseEvent object that was passed to dispatchEvent().

JavaScript
const clickEvent = new MouseEvent('click'); const targetButton = document.getElementById('target'); targetButton.addEventListener('click', (event) => { console.log(clickEvent === event); // true }); targetButton.addEventListener('click', (event) => { console.log(clickEvent === event); // true }); targetButton.dispatchEvent(clickEvent);

Result

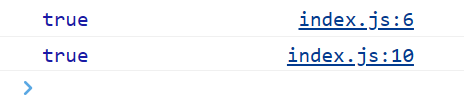
The dispatched event object is passed to click listeners.
The dispatched MouseEvent is passed to click listeners.

Apart from the event type passed as the first argument, we can pass options to the MouseEvent() constructor to control specific details about the event:

JavaScript
const targetButton = document.getElementById('target'); const clickEvent = new MouseEvent('click', { bubbles: true, cancelable: false, view: window }); targetButton.dispatchEvent(clickEvent);

The bubbles property determines whether the event can bubble up the DOM tree to the element’s containing elements.

The cancelable property determines whether or not the event’s default action can be prevented.

The view property sets the event’s AbstractView. You should pass the window object here.

Find more options in the MDN documentation for the MouseEvent() constructor and the now deprecated MouseEvent.initMouseEvent() method.

Simulate mouse click at position

We can also simulate a mouse click on an element at a specific position on the visible part of the webpage.

We do this by selecting the element with the document.elementFromPoint() method, and then simulating the click with the click() method.

JavaScript
const targetButton = document.elementFromPoint(x, y).click(); targetButton.click();

The elementFromPoint() method returns the topmost element at the specified coordinates, relative to the browser’s viewport. It returns an HTMLElement, which we call click() on to simulate the mouse click from JavaScript.

In the following example, we have a button and a containing div:

HTML
<div id="container"> <button id="target">Target</button> <br /><br /> Count: <span id="click-count"></span> </div>

Using CSS, we position the #container div to make its top-left corner exactly at the position (200, 100) in the viewport.

CSS
#container { position: absolute; top: 100px; left: 200px; height: 100px; width: 100px; border: 1px solid black; }

The #target button is at point (0, 0) in its #container, so point (200, 100) in the viewport.

To get the position of the #target with more certainty, we add an offset of 10px each to get the final position to search for: (210, 110).

JavaScript
let clickCount = 0; const clickCountEl = document.getElementById('click-count'); clickCountEl.innerText = clickCount; const targetButton = document.getElementById('target'); targetButton.addEventListener('click', () => { clickCount++; clickCountEl.innerText = clickCount; }); // Offset of 10px to get button's position in container const x = 200 + 10; const y = 100 + 10; setInterval(() => { const buttonAtPoint = document.elementFromPoint(x, y); buttonAtPoint.click(); }, 1000);

To verify that we’re actually selected the button by its position and it’s getting clicks, we select it by its ID (target) and set a click event listener on the HTMLElement returned, which will increase the count of how many times it has been clicked.

And we’re successful:

A click is simulated on the button at point (210, 110).

Simulate mouse click at position with MouseEvent object

We can also simulate a mouse click on an element at a certain (x, y) position using a MouseEvent object and the dispatchEvent() method.

Here’s how:

JavaScript
const clickEvent = new MouseEvent('click', { view: window, screenX: x, screenY: y, }); const elementAtPoint = document.elementFromPoint(x, y); elementAtPoint.dispatchEvent(clickEvent);

This time we specify the screenX and screenY options when creating the MouseEvent.

screenX sets the position where the click event should occur on the x-axis. It sets the value of the MouseEvent‘s screenX property.

screenY sets the position where the click event should occur on the Y-axis. It sets the value of the MouseEvent‘s screenY property.

So we can use MouseEvent to replace the click() method in our last example:

JavaScript
// ... // Offset of 10px to get button's position in container const x = 200 + 10; const y = 100 + 10; setInterval(() => { const buttonAtPoint = document.elementFromPoint(x, y); const clickEvent = new MouseEvent('click', { view: window, screenX: x, screenY: y, }); buttonAtPoint.dispatchEvent(clickEvent); }, 1000);

Note: screenX and screenY doesn’t decide where the click should occur (elementFromPoint does). These options are set so that they can be accessed from any click event listener attached to the element at the point.

3 Common Mistakes to Avoid When Handling Events in React

In React apps, event listeners or observers perform certain actions when specific events occur. While it’s quite easy to create event listeners in React, there are common pitfalls you need to avoid to prevent confusing errors. These mistakes are made most often by beginners, but it’s not rare for them to be the reason for one of your debugging sessions as a reasonably experienced developer.

In this article, we’ll be exploring some of these common mistakes, and what you should do instead.

1. Accessing state variables without dealing with updates

Take a look at this simple React app. It’s essentially a basic stopwatch app, counting up indefinitely from zero.

JavaScript
import { useState, useEffect } from 'react'; export default function App() { const [time, setTime] = useState(0); useEffect(() => { const timer = setInterval(() => { setTime(time + 1); }, 1000); return () => { window.clearInterval(timer); } }, []); return ( <div> Seconds: {time} </div> ); }

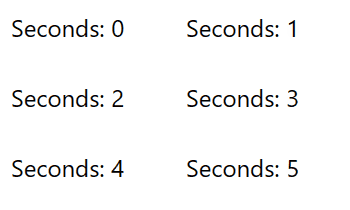
However, when we run this app, the results are not what we’d expect:

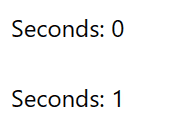
The seconds is stuck at 1.
Stuck at 1

This happens because the time state variable being referred to by the setInterval() callback/closure refers to the stale state that was fresh at the time when the closure was defined.

The closure is only able to access the time variable in the first render (which had a value of 0) but can’t access the new time value in subsequent renders. JavaScript closure remembers the variables from the place where it was defined.

The issue is also due to the fact that the setInterval() closure is defined only once in the component.

The time variable from the first render will always have a value of 0, as React doesn’t mutate a state variable directly when setState is called, but instead creates a new variable containing the new state. So when the setInterval closure is called, it only ever updates the state to 1.

Here are some ways to avoid this mistake and prevent unexpected problems.

1. Pass function to setState

One way to avoid this error is by passing a callback to the state updater function (setState) instead of passing a value directly. React will ensure that the callback always receives the most recent state, avoiding the need to access state variables that might contain old state. It will set the state to the value the callback returns.

Here’s how we apply this for our example:

JavaScript
import { useState, useEffect } from 'react'; export default function App() { const [time, setTime] = useState(0); useEffect(() => { const timer = setInterval(() => { // ๐Ÿ‘‡ Pass callback setTime((prevTime) => prevTime + 1); }, 1000); return () => { window.clearInterval(timer); } }, []); return ( <div> Seconds: {time} </div> ); }
The time is increased by 1 every second - success.
The time is increased by 1 every second – success.

Now the time state will be incremented by 1 every time the setInterval() callback runs, just like it’s supposed to.

2. Event listener re-registration

Another solution is to re-register the event listener with a new callback every time the state is changed, so the callback always accesses the fresh state from the enclosing scope.

We do this by passing the state variable to useEffect‘s dependencies array:

JavaScript
import { useState, useEffect } from 'react'; export default function App() { const [time, setTime] = useState(0); useEffect(() => { const timer = setInterval(() => { setTime(time + 1); }, 1000); return () => { window.clearInterval(timer); } }, [time]); return ( <div> Seconds: {time} </div> ); }

Every time the time state is changed, a new callback accessing the fresh state is registered with setInterval(). setTime() is called with the latest time state added to 1, which increments the state value.

2. Registering event handler multiple times

This is a mistake frequently made by developers new to React hooks and functional components. Without a basic understanding of the re-rendering process in React, you might try to register event listeners like this:

JavaScript
import { useState } from 'react'; export default function App() { const [time, setTime] = useState(0); setInterval(() => { setTime((prevTime) => prevTime + 1); }, 1000); return ( <div> Seconds: {time} </div> ); }

Or you might put it in a useEffect hook like this:

JavaScript
import { useState } from 'react'; export default function App() { const [time, setTime] = useState(0); useEffect(() => { setInterval(() => { setTime((prevTime) => prevTime + 1); }, 1000); }); return ( <div> Seconds: {time} </div> ); }

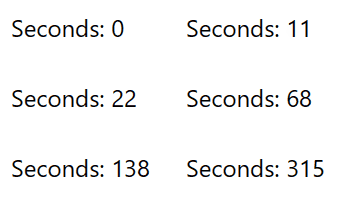
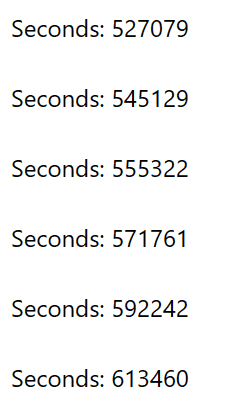
If you do have a basic understanding of this, you should be able to already guess what this will lead to on the web page.

The seconds keep accelerating.
It eventually gets as bad as this.

What’s happening?

What’s happening is that in a functional component, code outside hooks, and outside the returned JSX markup is executed every time the component re-renders.

Here’s a basic breakdown of what happens in a timeline:

  1. 1st render: listener 1 registered
  2. 1 second after listener 1 registration: time state updated, causing another re-render)
  3. 2nd render: listener 2 registered.
  4. Listener 1 never got de-registered after the re-render, so…
  5. 1 second after last listener 1 call: state updated
  6. 3rd render: listener 3 registered.
  7. Listener 2 never got de-registered after the re-render, so…
  8. 1 second after listener 2 registration: state updated
  9. 4th render: listener 4 registered.
  10. 1 second after last listener 1 call: state updated
  11. 5th render: listener 5 registered.
  12. 1 second after last listener 2 call: state updated
  13. 6th render: listener 6 registered.
  14. Listener 3 never got de-registered after the re-render, so…
  15. 1 second after listener 3 registration: state updated.
  16. 7th render: listener 7 registered…

Eventually, things spiral out of control as hundreds and then thousands (and then millions) of callbacks are created, each running at different times within the span of a second, incrementing the time by 1.

The fix for this is already in the first example in this article – put the event listener in the useEffect hook, and make sure to pass an empty dependencies array ([]) as the second argument.

JavaScript
import { useEffect, useState } from 'react'; export default function App() { const [time, setTime] = useState(0); useEffect(() => { setInterval(() => { setTime((prevTime) => prevTime + 1); }, 1000); }, []); return ( <div> Seconds: {time} </div> ); }

useEffect runs after the first render and whenever any of the values in its dependencies array change, so passing an empty array makes it run only on the first render.

The time increases steadily, but by 2.

The time increases steadily now, but as you can see in the demo, it goes up by 2 seconds, instead of 1 second in our very first example. This is because in React 18 strict mode, all components mount, unmount, then mount again. so useEffect runs twice even with an empty dependencies array, creating two listeners that update the time by 1 every second.

We can fix this issue by turning off strict mode, but we’ll see a much better way to do so in the next section.

3. Not unregistering event handler on component unmount.

What happened here was a memory leak. We should have ensured that any created event listener is unregistered when the component unmounts. So when React 18 strict mode does the compulsory unmounting of the component, the first interval listener is unregistered before the second listener is registered when the component mounts again. Only the second listener will be left and the time will be updated correctly every second – by 1.

You can perform an action when the component unmounts by placing in the function useEffect optionally returns. So we use clearInterval to unregister the interval listener there.

JavaScript
import { useEffect, useState } from 'react'; export default function App() { const [time, setTime] = useState(0); useEffect(() => { console.log('here'); const timer = setInterval(() => { setTime((prevTime) => prevTime + 1); }, 1000); // ๐Ÿ‘‡ Unregister interval listener return () => { clearInterval(timer); } }, []); return ( <div> Seconds: {time} </div> ); }

useEffect‘s cleanup function runs after every re-render, not only when the component unmounts. This prevents memory leaks that happen when an observable prop changes value without the observers in the component unsubscribing from the previous observable value.

Conclusion

Creating event listeners in React is pretty straightforward, you just need to be aware of these caveats, so you avoid unexpected errors and frustrating debugging spells. Avoid accessing stale state variables, don’t register more event listeners than required, and always unregister the event listener when the component unmounts.

Stop autosaving your code

Autosave has grown in popularity recently and become the default for many developers and teams, a must-have feature for various code editors. Apps like Visual Studio stubbornly refuse to fully provide the feature, and others make it optional. WebStorm, PHPStorm, and other JetBrains products have it enabled by default; for VSCode, you have to turn it on if you want it.

So obviously, we have two opposing views on the value of autosave because even though it can be highly beneficial, it has its downsides. In this article, weโ€™ll look at both sides of the autosave divide, good causes for turning it off and good causes not to.

Why you should stop autosaving your code

First, some reasons to think twice before enabling autosave in your code editor:

1. Higher and wasted resource usage

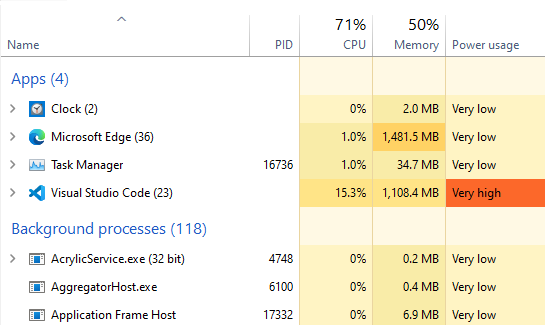
High VSCode CPU usage

When using tools that perform an expensive action any time the file is changed and saved, like build watchers, continuous testing tools, FTP client file syncers, etc, turning on autosave will make these actions much more often. They will also happen when there are errors in the file, and when you make a tiny change. It might instead be preferable for these tools to run only when they need to; when you reach a point where you really want to see the results of your changes.

With greater CPU and memory usage comes lower battery usage and more heat from higher CPU temperature. Admittedly, this will continue to become less and less of an issue as computers increase in processing power, memory capacity, and battery life across the board. But depending on your particular situation, you might want to conserve these things as much as possible.

2. Harder to recover from unexpected errors

Error output in the console.

With autosave enabled, any single change you make to your code file is written to disk, whether these changes leave your file in a valid state or not. This makes it harder to recover from unwanted changes.

What if you make an unintended and possibly buggy change, maybe from temporarily trying something out, and then close the file accidentally or unknowingly (autosave makes this more likely to happen)? With your Undo history wiped out, it will be harder to recover the previous working version of the file. You might even forget how the code used to look before the change, and then have to expend some mental effort to take the code back to what it was.

Git logo.

Of course, using version control tools like Git and Mercurial significantly decrease the chances of this happening. Still, the previous working version of the file you would want to recover could be one with uncommitted changes, not available from version control, especially if you don’t commit very frequently or you have a commit scheduling determined by more than just the code working after small changes, e.g., committing when a mini milestone is reached, committing after every successful build, etc.

So if you want to continue enjoying the benefits of auto-save while minimizing the possibility of this issue occurring, it’s best if you always use source control and have a frequent commit schedule.

3. No auto-formatting on save

VSCode "Format on Save" option

Many IDEs and text editors have a feature that automatically formats your code, so you can focus on the task at hand. For example, VSCode has built-in auto-formatting functionality, and also allows extensions to be written to provide more advanced or opinionated auto-formatters for various languages and file extensions.

These editors typically provide an option to format the file when it is saved. For manual saving, this makes sense, as usually you Ctrl/Cmd + S after making a small working change to a file and stop typing. This seems like a great point for formatting, so it’s a great idea to combine it with the saving action so there’s no need to think about it.

Prettier's format-on-save feature.

However, this feature isn’t very compatible with auto-save, and that’s why editors/IDEs like WebStorm and VSCode do not format your code for you on auto-save (you can still press Ctrl (Cmd) + S for it to happen, but isn’t one of the reasons for enabling auto-save to avoid this over-used keyboard shortcut?).

For one, it would probably be annoying for the cursor to change position due to auto-formatting as you’re typing. And then, there’s also the thing we already talked about earlier – the file won’t always be syntactically valid after an auto-save, and the auto-formatter will fail.

There is one way though, to have auto-formatting while still leaving auto save turned on, and that is enabling auto-formatting on commit. You can do this using Git pre-commit hooks provided by tools like Prettier and Husky.

Still only happens on commit though, so unless your code is not too messed up or you’re ready to format manually, you’ll have to endure the disorderliness until your next commit (or just press that Ctrl + S).

4. Can be distracting

If you have a tool in your project that performs an action when files are saved and indicate this visually in your editor, i.e, a pop-up notification to indicate recompilation, output in the terminal to indicate rebuilding, etc. With auto-save turned on, it can be a bit distracting for these actions to occur whenever you stop typing for a little while.

For instance, in this demo, notice how the terminal output in VSCode changes wildly from typing in a small bunch of characters:

The terminal output changes wildly from typing in a small bunch of characters.

Text editors have tried to fix this problem (and the resource usage problem too) by adding autosave delays; waiting a certain period of time since the file was last changed before actually committing the changes to disk.

This reduces the frequency at which the save-triggering actions occur and solves the issue to an extent, but it’s a trade-off as lack of immediate saving produces another non-ideal situation.

5. Auto-save is not immediate

The auto-save doesn't happen immediately.

Having an auto-save delay means that your code file will not be saved immediately. This can lead to some problems:

Data loss

Probably the biggest motivator for enabling auto-save is to reduce the likelihood that you’ll lose all the hard work you’ve put into creating code should an unexpected event like a system crash or the forced closing of the application occur. The higher your auto-save delay, the greater the chance of this data loss happening.

VSCode takes this into account; when its auto-save delay is set to 2 or more seconds, it will show the unsaved file indicator for a recently modified file, and the unsaved changes warning dialog if you try to close the file until the delay completes.

On-save action lags

Tools that run on save like build watchers will be held back by the auto-save delay. With manual save, you know that hitting Ctrl + S will make the watcher re-build immediately, but with delayed auto-save, you’ll have to experience the lag between your finishing and the watcher reacting to changes. This could impact the responsiveness of your workflow.

Why you should autosave your code

The reasons above probably won’t be enough to convince many devs to disable autosave. It is a fantastic feature after all. And now let’s look at some of the reasons why it’s so great to have:

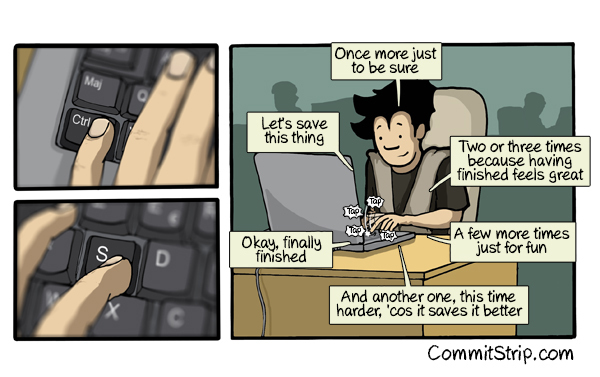
1. No more Ctrl + S fatigue

Comic on Ctrl + S fatigue.
Image source: CommitStrip

If you use manual save, you probably press this keyboard shortcut hundreds or even thousands of times in a working day. Auto-saving helps you avoid this entirely. Even if you’re very used to it now, once you get used to your files being autosaved, you’ll be hesitant to back to the days of carrying out the ever-present chore of Ctrl + S.

Eradicating the need for Ctrl + S might even lower your chances of suffering from repetitive strain injury, as you no longer have to move your wrists and fingers over and over to type the key combination.

2. Save time and increase productivity

Save time photo.
Save icons created by Kiranshastry – Flaticon

The time you spend pressing the key combination to save a file might not seem like much, but it does add up over time. Turning auto-save on lets you use this time for more productive activities. Of course, if you just switched to auto-save, you’ll have to work on unlearning your Ctrl + S reflex for this to be a benefit to you.

3. Certainty of working with latest changes

Any good automation turns a chore into a background operation you no longer have to think about. This is what auto-save does to saving files; no longer are you unsure of whether you’re working with the most recent version of the file. Build watchers and other on-file-change tools automatically run after the file’s contents are modified, and display output associated with the latest file version.

4. Avoids errors due to file not being saved

Error output in the console.

This follows from the previous point. Debugging can be a tedious process and it’s not uncommon for developers to forget to save a file when tirelessly hunting for bugs. You probably don’t want to experience the frustration of scrutinizing your code, line after line, wondering how this particular bug can still exist after everything you’ve done.

You might think I’m exaggerating, but it might take up to 15 (20? 30??) minutes before you finally notice the unsaved file indicator. Especially if you’ve been trapped in a cycle of making small changes, saving, seeing the futility of your changes, making more small changes, saving… when you’re finally successful and pressing Ctrl + S is the only issue, you might just assume your change didn’t work, instead of checking for other possible reasons for the reoccurrence of the error.

5. Encourages smaller changes due to triggering errors faster

When a tool performs an action due to a file being saved, the new contents of the file might be invalid and trigger an error. For example, a test case might fail when a continuous testing tool re-runs or there might be a syntax error when a build watcher re-builds.

Since this type of on-file-change action occur more (possibly much more) when files are auto-saved when you type code that causes an error, it will take a shorter time for the action to happen and for you to be notified of the error. You would have made a smaller amount of code changes, which will make it easier to identify the source of the error.

Conclusion

Autosave is an amazing feature with the potential to significantly improve your quality of life as a developer when used properly. Still, it’s not without its disadvantages, and as we saw in this article, enabling or disabling it is a trade-off to live with. Choose auto-format on save and lower CPU usage, or choose to banish Ctrl + S forever and gain the certainty of working with up-to-date files.

What are your views concerning the autosave debate? Please let me know in the comments!

Easy Endless Infinite Scroll With JavaScript

In this article, we’re going to learn how to easily implement infinite scrolling on a webpage using JavaScript.

What is infinite scroll?

Infinite scroll is a web design technique where more content is loaded automatically when the user scrolls down to the end. It removes the need for pagination and can increase the time users spend on our site.

Finished infinite scroll project

Our case study for this article will be a small project that demonstrates essential concepts related to infinite scroll.

Here it is:

HTML structure

Before looking at the JavaScript functionality, let’s check out the HTML markup for the project’s webpage.

HTML

<div id="load-trigger-wrapper">
  <div id="image-container"></div>
  <div id="load-trigger"></div>
</div>
<div id="bottom-panel">
  Images:
  &nbsp;<b><span id="image-count"></span>
  &nbsp;</b>/
  &nbsp;<b><span id="image-total"></span></b>
</div>

The #image-container div will contain the grid of images.

The #load-trigger div is observed by an Intersection Observer; more images will be loaded when this div comes within a certain distance of the bottom of the viewport.

The #bottom-panel div will contain an indicator of the number of images that have been loaded.

Detect scroll to content end

The detectScroll() function uses the Intersection Observer API to detect when the #bottom-panel div comes within a certain range of the viewport’s bottom. We set a root margin of -30px, so this range is 30px upwards from the bottom.

JavaScript

const loadTrigger = document.getElementById('load-trigger');

// ...

const observer = detectScroll();

// ...

function detectScroll() {
  const observer = new IntersectionObserver(
    (entries) => {
      for (const entry of entries) {
        // ...
            loadMoreImages();
        // ...          
      }
    },
    // Set "rootMargin" because of #bottom-panel height
    { rootMargin: '-30px' }
  );

  // Start watching #load-trigger div
  observer.observe(loadTrigger);

  return observer;
}

The callback passed to and Intersection Observer fires after the observe() call, so the images are loaded as the page is loaded.

Display skeleton images

Before the actual images are loaded, we first show a blank skeleton image with a loading animation. We store the image elements in an array variable to update them when their respective images have been loaded.

JavaScript

const imageClass = 'image';
const skeletonImageClass = 'skeleton-image';

// ...

// This function would make requests to an image server
function loadMoreImages() {
  const newImageElements = [];
  // ...

  for (let i = 0; i < amountToLoad; i++) {
    const image = document.createElement('div');

    // Indicate image load
    image.classList.add(imageClass, skeletonImageClass);

    // Include image in container
    imageContainer.appendChild(image);

    // Store in temp array to update with actual image when loaded
    newImageElements.push(image);
  }

  // ...
}

To display each image, we create a div and add the image and skeleton-image classes to it. Here are the CSS definitions for these classes:

CSS

.image,
.skeleton-image {
  height: 50vh;
  border-radius: 5px;
  border: 1px solid #c0c0c0;
  /* Three per row, with space for margin */
  width: calc((100% / 3) - 24px);

  /* Initial color before loading animation */
  background-color: #eaeaea;

  /* Grid spacing */
  margin: 8px;

  /* Fit into grid */
  display: inline-block;
}

.skeleton-image {
  transition: all 200ms ease-in;

  /* Contain ::after element with absolute positioning */
  position: relative;

  /* Prevent overflow from ::after element */
  overflow: hidden;
}

.skeleton-image::after {
  content: "";

  /* Cover .skeleton-image div*/
  position: absolute;
  top: 0;
  right: 0;
  bottom: 0;
  left: 0;

  /* Setup for slide-in animation */
  transform: translateX(-100%);

  /* Loader image */
  background-image: linear-gradient(90deg, rgba(255, 255, 255, 0) 0, rgba(255, 255, 255, 0.2) 20%, rgba(255, 255, 255, 0.5) 60%, rgba(255, 255, 255, 0));

  /* Continue animation until image load*/
  animation: load 1s infinite;
}

@keyframes load {
  /* Slide-in animation */
  100% {
    transform: translateX(100%)
  }
}
The skeleton loading animation.

Update skeleton images

Instead of getting images from a server, we get colors. After all the colors are loaded, we loop through the skeleton images, and for each image, we remove the skeleton-image class and apply the color.

JavaScript

function loadMoreImages() {
  // ...
  // Create skeleton images and stored them in "newImageElements" variable

  // Simulate delay from network request
  setTimeout(() => {
    // Colors instead of images
    const colors = getColors(amountToLoad);
    for (let i = 0; i < colors.length; i++) {
      const color = colors[i];
      newImageElements[i].classList.remove(skeletonImageClass);
      newImageElements[i].style.backgroundColor = color;
    }
  }, 2000);

  // ...
}

The getRandomColor() function takes a number and returns an array with that number of random colors.

JavaScript

function getColors(count) {
  const result = [];
  let randUrl = undefined;

  while (result.length < count) {
    // Prevent duplicate images
    while (!randUrl || result.includes(randUrl)) {
      randUrl = getRandomColor();
    }

    result.push(randUrl);
  }

  return result;
}

getColors() uses a getRandomColor() function that returns a random color, as its name says.

JavaScript

function getRandomColor() {
  const h = Math.floor(Math.random() * 360);

  return `hsl(${h}deg, 90%, 85%)`;
}

Stop infinite scroll

To save resources, we stop observing the load trigger element after all possible content has been loaded.

Let’s say we have 50 images that can be loaded and the loadLimit is 9. When the first batch of images is loaded, the amountToLoad should be 9, with 9 displayed images. When the fifth batch is to be loaded, the amountToLoad should still be 9, with 45 displayed images.

On the sixth batch, there’ll only be 5 images left to load, so the amountToLoad should now be 5, taking the displayed images to 50. This sixth batch of images will be the final one to be loaded, after which we’ll stop watching the load trigger element, with a call to the unobserve() method of the Intersection Observer.
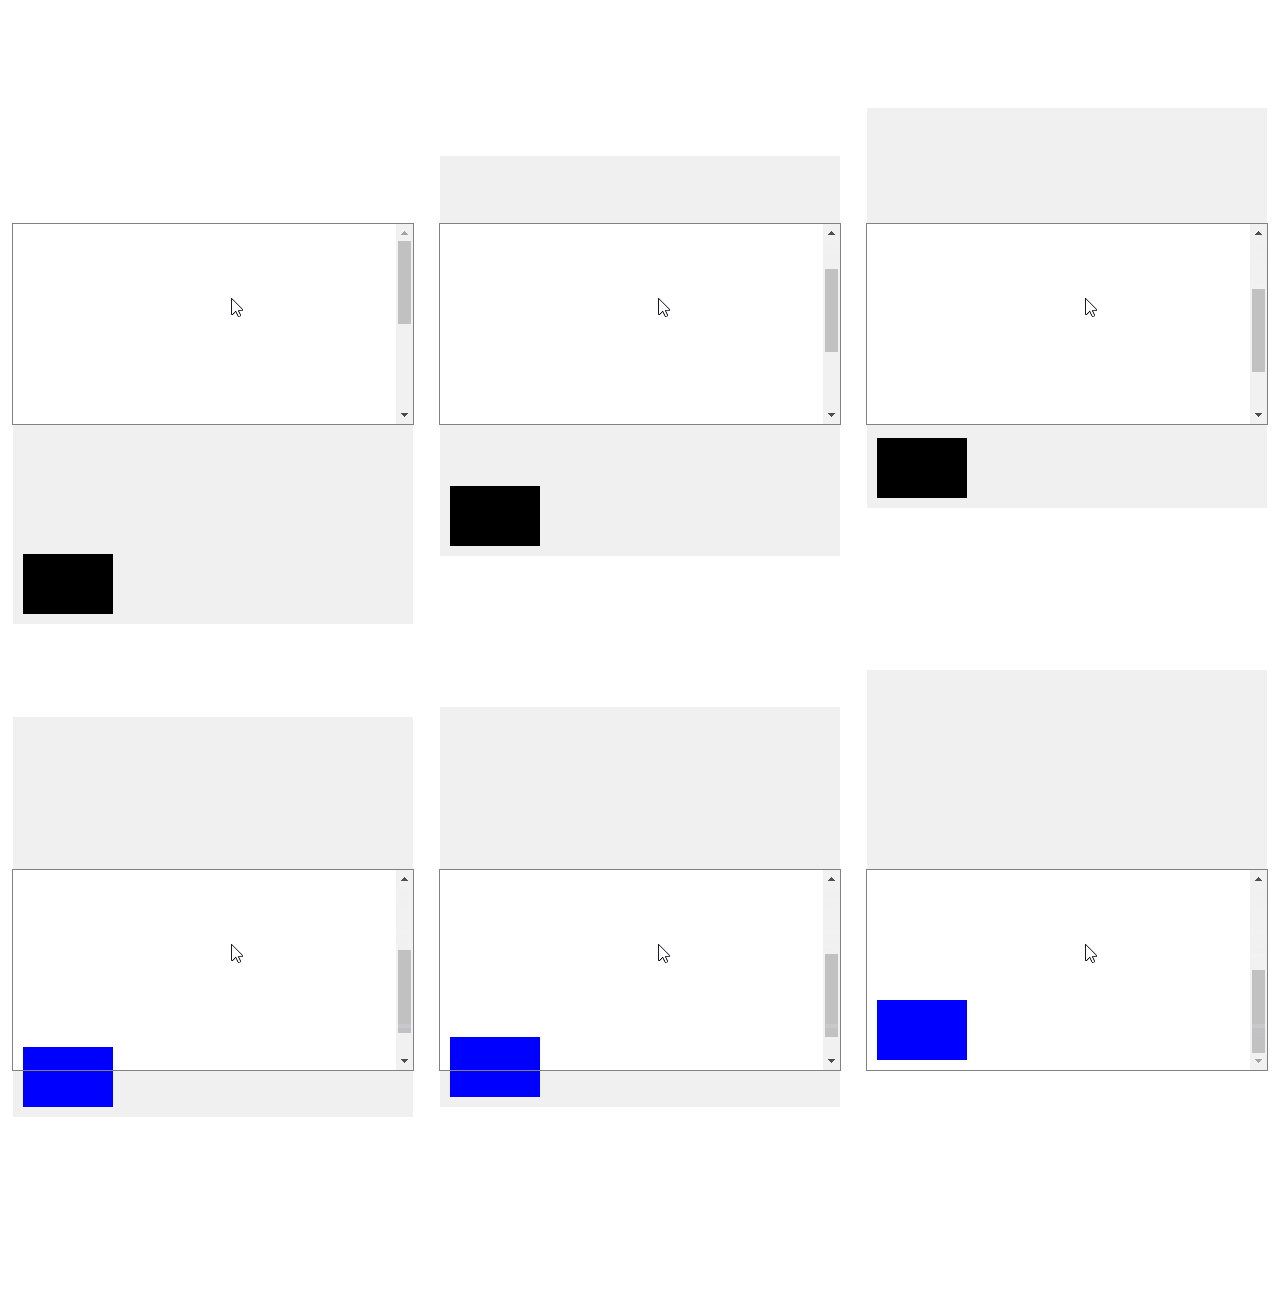
So we use the Math.min() method to ensure that the amountToLoad is always correct. amountToLoad should never be more than the, and never less than the images left to load.

JavaScript

const imageCountText = document.getElementById('image-count');

// ...

let imagesShown = 0;

// ...

function loadMoreImages() {
  // ...
  const amountToLoad = Math.min(loadLimit, imageLimit - imagesShown);
  

  // Load skeleton images...
  // Update skeleton images...

  // Update image count
  imagesShown += amountToLoad;
  imageCountText.innerText = imagesShown;

  if (imagesShown === imageLimit) {
    observer.unobserve(loadTrigger);
  }
}

Optimize performance with throttling

If the user scrolls down rapidly, it’s likely that the Intersection Observer will fire multiple times, causing multiple image loads in a short period of time, creating performance problems.

To prevent this, we can use a timer to limit the number of times multiple image batches can be loaded within a certain time period. This is called throttling.

The throttle() function accepts a callback and a time period in milliseconds (time). It will not invoke the callback if the current throttle() call was made withing time ms of the last throttle() call.

JavaScript

let throttleTimer;

// Only one image batch can be loaded within a second
const throttleTime = 1000;

// ...

function throttle(callback, time) {
  // Prevent additional calls until timeout elapses
  if (throttleTimer) {
    console.log('throttling');
    return;
  }
  throttleTimer = true;

  setTimeout(() => {
    callback();

    // Allow additional calls after timeout elapses
    throttleTimer = false;
  }, time);
}

By calling throttle() in the Intersection Observer’s callback with a time of 1000, we ensure that loadMoreImages() is never called multiple times within a second.


function detectScroll() {
  const observer = new IntersectionObserver(
    (entries) => {
          // ...
          throttle(() => {
            loadMoreImages();
          }, throttleTime);
        }
      }
    },
    // ...
  );

  // ...
}

Finished infinite scroll project

You can check out the complete source code for this project in CodePen. Here’s an embed:

Conclusion

In the article, we learned the basic elements need to implement infinite scroll functionality using JavaScript. With the Intersection Observer API, we observe a load trigger element and load more content when the element gets within a certain distance of the viewport’s bottom. With these ideas in mind, you should able to easily add infinite scroll to your project, customized according to your unique needs.

NEW: *Built-In* Syntax Highlighting on Medium

If you frequently read or write coding articles on Medium youโ€™ll know that it hasnโ€™t had any syntax highlighting support for years now, despite programming being one of the most common topics on the platform. Software writers have had to resort to third-party tools to produce beautiful code highlighting that enhances readability.

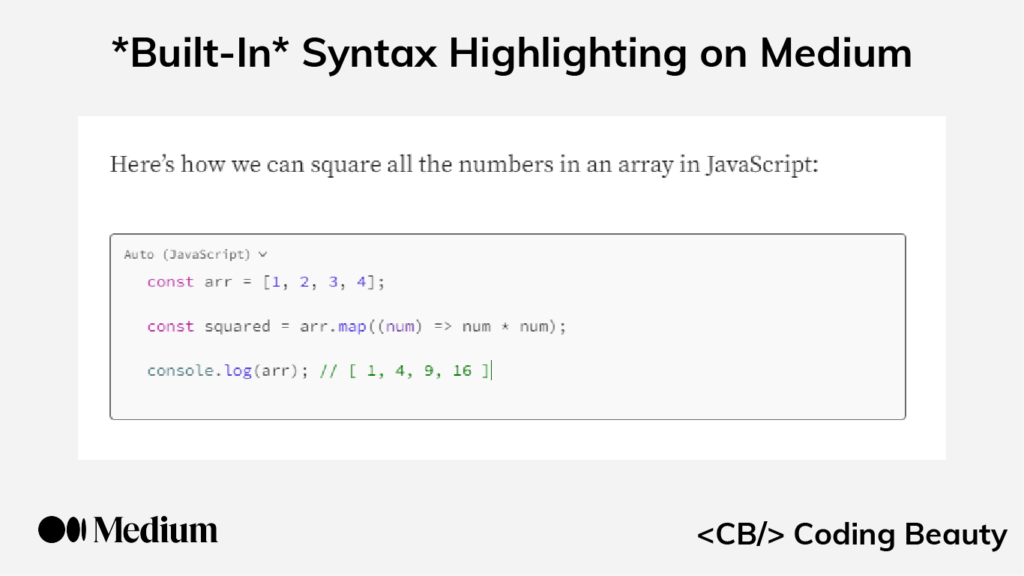
Luckily, all that should change soon, as recently the Medium team finally added built-in syntax highlighting support to the code block for major programming languages.

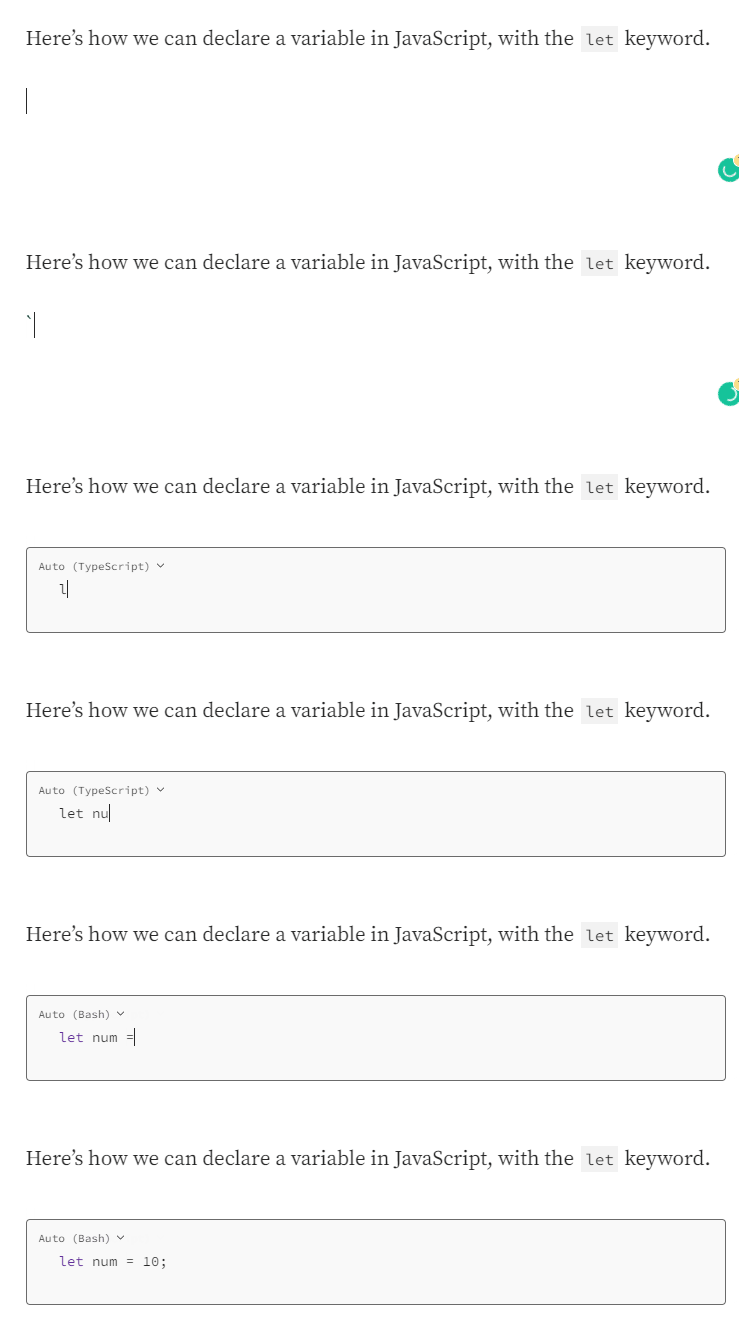
The Medium code block now has syntax highlighting support.

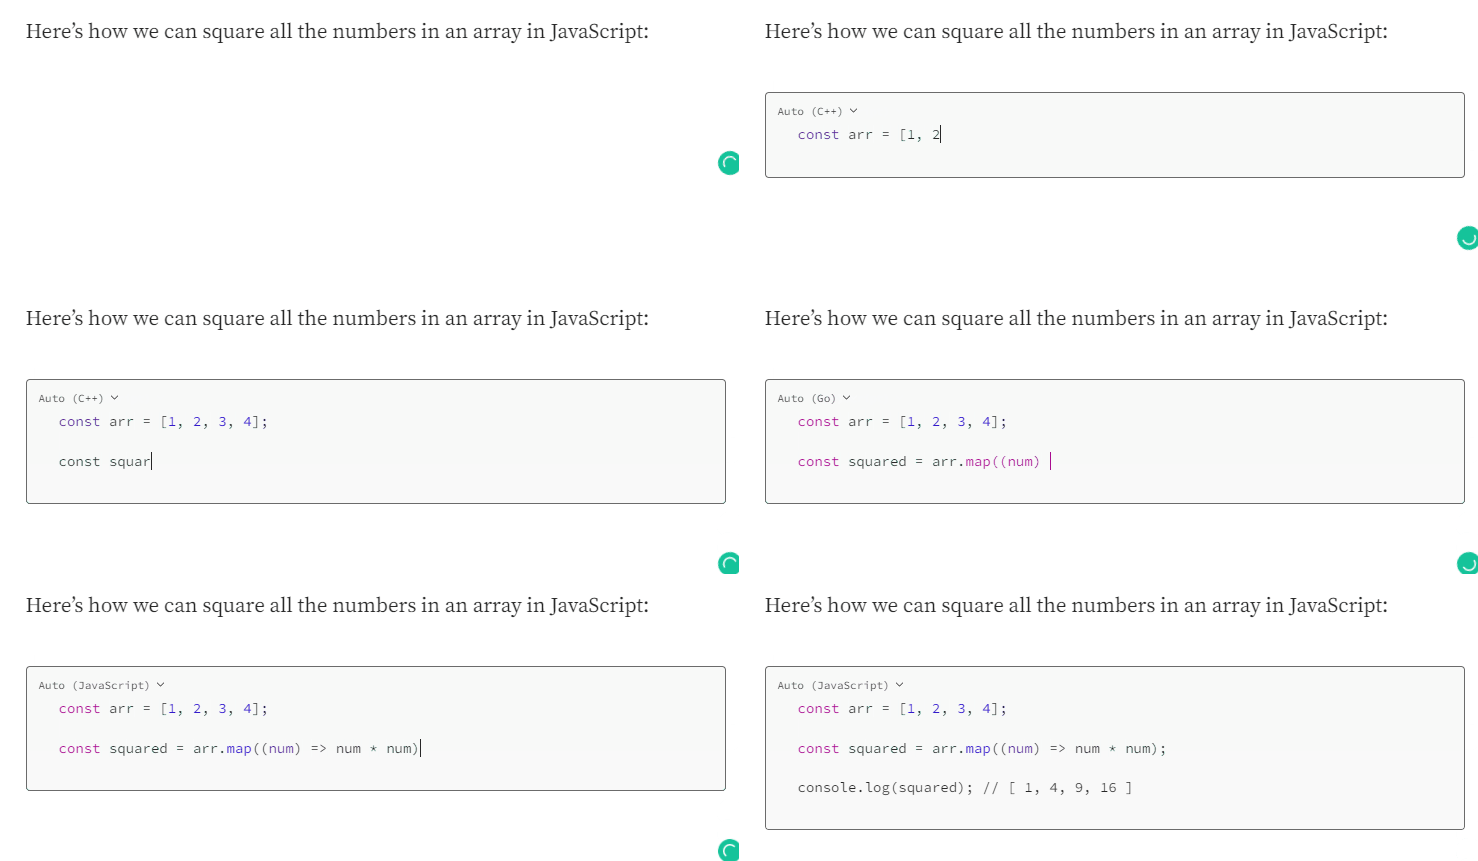
As you can see in the demo, the code block can now automatically detect the code’s language and highlight it.

Manual syntax highlighting

Auto-detection doesnโ€™t always work correctly though, especially for small code snippets, possibly due to the syntax similarities between multiple languages. Notice in the demo how the language detected changed during typing, from R to C++ to Go before arriving at JavaScript.

For tiny code snippets, auto-detection will likely fail:

Auto-detection fails to correctly detect the language.
Bash?

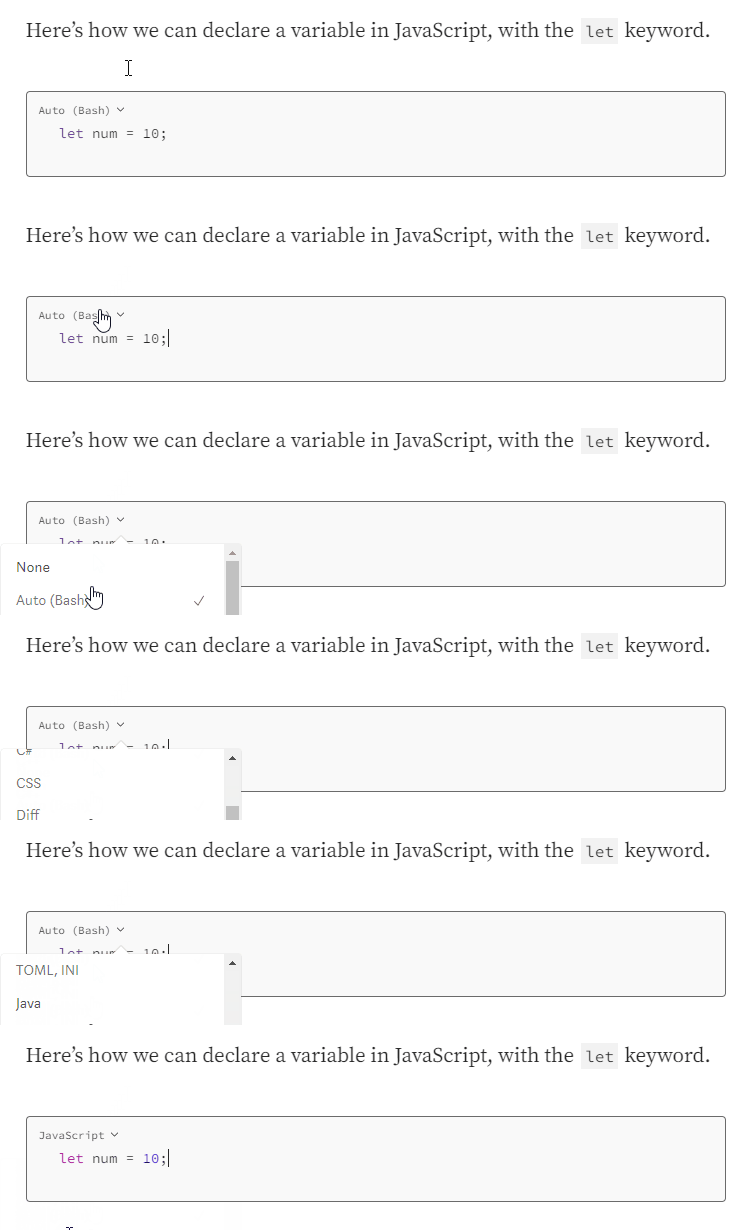
In such a case you can select the correct language from the drop-down list:

Manually setting the language for syntax highlighting.

Remove syntax highlighting

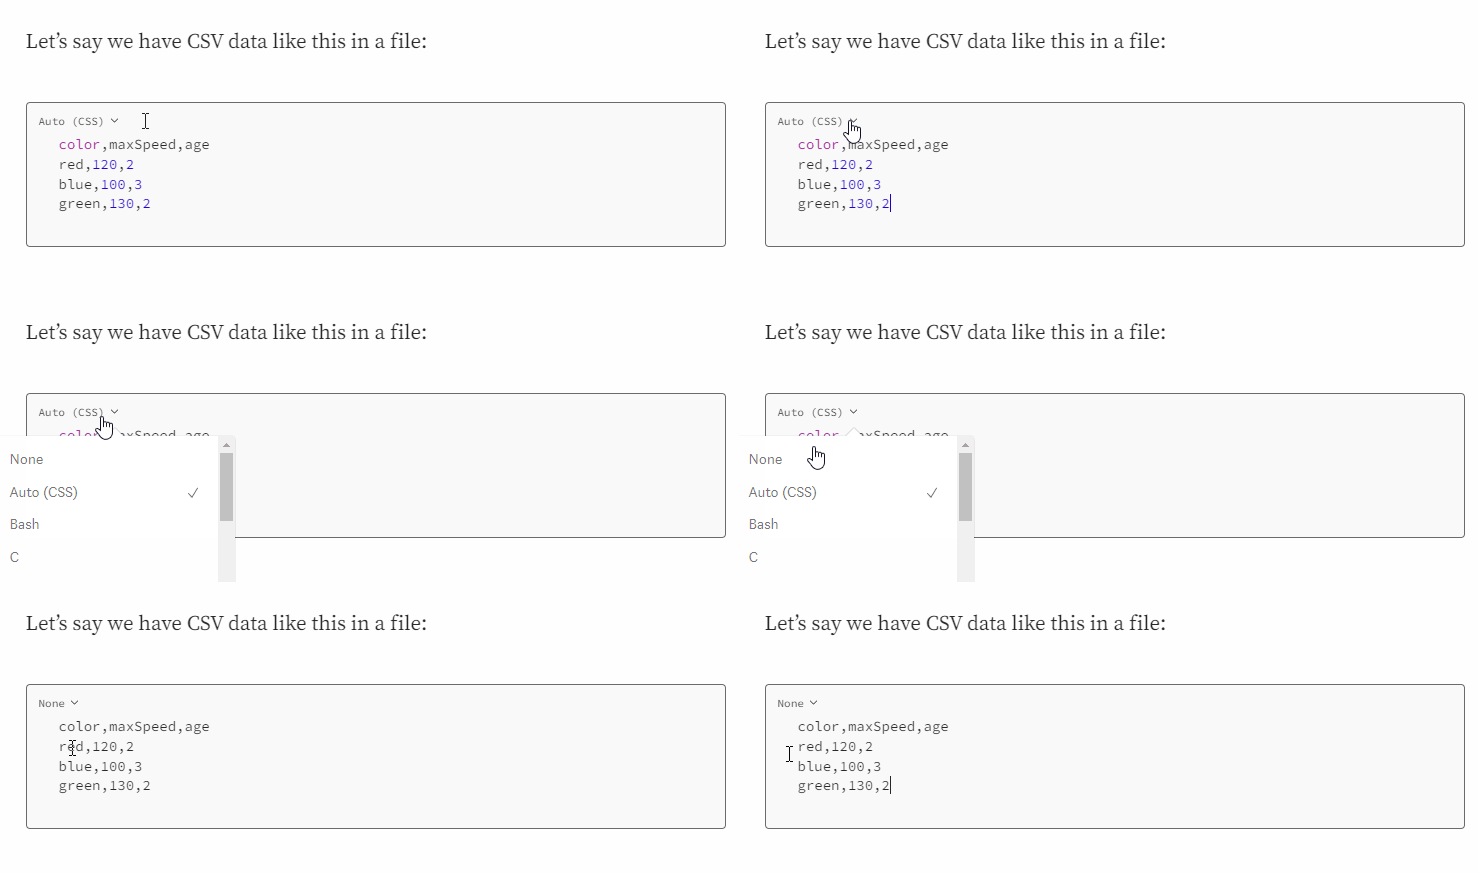
If the code is of a language not listed or it doesn’t require highlighting, you can select None and remove the highlighting.

Removing syntax highlighting with the "None" option.
Removing syntax highlighting with the None option.

Note that syntax highlighting isn’t applied to articles published before the feature arrived, probably because it would produce incorrect results in them if auto-detection failed.

So now we no longer need GitHub Gists or Carbon for this. Syntax highlighting on Medium is now easier than ever before.

How Does the useDeferredValue Hook Work in React?

React now has concurrency support with the release of version 18. There are numerous features now that help to make better use of system resources and boost app performance. One such feature is the useDefferedValue hook, in this article we’re going to learn about useDeferredValue and understand the scenarios where we can use it.

Why do we need useDefferedValue?

Before we can see this hook in action, we need to understand something about how React manages state and updates the DOM.

Let’s say we have the following code:

App.js

export default function App() {
  const [name, setName] = useState('');

  const computedValue = useMemo(() => {
    return getComputedValue(name);
  }, [name]);

  const handleChange = (event) => {
    setName(event.target.value);
  };

  return (
    <input
      type="text"
      placeholder="Username"
      value={name}
      onChange={handleChange}
    />
  );
}

Here we create a state variable with the useState hook, and a computed value (computedValue) derived from the state. We use the useMemo hook to recalculate the computed value only when the state changes.

So when the value of the input field changes, the name state variable is updated and the computed value is recomputed before the DOM is updated.

This usually isn’t an issue, but sometimes this recalculation process involves a large amount of computation and takes a long time to finish executing. This can reduce performance and degrade the user experience.

For example, we could be developing a feature that lets a user search for an item in a gigantic list:

App.js

function App() {
  const [query, setQuery] = useState('');

  const list = useMemo(() => {
    // ๐Ÿ‘‡ Filtering through large list impacts performance
    return largeList.filter((item) => item.name.includes(query));
  }, [query]);

  const handleChange = (event) => {
    setQuery(event.target.value);
  };

  return (
    <>
      <input type="text" value={query} onChange={handleChange} placeholder="Search"/>
      {list.map((item) => (
        <SearchResultItem key={item.id} item={item} />
      ))}
    </>
  );
}

In this example, we have a query state variable used to filter through a huge list of items. The longer the list, the more time it will take for the filtering to finish and the list variable to be updated for the DOM update to complete.

So when the user types something in the input field, the filtering will cause a delay in the DOM update and it’ll take time for the text in the input to reflect what the user typed immediately. This slow feedback will have a negative effect on how responsive your app feels to your users.

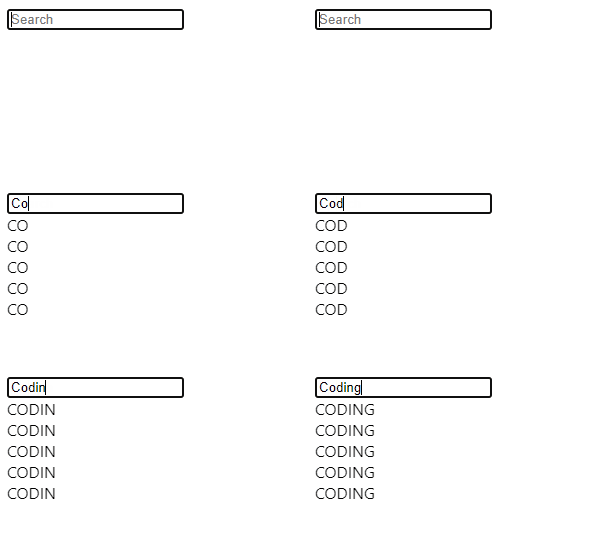
I simulated the slowness in the demo below so you can better understand this problem. There are only a few search results for you to properly visualize it, and they’re each just the uppercase of whatever was typed into the input field.

In this demo, I am typing each character one after the other as quickly as I can, but because of the artificial slowness, it takes about a second for my keystroke to change the input text.

The input doesn't respond to keystrokes fast enough.
The input doesn’t respond to keystrokes fast enough.

useDeferredValue in action

This is a situation where the useDeferredValue hook is handy. useDeferredValue() accepts a state value as an argument and returns a copy of the value that will be deferred, i.e., when the state value is updated, the copy will not update accordingly until after the DOM has been updated to reflect the state change. This ensures that urgent updates happen and are not delayed by less critical, time-consuming ones.

function App() {
  const [query, setQuery] = useState('');

  // ๐Ÿ‘‡ useDefferedValue
  const deferredQuery = useDefferedValue(query);

  const list = useMemo(() => {
    return largeList.filter((item) => item.name.includes(query));
  }, [deferredQuery]);

  const handleChange = (event) => {
    setQuery(event.target.value);
  };

  return (
    <>
      <input type="text" value={query} onChange={handleChange} placeholder="Search" />
      {list.map((item) => (
        <SearchResultItem key={item.id} item={item} />
      ))}
    </>
  );
}

In the example above, our previous code has been modified to use the useDeferredValue hook. As before, the query state variable will be updated when the user types, but this time, useMemo won’t be invoked right away to filter the large list, because now deferredQuery is the dependency useMemo is watching for changes, and useDeferredValue ensures that deferredQuery will not be updated until after query has been updated and the component has been re-rendered.

Since useMemo won’t be called and hold up the DOM update from the change in the query state, the UI will be updated without delay and the input text will change once the user types. This solves the responsiveness issue.

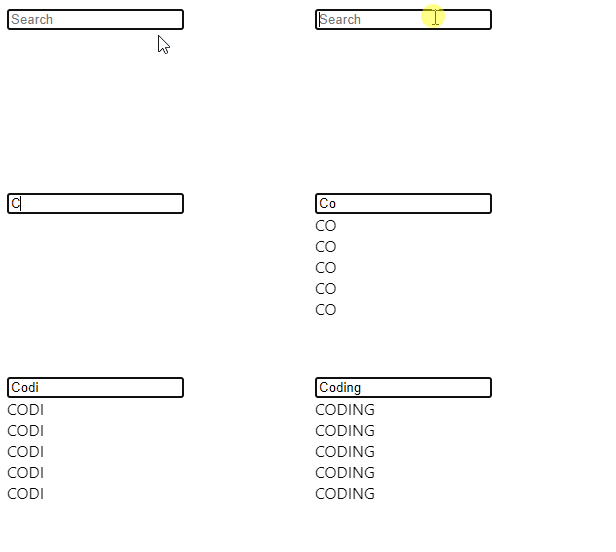
After the query state is updated, then deferredQuery will be updated, causing useMemo to filter through the large list and recompute a value for the list variable, updating the list of items shown below the input field.

The input responds instantly to keystrokes.
The input field responds instantly to keystrokes.

As you can see in the demo, the text changes immediately as I type, but the list lags behind and updates sometime later.
If we keep changing the input field’s text in a short period (e.g., by typing fast), the deferredQuery state will remain unchanged and the list will not be updated. This is because the query state will keep changing before useDeferredValue can be updated, so useDeferredValue will continue to delay the update until it has time to set deferredQuery to the latest value of query and update the list.

Here’s what I mean:

Typing quickly prevents the list from updating right away.

This is quite similar to debouncing, as the list is not updated till a while after input has stopped.

Tip

Sometimes in our apps, we’ll want to perform an expensive action when an event occurs. If this event happens multiple times in a short period, the action will be done as many times, decreasing performance. To solve this, we can set a requirement that the action only be carried out “X” amount of time since the most recent occurrence of the event. This is called debouncing.

For example, in a sign-up form, instead of sending a request once the user types to check for a duplicate username in the database, we can make the request get sent only 500 ms since the user last typed in the username input field (or of course, we could perform this duplicate check after the user submits the form instead of near real-time).

Since the useDeferredValue hook defers updates and causes additional re-render, it’s important that you don’t overuse it as this could actually cause the performance problems we’re trying to avoid, as it forces React to do extra re-renders in your app. Use it only when you have critical updates that should happen as soon as possible without being slowed down by updates of lower priority.

Conclusion

The useDeferred value accepts a state variable and returns a copy of it that will not be updated until the component has been re-rendered from an update of the original state. This improves the performance and responsiveness of the app, as time-consuming updates are put off to a later time to make way for the critical ones that should be shown in the DOM without delay for the user to see.

JavaScript Intersection Observer: Everything You Need to Know

The Intersection Observer API is used to asynchronously observe changes in the intersection of an element with the browser’s viewport. It makes it easy to perform tasks that involve detecting the visibility of an element, or the relative visibility of two elements in relation to each other, without making the site sluggish and diminishing the user experience. We’re going to learn all about it in this article.

Uses of Intersection Observer

Before we start exploring the Intersection Observer API, let’s look at some common reasons to use it in our web apps:

Infinite scrolling

This is a web design technique where content is loaded continuously as the user scrolls down. It eliminates the need for pagination and can improve user dwell time.

Lazy loading

Lazy loading is a design pattern in which images or other content are loaded only when they are scrolled into the view of the user, to increase performance and save network resources.

Scroll-based animations

This means animating elements as the user scrolls up or down the page. Sometimes the animation plays completely once a certain scroll position is reached. Other times, the time in the animation changes as the scroll position changes.

Ad revenue calculation

We can use Intersection Observer to detect when an ad is visible to the user and record an impression, which affects ad revenue.

Creating an Intersection Observer

Let’s take a look at a simple use of an Intersection Observer in JavaScript.

index.js

const observer = new IntersectionObserver((entries) => {
  for (const entry of entries) {
    const intersecting = entry.isIntersecting;
    entry.target.style.backgroundColor = intersecting ? 'blue' : 'orange';
  }
});

const box = document.getElementById('box');

observer.observe(box);

The callback function receives an array containing objects of the IntersectionObserverEntry interface. This object contains intersection-related information about an element currently being watched by the Observer.
The callback is called whenever the target element intersects with the viewport. It is also called the first time the Observer is asked to watch the element.
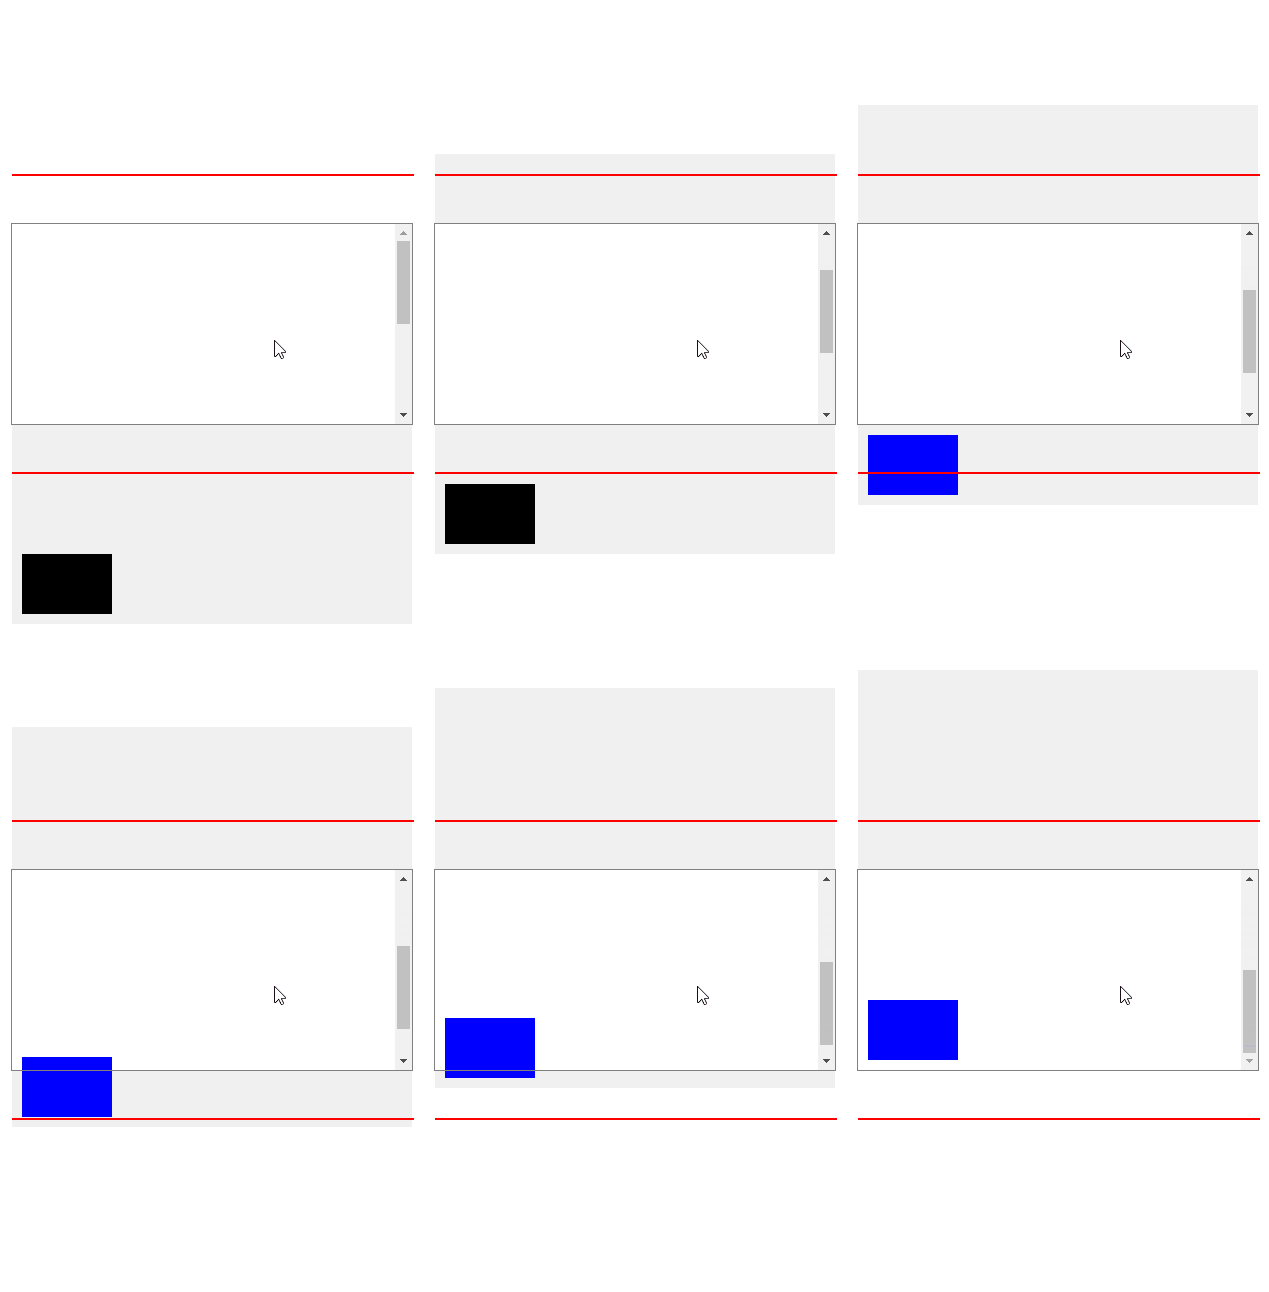
We use the for...of loop to iterate through the entries passed to the callback. We’re observing only one element, so the entries array will contain just the IntersectionObserverEntry element that represents the box, and the for...of loop will have only one iteration.

The isIntersecting property of an IntersectionObserverEntry element returns a boolean value that indicates whether the element is intersecting with the viewport.

When isIntersection is true, it means that the element is transitioning from non-intersecting to intersecting. But when it is false, it indicates that the element is transitioning from intersecting to non-intersecting.

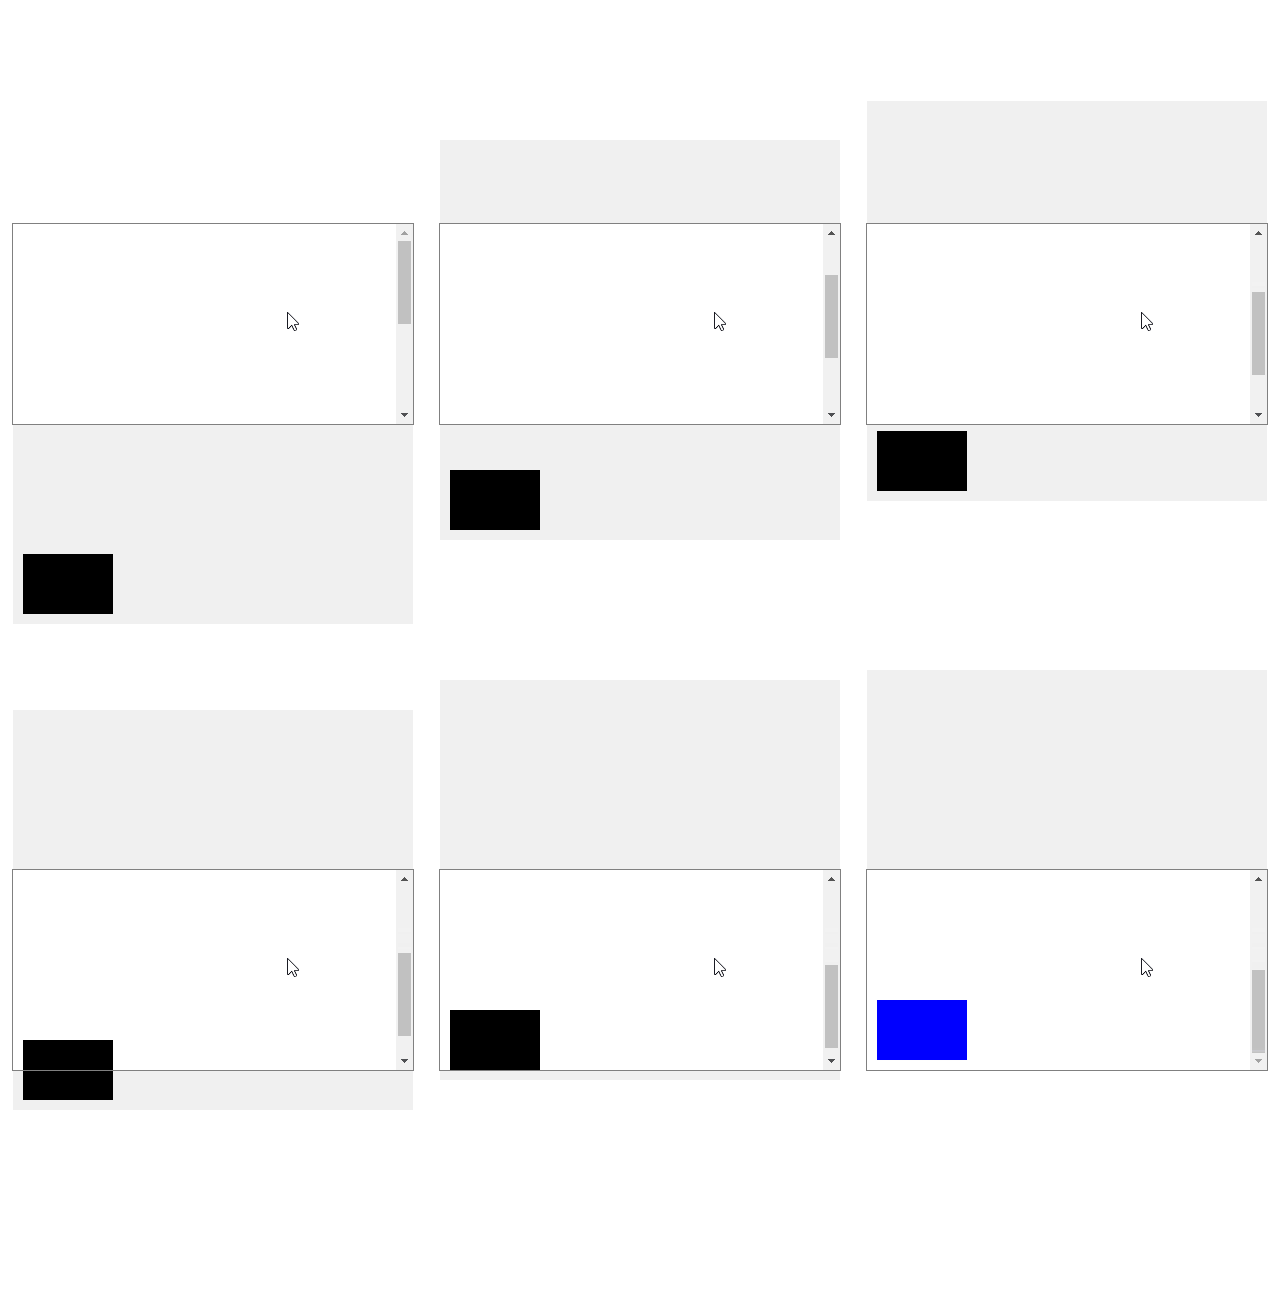
So we use the isIntersection property to set the color of the element to blue as it enters the viewport, and back to black as it leaves.

We call the observe() method on the IntersectionObserver object to make the Observer start watching the element for an intersection.

In the demo below, the white area with the scroll bar represents the viewport. The gray part indicates areas on the page that are outside the viewport and not normally visible in the browser.

Watch how the color of the box changes as soon as one single pixel of it enters the viewport:

The element changes color once a single pixel of it enters the viewport.
The element changes color once one single pixel of it enters the viewport.

Intersection Observer options

Apart from the callback function, the IntersectionObserver() constructor also accepts an options object we use to customize the conditions that must be met for the callback to be invoked.

threshold

The threshold property accepts a value between 0 and 1 that specifies the percentage of the element that must be visible within the viewport for the callback to be invoked. It has a value of 0 by default, meaning that the callback will be run once a single pixel of the element enters the viewport.

Let’s modify our previous example to use a threshold of 1 (100%):

index.js

const observer = new IntersectionObserver(
  (entries) => {
    for (const entry of entries) {
      const intersecting = entry.isIntersecting;
      entry.target.style.backgroundColor = intersecting ? 'blue' : 'black';
    }
  },
  // ๐Ÿ‘‡ Threshold is 100%
  { threshold: 1 }
);

const box = document.getElementById('box');

observer.observe(box);

Now the callback that changes the color will only be executed when every single pixel of the element is visible in the viewport.

The element changes color once every single pixel of it enters the viewport.

threshold also accepts multiple values, which makes the callback get each time the element passes one of the threshold values set.

For example:

index.js

const threshold = document.getElementById('threshold');

const observer = new IntersectionObserver(
  (entries) => {
    for (const entry of entries) {
      const ratio = entry.intersectionRatio;
      threshold.innerText = `${Math.round(ratio * 100)}%`;
    }
  },
  // ๐Ÿ‘‡ Multiple treshold values
  { threshold: [0, 0.25, 0.5, 0.75, 1] }
);

const box = document.getElementById('box');

observer.observe(box);

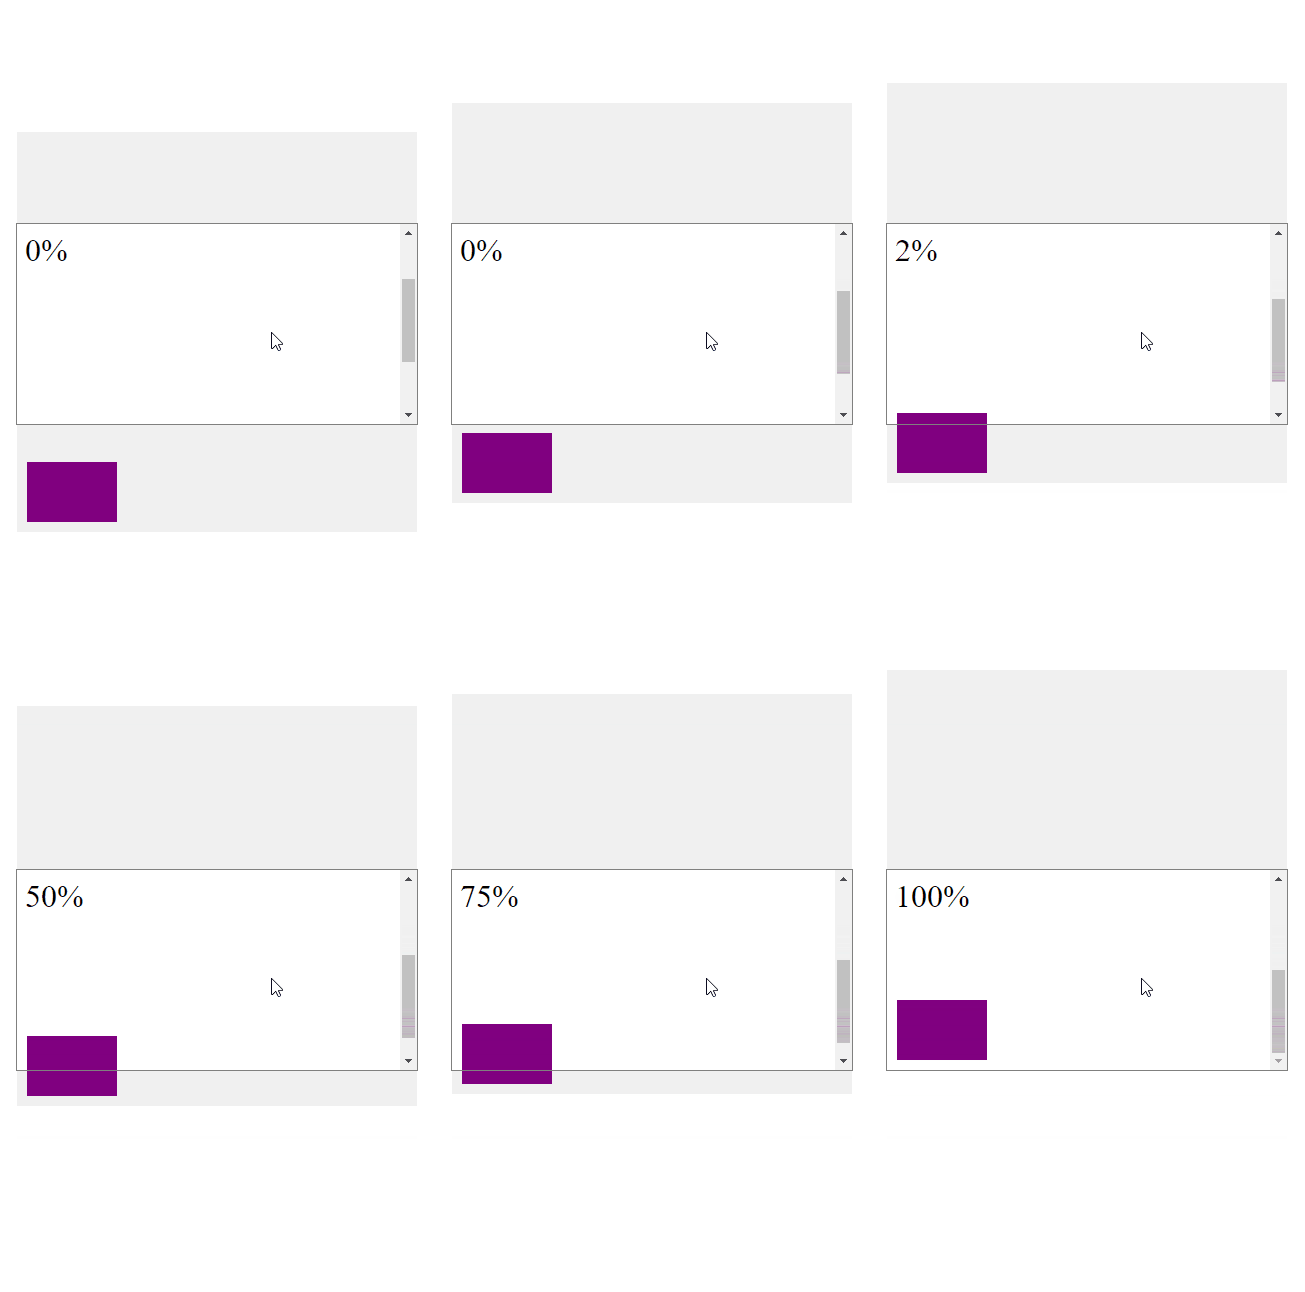
We pass 5 percentage values in an array to the threshold property and display each value as the element reaches it. To do this we use the intersectionRatio property, a number between 0 and 1 indicating the current percentage of the element that is in the viewport.

The text is updated each time a percentage of the element in the viewport reaches a certain threshold.

Notice how the text shown doesn’t always match our thresholds, e.g., 2% was shown for the 0% threshold in the demo. This happens because when we scroll fast and reach a threshold, by the time the callback can fire to update the text, we have already scrolled in more of the element beyond the threshold.

If we scrolled more slowly the callback would have time to update the text before the element scrolls past the current threshold.

rootMargin

The rootMargin property applies a margin around the viewport or root element. It accepts values that the CSS margin property can accept e.g., 10px 20px 30px 40px (top, right, bottom, left). A margin grows or shrinks the region of the viewport that the Intersection Observer watches for an intersection with the target element.

Here’s an example of using the rootMargin property:

index.js

const observer = new IntersectionObserver(
  (entries) => {
    for (const entry of entries) {
      const intersecting = entry.isIntersecting;
      entry.target.style.backgroundColor = intersecting ? 'blue' : 'black';
    }
  },
  // ๐Ÿ‘‡ Root margin 50px from bottom of viewport
  { rootMargin: '50px' }
);

const box = document.getElementById('box');

observer.observe(box);

After setting a rootMargin of 50px, the viewport is effectively increased in height for intersection purposes, and the callback function will be invoked when the element comes within 50px of the viewport.

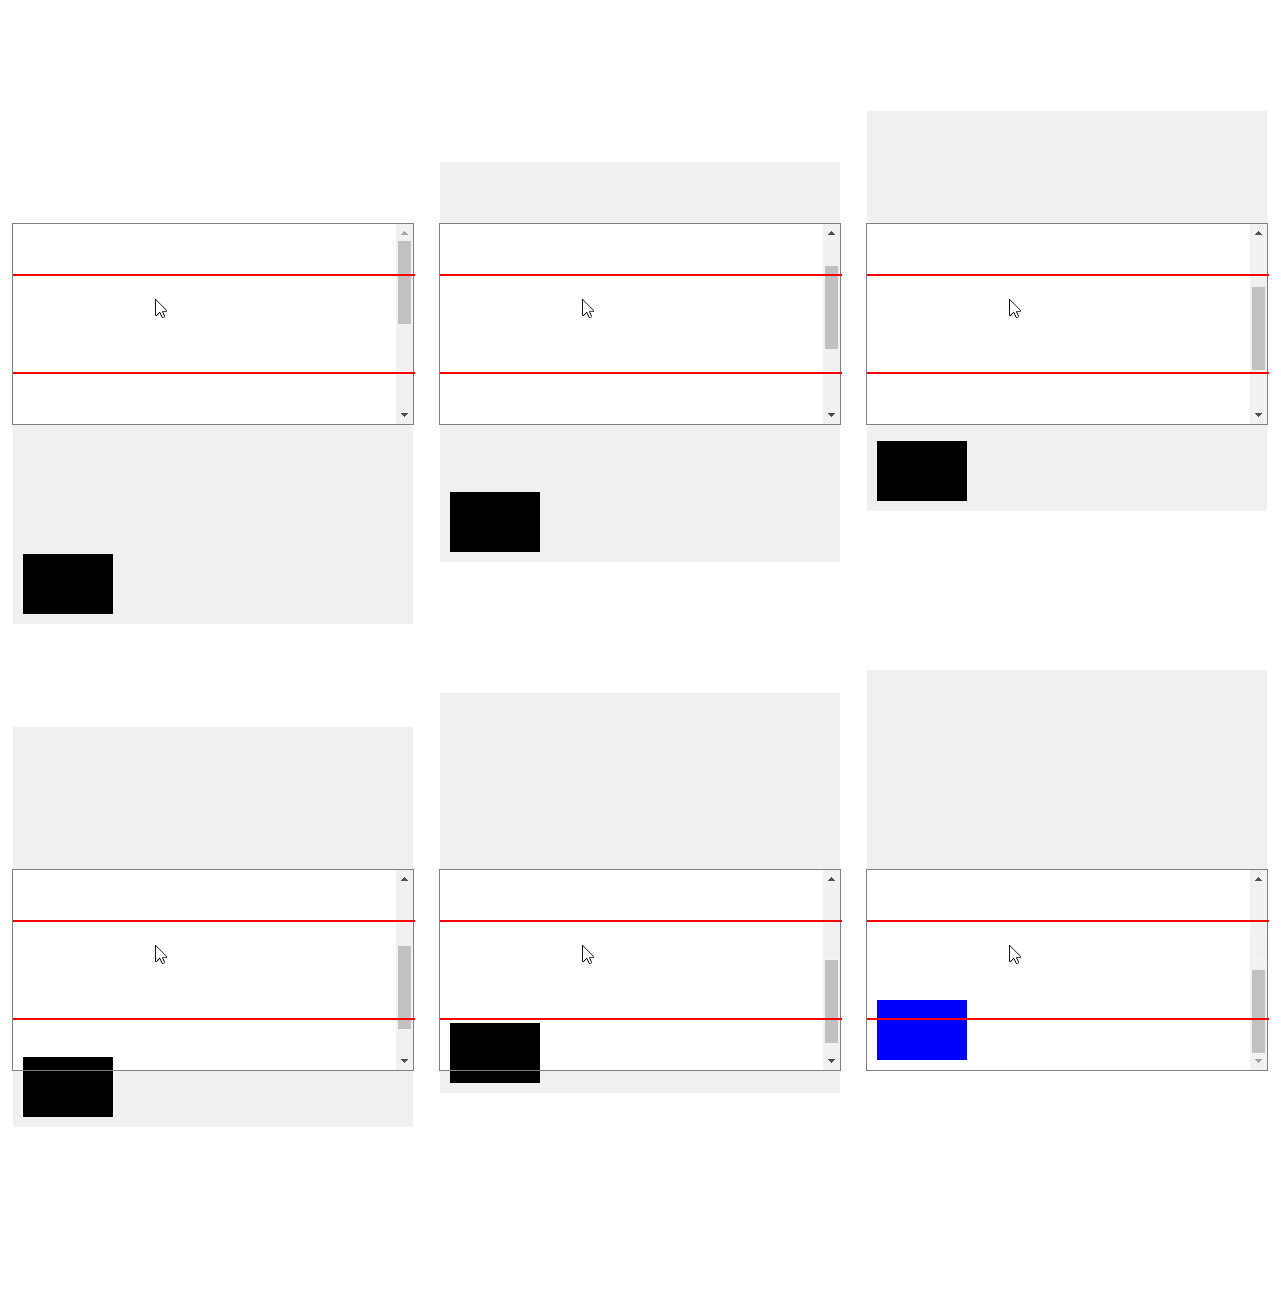
The red lines in the demo indicate the bounds of the region watched by the Observer for any intersection.

The element changes color when it comes within 50px of the viewport.

We can also specify negative margins to shrink the area of the viewport used for the intersection.

const observer = new IntersectionObserver(
  (entries) => {
    for (const entry of entries) {
      const intersecting = entry.isIntersecting;
      entry.target.style.backgroundColor = intersecting ? 'blue' : 'black';
    }
  },
  // ๐Ÿ‘‡ Negative margin
  { rootMargin: '-50px' }
);

const box = document.getElementById('box');

observer.observe(box);

Now the callback is fired when a single pixel of the element is more than 50px inside the viewport.

The element changes color when a single pixel of the element is more than 50px inside the viewport.

root

The root property accepts an element that must be an ancestor of the element being observed. By default, it is null, which means the viewport is used. You won’t need to use this property often, but it is handy when you have a scrollable container on your page that you want to check for intersections with one of its child elements.

For instance, to create the demos in this article, I set the root property to a scrollable container on the page, to make it easy for you to visualize the viewport and the areas outside it and gain a better understanding of how the intersection works.

Second callback parameter

The callback passed to the IntersectionObserver() constructor actually has two parameters. The first parameter is the entries parameter we looked at earlier. The second is simply the Observer that is watching for intersections.

const observer = new IntersectionObserver((entries, o) => {
  console.log(o === observer); // true
});

This parameter is useful for accessing the Observer from within the callback, especially in situations where the callback is in a location where the Observer variable can’t be accessed, e.g., in a different file from the one containing the Observer variable.

Preventing memory leaks

We need to stop observing elements when they no longer need to be observed, like when they are removed from the DOM or after one-time scroll-based animations, to prevent memory leaks or performance issues.

We can do this with the unobserve() method.

new IntersectionObserver((entries, observer) => {
  entries.forEach(entry => {
    if (entry.isIntersecting) {
      doAnim(entry.target);
      observer.unobserve(entry.target);
    }
  });
});

The unobserver() takes a single element as its argument and stops observing that element.

There is also the disconnect() method, which makes the Observer stop observing all elements.

Conclusion

Intersection Observer is a powerful JavaScript API for easily detecting when an element has intersected with the viewport or a parent element. It lets us implement lazy loading, scroll-based animations, infinite scrolling, and more, without causing performance issues and having to use complicated logic.

The Complete Guide to JavaScript Symbols

In this article, we’re going to learn all about JavaScript symbols and how to use them in practice.

Creating symbols

The Symbol is a data type that was added to JavaScript in ES6. To create a symbol, you can use the global Symbol() function.

const sym1 = Symbol();

The Symbol() function accepts an optional string that serves as the description of the symbol.

const sym2 = Symbol('color');

const sym3 = Symbol('maxSpeed');

const sym4 = Symbol('age');

You can access this description with the description property of the Symbol. If no description was set, this property would be undefined.

console.log(sym1.description); // undefined

console.log(sym2.description); // color

console.log(sym3.description); // maxSpeed

console.log(sym4.description); // age

Every time you call the Symbol() function, it returns a new unique value.

console.log(Symbol() === Symbol()); // false

console.log(Symbol('color') === Symbol('color')); // false

console.log(Symbol('age') === Symbol('age')); // false

As a symbol is a primitive value, using the typeof operator on it will return a symbol string.

console.log(typeof sym1); // symbol

Trying to use the new operator to create a symbol will cause a TypeError. This prevents the creation of an explicit Symbol wrapper object in place of a new symbol value.

const num1 = Number(2);
console.log(typeof num1); // number

const num2 = new Number();
console.log(typeof num2); // object

const bool1 = Boolean(true);
console.log(typeof bool1); // boolean

const bool2 = new Boolean(true);
console.log(typeof bool2); // object

const sym1 = Symbol('color');
console.log(typeof sym1); // symbol

// โŒ TypeError
const sym2 = new Symbol('color');
console.log(typeof sym2);

Sharing symbols

ES6 comes with a global symbol registry that allows you to share symbols globally. To create a symbol for sharing, you use the Symbol.for() method instead of the Symbol() function. Symbol.for() takes a key and returns a symbol value from the registry.

For example:

const color = Symbol.for('color');

The Symbol.for() method first searches the global symbol registry for a symbol with the color key and returns it if it exists. Otherwise, Symbol.for() creates a new symbol, adds it to the registry with the specified color key, and returns the symbol.

Afterward, calling Symbol.for() with the same key returns this same symbol, as it now exists in the registry.

const carColor = Symbol.for('color');

console.log(color === carColor); // true

The Symbol.keyFor() method works together with Symbol.for() to retrieve information from the global symbol registry. You can get the key of a symbol that exists in the registry with Symbol.keyFor().

console.log(Symbol.keyFor(carColor)); // 'color'

If the key doesn’t exist, Symbol.keyFor() returns undefined.

const filename = Symbol('filename');

console.log(Symbol.keyFor(filename)); // undefined;

Uses of symbols

1. Enumerations

With symbols, we can define a group of constants to set a variable to a predefined set of values – an enumeration.

Let’s say we want to create a variable to store a value representing the day of the week. To create an enum, we could use strings like ‘Mon', 'Tue', 'Wed', etc.

const daysOfWeek = {
  Mon: 'Mon',
  Tue: 'Tue',
  Wed: 'Wed',
  Thu: 'Thu',
  Fri: 'Fri',
  Sat: 'Sat',
  Sun: 'Sun',
};

const dayOfWeek = daysOfWeek.Tue;

By using symbols in place of the string, we can ensure that the constants are always distinct from one another, and not worry about duplicate string values.

const daysOfWeek = {
  Mon: Symbol('Mon'),
  Tue: Symbol('Tue'),
  Wed: Symbol('Wed'),
  Thu: Symbol('Thu'),
  Fri: Symbol('Fri'),
  Sat: Symbol('Sat'),
  Sun: Symbol('Sun'),
};

const dayOfWeek = daysOfWeek.Tue;

2. Prevention of property name clashes

Since a symbol is always guaranteed to be unique, we can use it to avoid name clashes when entirely separate sections of code need to store data on an object. The different sections may not be aware of each other, but each wants to make sure that the property it uses is not going to be used by another.

For example:

// module-1.js

const module1 = () => {
  // Prevent external access with closure
  const module1Sym = Symbol();
  return (obj) => {
    // Put some data on obj that this module can access later
    obj[module1Sym] = 'module 1 data';
  };
};

// module-2.js

const module2 = () => {
  // Prevent external access with closure
  const module2Sym = Symbol();
  return (obj) => {
    // Put some data on obj that this module can access later
    obj[module2Sym] = 'module 2 data';
  };
};

// index.js

const obj = {};
module1(obj);
module2(obj);

If the modules each used a string instead of a symbol for the property name, it could cause problems as the names could clash.

For example:

// module-1.js

const module1 = () => {
  return (obj) => {
    // Put some data on obj that this module can access later
    obj.moduleData = 'module 1 data';
  };
};

// module-2.js

const module2 = () => {
  return (obj) => {
    // Put some data on obj that this module can access later
    obj.moduleData = 'module 2 data';
  };
};

// index.js

const obj = {};
module1(obj);
module2(obj);

// 'module 1 data' has been overwritten by the call the module2()

Note that symbol properties are not enumerable, if you call Object.keys() on the object, they will not be included in the array result.

const dayOfWeek = Symbol('dayOfWeek');
const event = {
  [dayOfWeek]: daysOfWeek.Tue,
  description: 'Birthday',
};

console.log(Object.keys(event)); // [ 'description' ]

Object.getOwnPropertyNames() returns an array of all the enumerable and non-enumerable properties of an object, but symbol properties are still excluded.

console.log(Object.getOwnPropertyNames(event)); // [ 'description' ]

To get all the symbol properties, you use the Object.getOwnPropertySymbols() method. This method returns an array of all symbol properties found directly on a given object.

console.log(Object.getOwnPropertySymbols(event)); // [ Symbol(dayOfWeek) ]

Well-known symbols

The Symbol class comes with static properties known as well-known symbols. They are used to implement and customize the behavior of certain built-in JavaScript operations.

Let’s explore some of these well-known symbols:

Symbol.hasInstance

The Symbol.hasInstance method customizes the behavior of the instanceof operator. Generally, when you use the instanceof operator like this:

obj instanceof type

JavaScript will call the Symbol.instanceof method like this:

type[Symbol.hasInstance](obj);

Here’s an example where we use the instanceof method on an instance of a user-defined class.

class List {}

console.log([] instanceof List); // false

Going by the default behavior of instanceof, [] is an Array, not an instance of the List class, so instanceof returns false here.

If we want to change this behavior and make instanceof return true in this scenario, we would customize the Symbol.hasInstance method like this:

class List {
  static [Symbol.hasInstance](obj) {
    return Array.isArray(obj);
  }
}

console.log([] instanceof List); // true

Symbol.iterator

With the Symbol.iterator method, we can specify if and how objects of a class can be iterated over. When this method is present, we will be able to use the for...of loop and spread syntax (...) on the objects of the class.

When you use the for...of loop on an array:

const numbers = [1, 2, 3];

for (const num of numbers) {
  console.log(num);
}

/*
1
2
3
*/

Internally, JavaScript first calls the Symbol.iterator method of the numbers array to get the iterator object. Then it continuously calls the next() method on the iterator object and copies the value property in the num variable, It exits the loop when the done property of the iterator object is true.

var iterator = numbers[Symbol.iterator]();

console.log(iterator.next()); // Object {value: 1, done: false}

console.log(iterator.next()); // Object {value: 2, done: false}

console.log(iterator.next()); // Object {value: 3, done: false}

console.log(iterator.next()); // Object {value: undefined, done: true}

By default, objects of a user-defined class are not iterable. But we can make them iterable with the Symbol.iterator method, as you’ll use in the following example:

class List {
  elements = [];

  add(element) {
    this.elements.push(element);
    return this;
  }

  // Generator
  *[Symbol.iterator]() {
    for (const element of this.elements) {
      yield element;
    }
  }
}

const colors = new List();
colors.add('red').add('blue').add('yellow');

// Works because of Symbol.iterator
for (const color of colors) {
  console.log(color);
}

/*
red
blue
yellow
*/

console.log([...colors]);
// [ 'red', 'blue', 'yellow' ]

Symbol.toStringTag

This symbol lets us customize the default string description of the object. It is used internally by the Object.prototype.toString() method.

class CarClass {
  constructor(color, maxSpeed, age) {
    this.color = color;
    this.maxSpeed = maxSpeed;
    this.age = age;
  }
}

const car = new CarClass('red', 100, 2);

console.log(Object.prototype.toString.call(car));
// [object Object]

Here is the default implementation of Symbol.toStringTag was outputted. Here’s how we can customize it:

class CarClass {
  constructor(color, maxSpeed, age) {
    this.color = color;
    this.maxSpeed = maxSpeed;
    this.age = age;
  }

  get [Symbol.toStringTag]() {
    return 'Car';
  }
}

const car = new CarClass('red', 100, 2);

console.log(Object.prototype.toString.call(car));
// [object Car]

Symbol.toPrimitive

The Symbol.toPrimitive method makes it possible for an object to be converted to a primitive value. It takes a hint argument that specifies the type of the resulting primitive value. This hint argument can be one of 'number', 'string', or 'default'.

Here’s an example of using the Symbol.toPrimitive method.

class Money {
  constructor(amount, currency) {
    this.amount = amount;
    this.currency = currency;
  }

  [Symbol.toPrimitive](hint) {
    if (hint === 'string') {
      return `${this.amount} ${this.currency}`;
    } else if (hint === 'number') {
      return this.amount;
    } else if (hint === 'default') {
      return `${this.amount} ${this.currency}`;
    }
  }
}

const price = new Money(500, 'USD');

console.log(String(price)); // 500 USD
console.log(+price); // 500
console.log('Price is ' + price); // Price is 500 USD

Conclusion

In this article, we learned how to create JavaScript symbols and share them in the global symbol registry. We saw the advantages of using symbols, and how well-known symbols can be used to customize the behavior of built-in JavaScript operations.