
javascript

How to quickly fix the ERR_OSSL_EVP_UNSUPPORTED error in Node.js

The ERR_OSSL_EVP_UNSUPPORTED error happens in Node.js when a JavaScript module still uses a flawed OpenSSL version that is incompatible with the version Node.js uses.
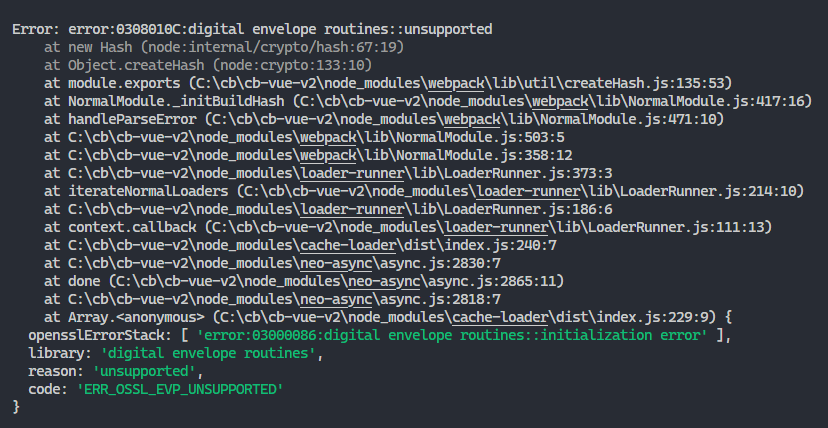
The ERR_OSSL_EVP_UNSUPPORTED error occurring.

To fix it, downgrade to Node.js v16.13.0, or use the npm audit fix --force command to upgrade your packages to versions that use the updated OpenSSL version.

Why does the ERR_OSSL_EVP_UNSUPPORTED error occur in Node.js?

In Node.js v17, the Node.js team patched an OpenSSL security vulnerability. This fix introduced a breaking change; if you try to use OpenSSL in Node.js v17 or later versions without simultaneously updating those modules that use previous OpenSSL versions, you’ll get this error.

And you’ll get it the next time Node.js updates to use a newer OpenSSL version with breaking changes and you haven’t updated the OpenSSL-dependent libraries.

Fix: upgrade NPM packages

To fix the ERR_OSSL_EVP_UNSUPPORTED error, update the Node.js packages causing the error to the latest version.

Run npm audit fix to fix vulnerabilities

You can run the npm audit fix command to identify those packages using the outdated OpenSSL version and fix them automatically.

Shell
npm audit fix

npm audit fix reviews the project’s dependency tree to identify packages that have known vulnerabilities, and attempts to upgrade and/or fix the vulnerable dependencies to a safe version.

npm audit fix --force

If you want to install semver major updates to vulnerable packages, you can use the --force option. 

Shell
npm audit fix --force

Be cautious with this option as it could potentially break your project.

yarn-audit-fix

If you’re a Yarn user, you can use the yarn-audit-fix package to do what npm audit fix does.

Upgrade Webpack to v5

If you’re using Webpack directly to bundle your files, you can upgrade it to version v5 – specifically, v5.61.0 – to fix the ERR_OSSL_EVP_UNSUPPORTED error.

Shell
npm i webpack@latest # Yarn yarn add webpack@latest

If instead, you’re using a tool like Create React App and the Vue CLI that use Webpack internally, you’ll upgrade the tool to a version that doesn’t have this error.

Fix for Create React App: Upgrade react-scripts to v5

If you’re using Create React App then you can fix the ERR_OSSL_EVP_UNSUPPORTED error by upgrading react-scripts to version 5, which comes with the newer Webpack version 5.

Install version 5 or later with this command:

Shell
npm i react-scripts@latest # Yarn yarn add react-scripts@latest

Fix for Vue CLI: Upgrade to v5

Similarly for the Vue CLI, you can fix the ERR_OSSL_EVP_UNSUPPORTED error by upgrading the Vue CLI to version 5 which also comes with the newer Webpack version 5.

Install Vue CLI version 5 or later with this command:

Shell
npm update -g @vue/cli # OR yarn global upgrade --latest @vue/cli

More info on how to upgrade the Vue CLI here.

Fix: Use --openssl-legacy-provider option

To fix the ERR_OSSL_EVP_UNSUPPORTED error in Node.js, you can also use the --openssl-legacy-provider option when running the script.

This solution is more of a hack though, as it leaves your app open to security threats.

The --openssl-legacy-provider option is only available in Node version 17 or later.

Run with script

So for the start script, you’ll use this command:

Shell
export NODE_OPTIONS=--openssl-legacy-provider && npm run start # Windows set NODE_OPTIONS=--openssl-legacy-provider && npm run start

Modify script

You can also set this directly in the script to avoid needless repetition.

On Linux/Mac:

JSON
{ ... "scripts": { "start": "export NODE_OPTIONS=--openssl-legacy-provider && webpack serve", "build": "webpack --mode production" } ... }

On Windows:

JSON
{ ... "scripts": { "start": "set NODE_OPTIONS=--openssl-legacy-provider && node .", "build": "set NODE_OPTIONS=--openssl-legacy-provider && node build.js" } ... }

Make sure the script is cross-platform

But now the scripts aren’t cross-platform.

They’ll obviously be problematic when collaborating and team members use other operating systems. What do we do? We install the cross-env NPM module and run the script with it.

Shell
npm i cross-env # Yarn yarn add cross-env
JSON
{ ... "scripts": { "start": "cross-env NODE_OPTIONS=--openssl-legacy-provider webpack .", "build": "cross-env NODE_OPTIONS=--openssl-legacy-provider node build.js" }, "devDependencies": { "cross-env": "^7.0.3" } ... }

Now the script runs successfully on every platform.

Fix for Vue CLI

So to fix the ERR_OSSL_EVP_UNSUPPORTED error when using Vue with the Vue CLI, install the cross-env module and set the --openssl-legacy-provider option:

JSON
{ ... "scripts": { "serve": "cross-env NODE_OPTIONS=--openssl-legacy-provider vue-cli-service serve", ... }, "devDependencies": { "cross-env": "^7.0.3" ... } ... }

Fix for Create React App

And to fix the ERR_OSSL_EVP_UNSUPPORTED error when using React with Create React App, install the cross-env module and set the --openssl-legacy-provider option.

JSON
{ ... "scripts": { "serve": "cross-env NODE_OPTIONS=--openssl-legacy-provider ", ... }, "devDependencies": { "cross-env": "^7.0.3" ... } ... }

Fix: Downgrade to Node.js v16.13.0

To fix the ERR_OSSL_EVP_UNSUPPORTED error in Node.js, downgrade your Node.js version to 16.13.0.

This solution is more of a hack though, as it leaves your app open to security threats.

Install from official website

Use this official link to download Node.js v16.13.0.

Install with Chocolatey

If you’re using Chocolatey, Node.js is available as the nodejs package, meaning you can easily install it in a terminal using the following command.

Shell
# Use current LTS version choco install nodejs --version=18.5.0

Install with nvm

If you’re using nvm or nvm-windows, use these commands to quickly install and switch to Node.js v16.13.0.

Shell
nvm install 16.13.0 nvm use 16.13.0

Key takeaways

  • The ERR_OSSL_EVP_UNSUPPORTED error in Node.js occurs when a JavaScript module uses an outdated OpenSSL version that is incompatible with the current Node version. This typically happens when Node.js v17 or later versions are used without updating the modules that use previous OpenSSL versions.
  • To fix this error, you can:
    • Downgrade to Node.js v16.13.0.
    • Use the npm audit fix --force or yarn-audit-fix command to upgrade your packages to versions that use the updated OpenSSL version.
  • If you’re using Webpack, you can upgrade it to version v5.61.0 to fix the error. For Create React App and Vue CLI, you can upgrade them to v5.
  • Another way to fix the error is to use the --openssl-legacy-provider option when running the script. However, this solution leaves your app open to security threats and is only available in Node version 17 or later.
  • Downgrading to Node.js v16.13.0 is another way to fix the error. However, this solution also leaves your app open to security threats. You can install this version from the official website, or use Chocolatey, nvm, or nvm-windows to install and switch to this version.

10 powerful JavaScript animation libraries for engaging user experiences

Animations. A fantastic way to stand out from the crowd and grab the attention of your visitors.

With creative object motion and fluid page transitions, you not only add a unique aesthetic appeal to your website but also enhance user engagement and create a memorable first impression.
And creating animations can’t get any easier with these 10 powerful JavaScript libraries. Scroll animations, handwriting animations, SPA page transitions, typing animations, color animations, SVG animations… they are endlessly capable. They are the best.

1. Anime.js

An animation creating with Anime.js
An animation created with Anime.js.

With over 43k stars on GitHub, Anime.js is easily one of the most popular animation libraries out there.

It’s a lightweight JavaScript animation library with a simple API that can be used to animate CSS properties, SVG, DOM attributes, and JavaScript objects. With Anime.js, you can play, pause, restart or reverse an animation. The library also provides staggering features for animating multiple elements with follow-through and overlapping actions. There are various animation-related events also included, which we can listen to using callbacks and Promises.

Visit the Anime.js website

2. Lottie

An animation created with Lottie.js
An animation created with Lottie.

Lottie is a library that parses Adobe After Effects animations exported as JSON with the Bodymovin plugin and renders them natively on mobile and web applications. This eliminates the need to manually recreate the advanced animations created in After Effects by expert designers. The Web version alone has over 27k stars on GitHub.

Visit the Lottie website

3. Velocity

An animation created with Velocity.

With Velocity you create color animations, transforms, loops, easings, SVG animations, and more. It uses the same API as the $.animate() method from the jQuery library, and it can integrate with jQuery if it is available. The library provides fade, scroll, and slide effects. Besides being able to control the duration and delay of an animation, you can reverse it sometime after it has been completed, or stop it altogether when it is in progress. It has over 17k stars on GitHub and is a good alternative to Anime.js.

Visit the Velocity website

4. Rough Notation

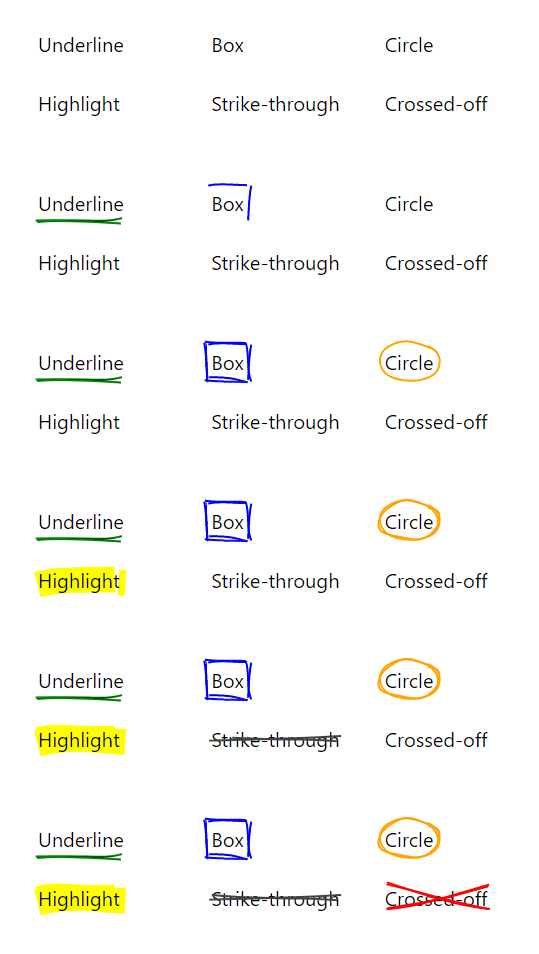
Som Rough Notation annotation styles.
Some Rough Notation annotation styles.

Rough Notation is a JavaScript library for creating and animating colorful annotations on a web page. It uses RoughJS to create a hand-drawn look and feel. You can create several annotation styles, including underline, box, circle, highlight, strike-through, etc., and control the duration and color of each annotation style.

Visit the Rough Notation website

5. Popmotion

An animation created with Popmotion.
Popmotion is a functional library for creating prominent and attention-grabbing animations. What makes it stand out? – there are zero assumptions about the object properties you intend to animate, but instead provides simple, composable functions that can be used in any JavaScript environment.
The library supports keyframes, spring and inertia animations on numbers, colors, and complex strings. It is well-tested, actively maintained, and has over 19k stars on GitHub.

Visit the Popmotion website

6. Vivus

An animation created with Vivus.

Vivus is a JavaScript library that allows you to animate SVGs, giving them the appearance of being drawn. It is fast and lightweight with exactly zero dependencies, and provides three different ways to animate SVGs: Delayed, Sync, and OneByOne. You can also use a custom script to draw an SVG in your preferred way.

Vivus also allows you to customize the duration, delay, timing function, and other animation settings. Check out Vivus Instant for live, hands-on examples.

Visit the Vivus website

7. GreenSock Animation Platform (GSAP)

An animation created with GSAP

The GreenSock Animation Platform (GSAP) is a library that lets you create wonderful animations that work across all major browsers. You can use it in React, Vue, WebGL, and the HTML canvas to animate colors, strings, motion paths, and more. It also comes with a ScrollTrigger plugin that lets you create impressive scroll-based animations with little code.

Used in over 11 million sites, with over 15k stars on GitHub, it is a versatile and popular indeed. You can use the GSDevTools from GreenSock to easily debug animations created with GSAP.

Visit the GSAP website

8. Three.js

An animation created with Three.js

Three.js is a lightweight library for displaying complex 3D objects and animations. It makes use of WebGL, SVG, and CSS3D renderers to create engaging three-dimensional experiences that work across a wide range of browsers and devices. It is a well-known library in the JavaScript community, with over 85k stars on GitHub.

Visit Three.js website

9. ScrollReveal

ScrollReveal animations.

The ScrollReveal library lets you easily animate a DOM element as it enters or leaves the browser viewport. It provides various types of elegant effects to reveal or hide an element on-scroll in multiple browsers. And quite easy to use too, with with zero dependencies and over 21k stars on GitHub.

Visit the ScrollReveal website

10. Barba.js

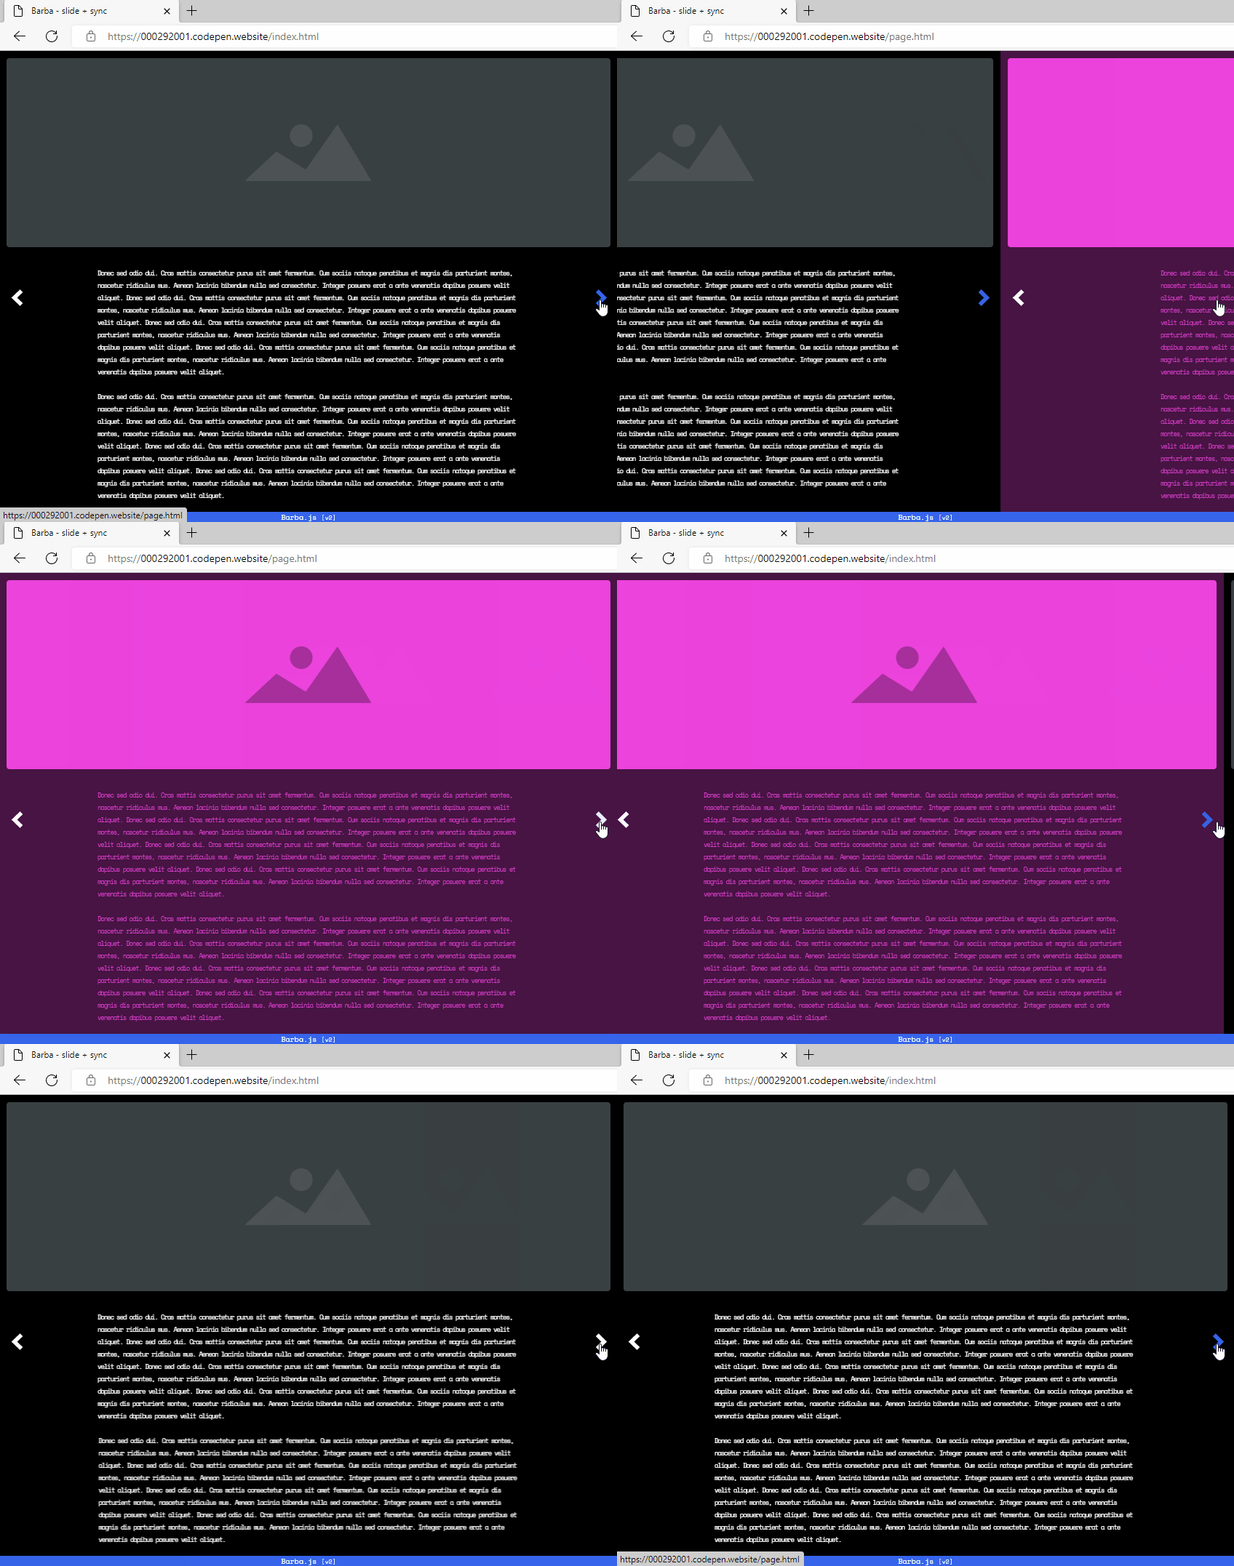
Page transitions created with Barba.js.

One creative way to make your website outstanding is to add lively transitions between the pages as your users navigate between them. This produces a better user experience than simply displaying the new webpage or reloading the browser.

And that’s why Barba.js is so useful; this library lets you create enjoyable page transitions by making the site run like a Single Page Application (SPA). It reduces the delay between pages and minimizes the number of HTTP requests that the browser makes. It’s gotten almost 11k stars on GitHub.

Visit Barba.js website

Bonus

11. Mo.js

An animation created with Mo.js
An animation created with Mo.js.

Great library for creating compelling motion graphics.

It provides simple, declarative APIs for effortlessly creating smooth animations and effects that look great on devices of various screen sizes. You can move HTML or SVG DOM elements, or you can create a special Mo.js object, which comes with a set of unique capabilities. It is a reliable and well-tested library, with over 1500 tests written and over 17k stars on GitHub.

Visit the Mo.js website

12. Typed.js

An animation created with Typed.js

The name says it all; an animated typing library.

It types out a specific string character by character as if someone was typing in real-time, allowing you pause the typing speed, and even pause the typing for a specific amount of time. With smart backspacing, it types out successive strings starting with the same set of characters as the current one without backspacing the entire preceding string – as we saw in the demo above.

Also included is support for bulk typing, which types out a group of characters on the screen at the same time, instead of one after the other. Typed.js has over 12k stars on GitHub and is trusted by Slack and Envato.

Visit the Typed.js website

Final thoughts

The world of web animation is vast and dynamic, constantly evolving with the advent of new technologies and libraries. The animation libraries highlighted in this article offer an array of features to create engaging, interactive, and visually appealing experiences for users. They are a testament to the power and flexibility of JavaScript, and demonstrate how animations greatly enhance the user experience.

As a developer, harnessing these tools will no doubt elevate your projects, making them stand out in an increasingly competitive digital landscape.

How to prevent form submission in Vue.js

To prevent a page refresh on form submit in Vue.js, use the .prevent event modifier in the submit event listener.

App.vue
<template> <div id="app"> <form @submit.prevent="handleSubmit"> <label> Email <br /> <input type="email" v-model="email" required /> </label> <br /> <label> Password <br /> <input type="password" v-model="password" required /> </label> <br /> <button type="submit" style="margin-top: 16px" > Submit </button> </form> </div> </template> <script> export default { name: 'App', data() { return { email: '', password: '', }; }, methods: { handleSubmit() { this.email = ''; this.password = ''; alert('Form submitted'); }, }, }; </script>
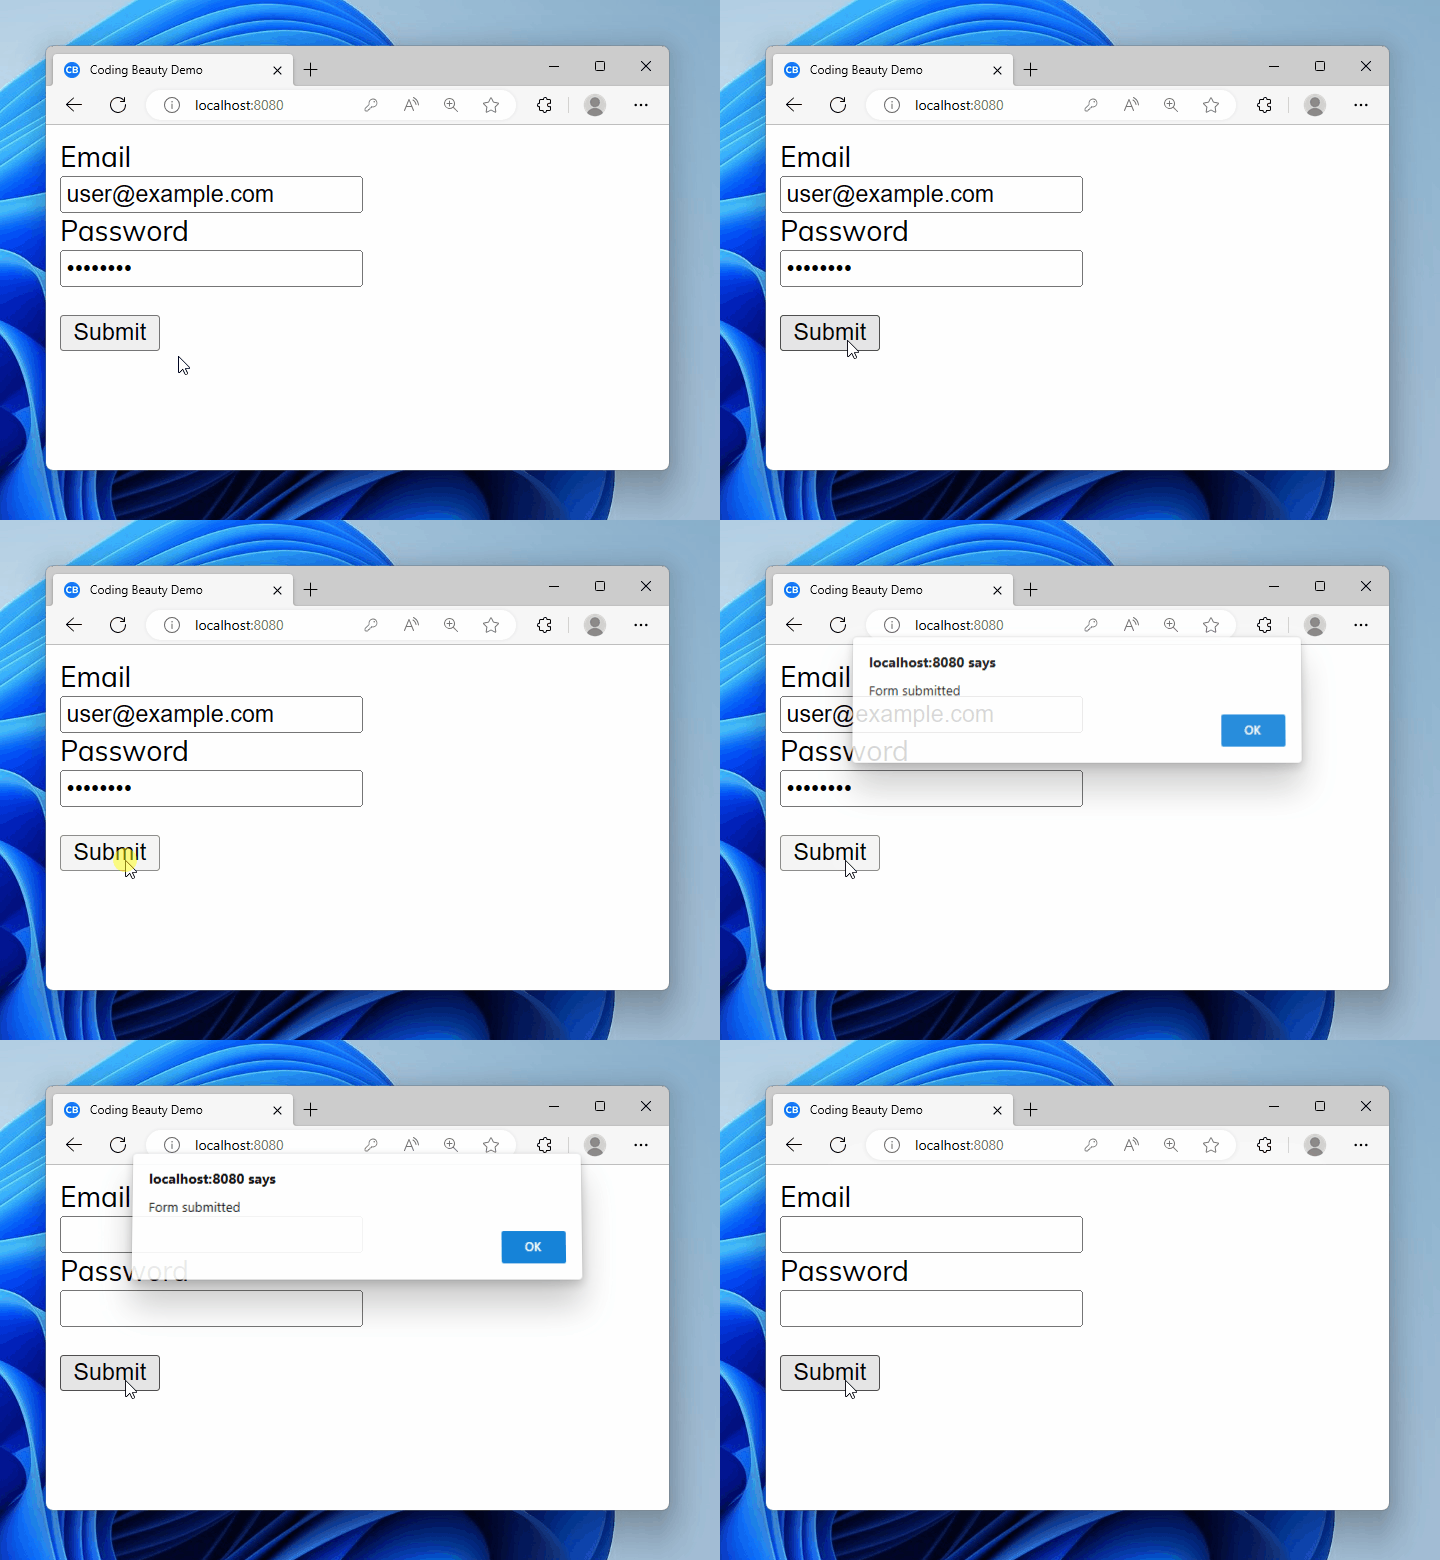
The page refresh is prevented in Vue.js when the button submits the form.

We use the .prevent modifier to stop the default action of the event from happening. In this case, that action was a page refresh, so .prevent stopped the page refresh on the form submission.

App.vue
<form @submit.prevent="handleSubmit">

.prevent is a Vue.js event modifier, which lets us access and modify event-related data.

We use the @submit directive to add a submit event listener to the form; this listener runs when the user clicks the button to submit the form.

In this case we only reset the form; in practical scenarios you’ll likely make an AJAX request to a server with the form data.

App.vue
<template> ... </template> <script> export default { ... methods: { async handleSubmit() { const user = { email: this.email, password: this.password, }; try { const response = await axios.post('http://your-api-url.com', user); console.log(response.data); } catch (error) { console.error(error); } this.email = ''; this.password = ''; } } }; </script>

For the button to submit the form, we must set its type attribute to "submit"

App.vue
<button type="submit" style="margin-top: 16px;"> Submit </button>

With type="submit", the browser also submits the form when the user presses the Enter key in an input field.

Remove type="submit" from the button to prevent page refresh

To prevent page refresh on form submit in Vue.js, you can also remove the type="submit" from the button.

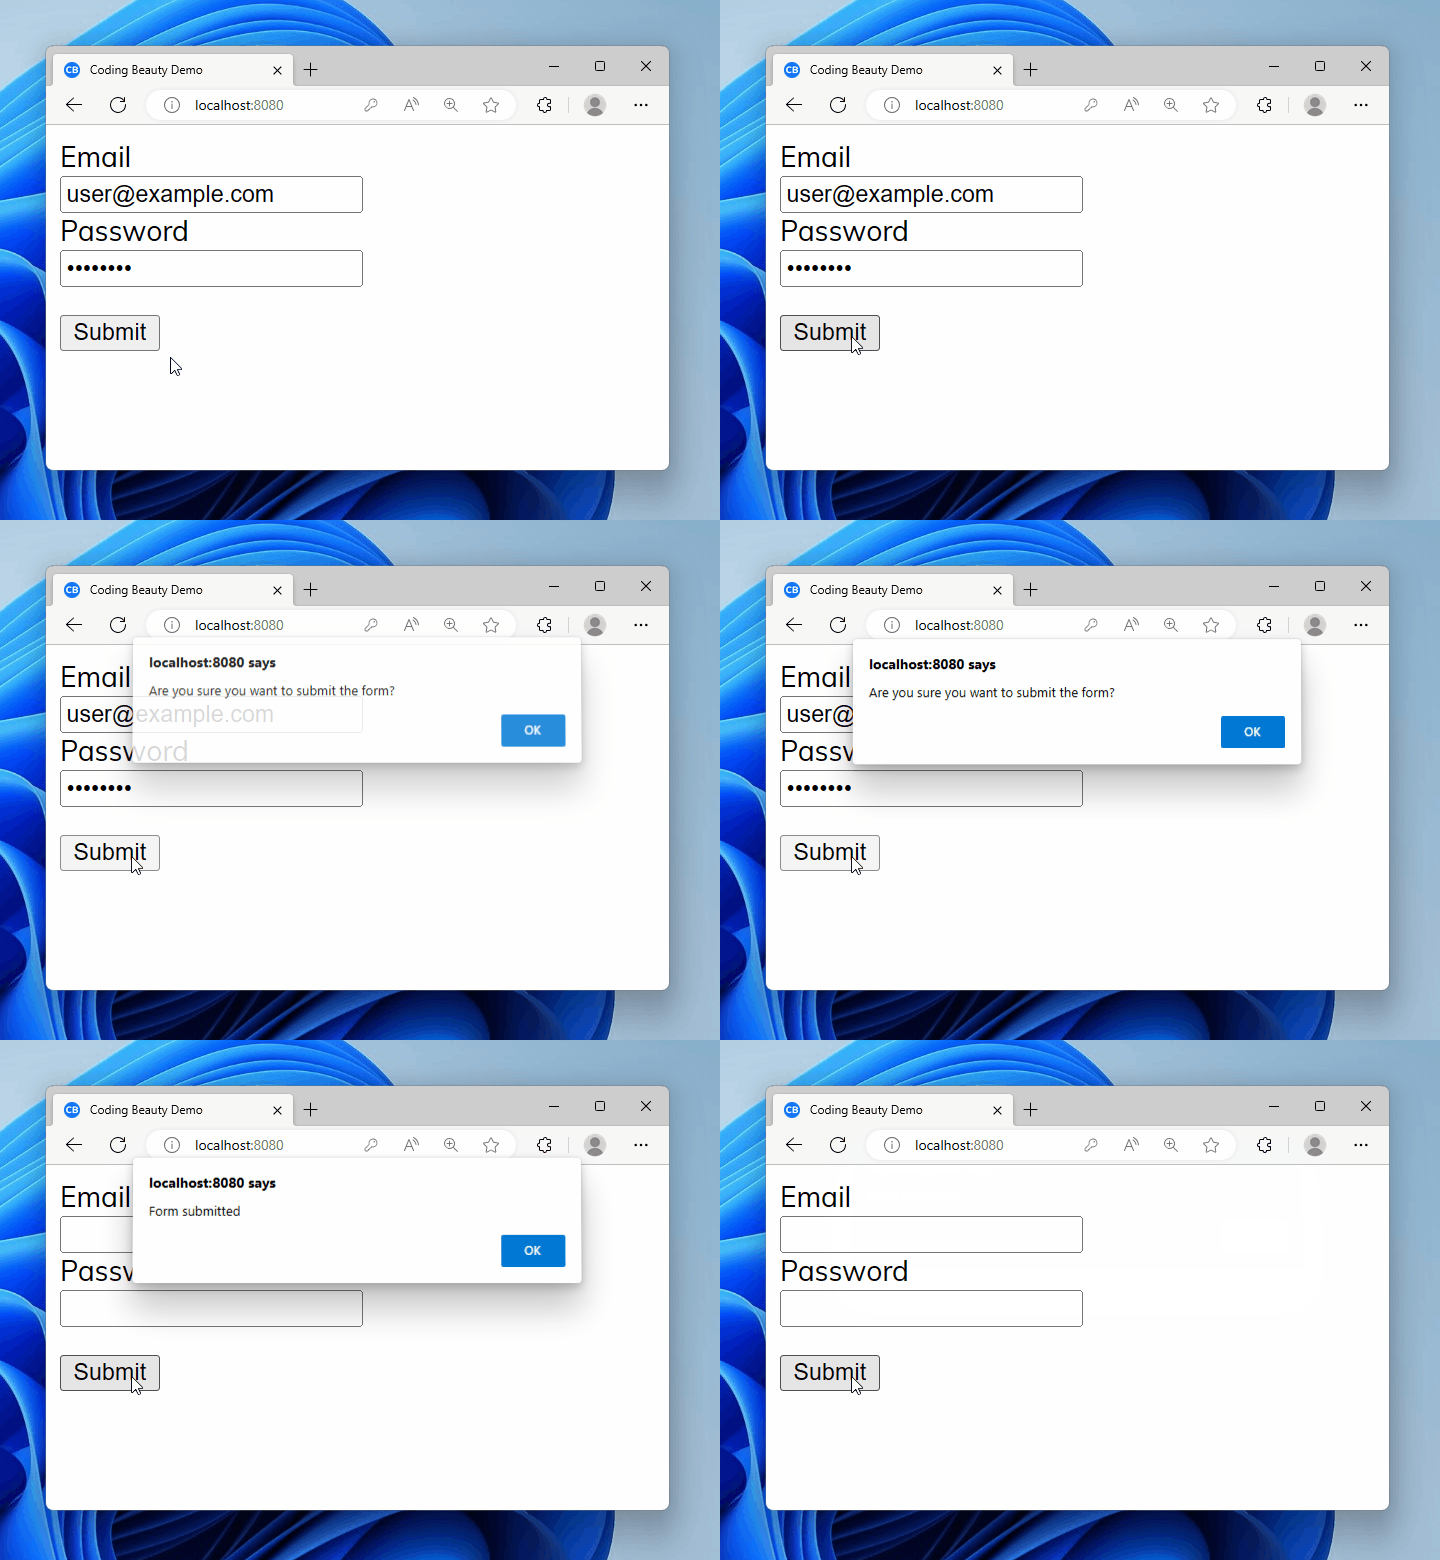
When is this useful? You may want to show an alert message or something before submission. In this case, we wouldn’t want type="submit" since it submits the form on button click.

App.vue
<template> <div id="app"> <form> <label> Email <br /> <input type="email" v-model="email" required /> </label> <br /> <label> Password <br /> <input type="password" v-model="password" required /> </label> <br /> <button type="button" @click="handleSubmit" style="margin-top: 16px" > Submit </button> </form> </div> </template> <script> export default { data() { return { email: '', password: '', }; }, methods: { handleSubmit() { // Perform custom actions before form submission alert('Are you sure you want to submit the form?'); // Simulate form submission by clearing input fields this.email = ''; this.password = ''; alert('Form submitted'); }, }, }; </script>
Preventing a page refresh on form submit in Vue.js to show an alert dialog before submission.

We used type="button" on the button, but that’s as good as not having a type attribute. It doesn’t do anything on click.

Key takeaways

  • To prevent page refresh on form submit in Vue.js, use the .prevent modifier in the submit event listener.
  • Set type="submit" to ensure the form submits on button click or Enter press. Remove it when you don’t want this.
  • Remove type="submit" when something needs to happen after the button click before submitting the form, e.g., show a dialog, make an initial request, etc.

How to check if a variable is null or undefined in React

To check if a variable in null or undefined in React, use the || operator to check if the variable is equal to null or equal to undefined.

JavaScript
import { useState } from 'react'; export default function App() { const [variable] = useState(undefined); const [message, setMessage] = useState(undefined); const nullOrUndefinedCheck = () => { // Check if undefined or null if (variable === undefined || variable === null) { setMessage('Variable is undefined or null'); } else { setMessage('Variable is NOT undefined or null'); } // Check if NOT undefined or null if (variable !== undefined && variable !== null) { setMessage('Variable is NOT undefined or null'); } }; return ( <div> <button onClick={() => nullOrUndefinedCheck()}>Check variable</button> <h2>{message}</h2> </div> ); }
Checking if a variable is null or undefined in React.

The logical OR (||) operator

The logical OR operator (||) results in true if either the value at the left or right is true.

JavaScript
const isTrue = true; const isFalse = false; const result1 = isTrue || isFalse; console.log(result1); // Output: true const result2 = isFalse || isFalse; console.log(result2); // Output: false

When you use || on non-boolean values, it returns the first truthy value:

JavaScript
const str = ''; const num = 0; const result1 = str || 'Default String'; console.log(result1); // Output: 'Default String' const result2 = num || 42; console.log(result2); // Output: 42

The falsy values in JavaScript are undefined, null, 0, NaN, '' (empty string), and false. Every other value is truthy.

Checking if NOT null or undefined with De Morgan’s laws

From De Morgan’s law, not (A or B) = not A and not B, where A and B are boolean conditions.

That’s why we used this condition to check if the variable is not null or undefined:

JavaScript
// not A and not B if (variable !== undefined && variable !== null) { setMessage('✅ Variable is NOT undefined or null'); }

And why we could just as easily do this:

JavaScript
// not (A or B) if (!(variable === undefined || variable === null)) { setMessage('✅ Variable is NOT undefined or null'); }

null and undefined are the same with ==

It’s important you use === over == for the check, if you want null and undefined to be treated separately. == is known as the loose equality operator, can you guess why it has that name?

JavaScript
console.log(null == undefined); // true console.log(null === undefined); // false

Loose equality fails in cases where undefined and null don’t mean the same thing.

Imagine a shopping cart application where a user adds items the cart, represented by a cartItems variable.

  • If cartItems is undefined, it’ll mean that the shopping cart hasn’t been initialized yet, or an error occurred while fetching it, and we should load this data before proceeding.
  • If cartItems is null, it’ll mean that the shopping cart is empty – the user hasn’t added any items yet.

Here’s a simplified example of how you might handle this in a React component:

JavaScript
import React, { useEffect, useState } from 'react'; const ShoppingCart = () => { const [cartItems, setCartItems] = useState(); // ... useEffect(() => { // Assume fetchCartItems() returns a promise that resolves to the cart items fetchCartItems() .then((items) => setCartItems(items)) .catch(() => setCartItems(null)); }, []); if (cartItems === undefined) { return <div>Loading cart items...</div>; } else if (cartItems === null) { return <div>Your shopping cart is empty! Please add some items.</div>; } else { return ( <div> <h2>Your Shopping Cart</h2> {cartItems.map((item) => ( <p key={item.id}>{item.name}</p> ))} </div> ); } }; export default ShoppingCart;

If we had used the == operator, only the first comparison to undefined or null would have run.

Check for null, undefined, or anything falsy in React

Instead of checking explicitly for null or undefined, you might be better off checking if the variable is falsy.

JavaScript
import { useState } from 'react'; export default function App() { const [variable] = useState(undefined); const [message, setMessage] = useState(undefined); const falsyCheck = () => { // Check if falsy if (!variable) { setMessage('✅ Variable is falsy'); } else { setMessage('❌ Variable is NOT falsy'); } }; return ( <div> <button onClick={() => falsyCheck()}>Check variable</button> <h2>{message}</h2> </div> ); }

By passing the variable to the if statement directly, it is coalesced to a true or false boolean depending on whether the value is truthy or falsy.

The falsy values in JavaScript are undefined, null, 0, NaN, '' (empty string), and false. Every other value is truthy.

How to Fix the “Unexpected reserved word ‘enum'” Error in JavaScript

The “Unexpected reserved word ‘enum'” syntax error happens in JavaScript happens because enum is not a valid keyword in JavaScript, but it is reserved.

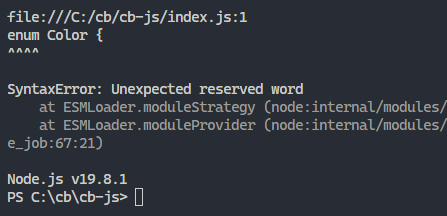
The "Unexpected reserved word 'enum'" syntax error happening in JavaScript.

It was reserved in the ECMAScript specification in case it may become valid in the future.

If it wasn’t reserved, devs could start using it as variable names in their code – making future keyword use impossible!

JavaScript
// ❌ SyntaxError: Unexpected reserved word 'enum' enum Color { Red, Blue, Green } const color = Color.Red;

To fix it, represent the enumeration in another way, or change the file to TypeScript.

Fix: Create a JavaScript enum the right way

Enums are useful stuff, but since there’s no enum keyword in JS, we’ll have to find others way to create and use them.

One powerful way to create an enumeration is with an object with JavaScript symbol properties:

JavaScript
const daysOfWeek = { Mon: Symbol('Mon'), Tue: Symbol('Tue'), Wed: Symbol('Wed'), Thu: Symbol('Thu'), Fri: Symbol('Fri'), Sat: Symbol('Sat'), Sun: Symbol('Sun'), }; const dayOfWeek = daysOfWeek.Tue;

With JavaScript symbols, we make sure that the constants are always different values, as every symbol is unique.

No need to worry duplicates – pretty convenient, right?

If we used this:

JavaScript
const daysOfWeek = { Mon: 'Mon', Tue: 'Tue', Wed: 'Wed', Thu: 'Thu', Fri: 'Fri', Sat: 'Sat', Sun: 'Sun', }; const dayOfWeek = daysOfWeek.Tue;

Someone could easily reassign the object’s properties to something else, giving us something more to worry about.

Fix: Just use TypeScript

Ah, TypeScript.

Alway there for us. Filled to the top with juicy modern stuff.

I mean enums aren’t so modern, but it’s one thing TS has that JS doesn’t.

Our first JS code runs flawlessly in TypeScript.

TypeScript
// ✅ No error - enums all the way! enum Color { Red, Blue, Green } const color = Color.Red;

So, if you really need that enum keyword – even though much of the TypeScript community seems to frown on it – change that file extension.

Oh, it could even be that it’s TypeScript you wanted all along. As it happened here.

Here, this person was new to TypeScript on Node (we’ll all been there) and ran his TS file with the node command directly.

Well, Node didn’t care about the extension and just treated the entire thing like a JavaScript file.

The easy solution was to compile it first with tsc before running node on the JS output. Or to use ts-node on the TypeScript file directly.

Key takeaways

So, the few things to keep in mind on fixing the “Unexpected reserved keyword ‘enum'” error in JavaScript:

  1. enum is a no-go in JavaScript (for now): JavaScript doesn’t have enum. It’s reserved for future use.
  2. Use objects with symbol properties: Want to create enumerations in JavaScript? Use objects with symbol properties.
  3. Symbols keep your code safe: Symbols are unique. They stop others from messing with your object’s properties.
  4. TypeScript has enum: Need enum? Switch to TypeScript. It’s got your back.
  5. Remember to compile TypeScript: Using TypeScript for Node.js? Compile your TypeScript files first. Or quickly use ts-node.

This new ES7 feature made my math 3 times easier

But 5 lines of Java is one line of Python.

How many times have you heard something like that from lovers of the later?

Seems like they love to trash languages they stubbornly believe are verbose. I came to see that “Pythonic” is something truly cherished by our friends in the Python community.

Your Python code works, and so what? Where is elegance? Where is readability?

Think you can write a simple for loop and get away with it?

Python
total = 0 for i in range(1, 11): total += i print("The sum of the first 10 numbers is:", total)

Just wait till one of them find out — to say you’ll face severe criticism is an understatement.

Because apparently — and I kind of agree — it’s just not “beautiful” or concise enough.

To be “Pythonic” is best.

JavaScript
total = sum(i for i in range(1, 11)) print("The sum of the first 10 numbers is:", total)

An ES7 feature that brings syntactic sugar and conciseness

The ** operator.

This one almost always comes up in Python’s favor when talking about language conciseness, up there with generators and the // operator.

It’s good to know JavaScript now has this feature, over 6 years ago in fact.

But it was surprising to know that a sizeable number of our fellow JavaScripters never knew it’s in the language.

It’s now effortless to get the power of a number, with the ** operator. Instead of Math.pow(a, b), you do a ** b.

JavaScript
const result = Math.pow(10, 2); console.log(result); // 100 const result2 = Math.pow(2, Math.pow(3, 2)); console.log(result2); const result3 = 10 ** 2; console.log(result3); // 100 const result4 = 2 ** 3 ** 2; console.log(result4) // 512

We don’t need a function for such a common math operation anymore.

You can even pass a decimal number as a power with **Math.pow() can do this too:

JavaScript
const result = Math.pow(49, 1.5); console.log(result); // 343 const result2 = 49 ** 1.5; console.log(result2); // 343

And it’s not only a drop-in replacement for Math.pow(); ** can take BigInts too:

JavaScript
// ❌ Error: Cannot convert a BigInt value to a number const result1 = Math.pow(32n, 2); console.log(result1);
JavaScript
const result2 = 32n ** 2n; console.log(result2); // 1024n

BigInts let us represent numbers of any size without losing precision or experiencing overflow errors.

JavaScript
const veryLargeNumber = 1234567890123456789012345678901234567890n; console.log(typeof veryLargeNumber); // "bigint" console.log(veryLargeNumber * 2n); // 2469135780246913578024691357802469135780n

You can see that we simply add an n at the end of the digits to make it a BigInt.

Final thoughts

Language wars are a fun programmer pastime.

It’s always fun to debate about which programming language is more elegant and concise.

But at the end of the day, we’ve got to keep in mind that writing readable and maintainable code is what matters most.

In this article, we saw that the ** operator introduced in ES7 for JavaScript is a neat trick that can make your code more concise, and it even works with BigInts!

More features keep getting added every year — ES13 was released in 2022 — to increase and add more syntactic sugar.

So, keep exploring the possibilities of your favorite programming language, and have fun coding!

How to Fix the “Unexpected strict mode reserved word ‘yield'” Error in JavaScript

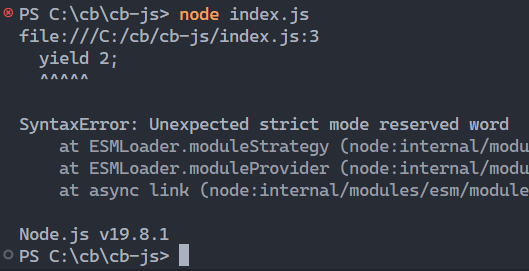
The “Unexpected strict mode reserved word ‘yield'” syntax error happens in JavaScript when you use the yield keyword outside a generator function.

The unexpected strict mode reserved word 'yield' error happening in JavaScript

Here’s an example of the error happening:

JavaScript
function* numberGen() { // ❌ SyntaxError: Unexpected strict mode reserved word 'yield' yield 2; yield 4; } const gen = numberGen(); console.log(gen.next().value); console.log(gen.next().value);

Note: As this is a syntax error, we don’t need to call the function for it to happen, and no part of the code runs until we fix it.

To fix the “SyntaxError unexpected strict mode reserved word ‘yield'” error, ensure that the innermost enclosing function containing the yield keyword is a generator function.

JavaScript
function* numberGen() { // ✅ Runs successfully - no error yield 2; yield 4; } const gen = numberGen(); console.log(gen.next().value); // 2 console.log(gen.next().value); // 4

We create generator functions with function*; the * must be there.

Make sure innermost function is generator function

A common reason why the “Unexpected strict mode reserved word ‘yield'” happens is using yield in an inner function that’s in a generator function.

This could be a callback or closure.

JavaScript
function* numberGen() { return () => { for (let i = 0; i < 30; i += 10) { // ❌ SyntaxError: Unexpected strict mode reserved word 'yield' yield i; } } } const gen = numberGen()(); console.log(gen.next().value); console.log(gen.next().value);

You may think the outer function* will let the yield work, but nope – it doesn’t!

You have to make the innermost function a generator:

JavaScript
function numberGen() { return function* () { for (let i = 0; i < 30; i += 10) { // ✅ Runs successfully - no error yield i; } }; } const gen = numberGen()(); console.log(gen.next().value); // 10 console.log(gen.next().value); // 20

Note we removed the * from the outer one, so it acts like a normal function and returns the generator.

Also we change the arrow function a normal one, because arrow functions can’t be generators.

Here’s another example, seen here:

JavaScript
function* generator() { const numbers = [1, 2, 3, 4, 5]; // ❌ SyntaxError: Unexpected strict mode reserved word numbers.map((n) => yield(n + 1)); } for (const n of generator()) { console.log(n); }

Here the goal was to consume the generator in the for loop, printing out each number one by one.

But the callback is the innermost function that has the yield, and it’s not a generator. Let’s fix this:

JavaScript
function* generator() { const numbers = [1, 2, 3, 4, 5]; // ✅ Runs successfully - no error yield* numbers.map((n) => n + 1); } for (const n of generator()) { console.log(n); }

yield* keyword

Wondering about the * in the yield*? It’s a shorter way of looping through the array and yielding each item.

A shorter way of this:

JavaScript
function* generator() { const numbers = [1, 2, 3, 4, 5]; // ✅ Runs successfully - no error for (const num of numbers.map((n) => n + 1)) { yield num; } } for (const n of generator()) { console.log(n); }

Key takeaways

The “Unexpected strict mode reserved word ‘yield'” error can happen in JavaScript when you mistakenly use the yield keyword outside a generator function.

To fix this error, make sure that the innermost enclosing function containing the yield keyword is actually a generator function.

One common reason for meeting this error is using yield in an inner function that’s not a generator.

Remember, the yield* syntax lets us easily loop through an array and yield each item. No need for a traditional for loop with yield statements.

By understanding and correctly applying these concepts, you can avoid the “Unexpected reserved word ‘yield'” error and ensure smooth execution of your generator functions in JavaScript. Happy coding!

How to easily get the current route in Next.js

Getting the current route in a web application is important for managing user sessions, handling authentication, and dynamically displaying UI elements.

Let’s how see how easy it is to get the current route or pathname in our Next.js app.

In this article

Get current route in Next.js Pages Router component

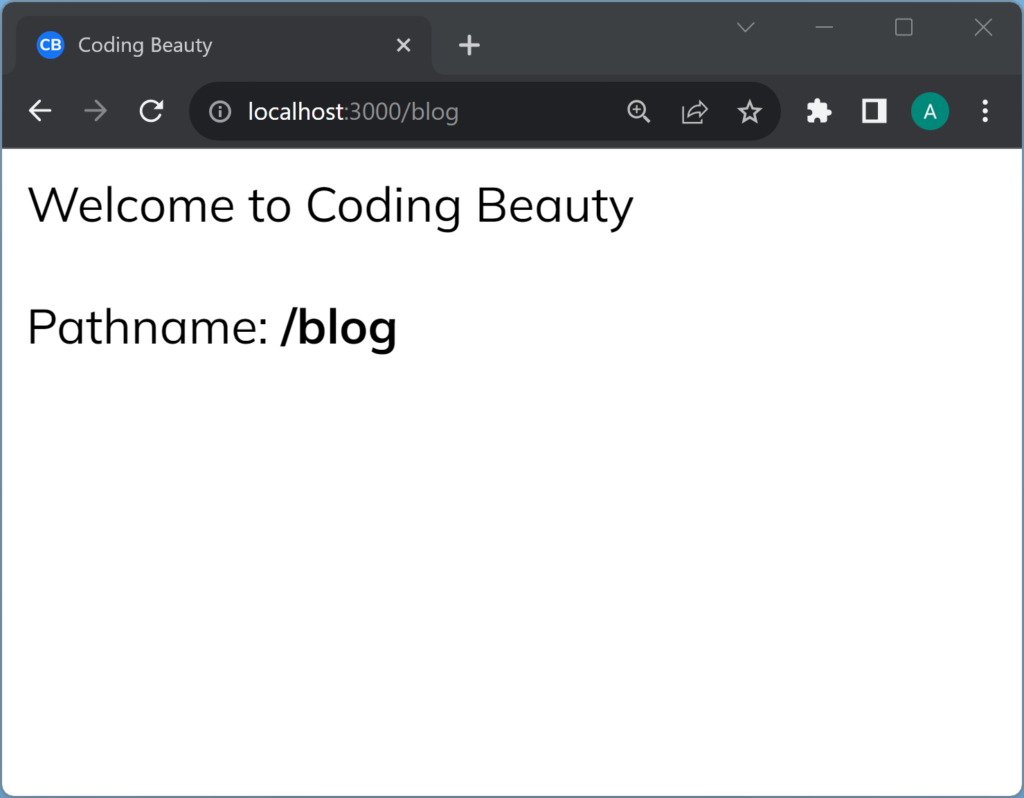
We can get the current route in a Next.js component with the useRouter hook:

src/pages/blog.tsx
import Head from 'next/head'; import { useRouter } from 'next/router'; export default function Page() { const { pathname } = useRouter(); return ( <> <Head> <title>Next.js - Coding Beauty</title> <meta name="description" content="Next.js Tutorials by Coding Beauty" /> <meta name="viewport" content="width=device-width, initial-scale=1" /> <link rel="icon" href="/favicon.ico" /> </Head> <main> Welcome to Coding Beauty <br /> <br /> Pathname: <b>{pathname}</b> </main> </> ); }

Get current route in Next.js App Router component

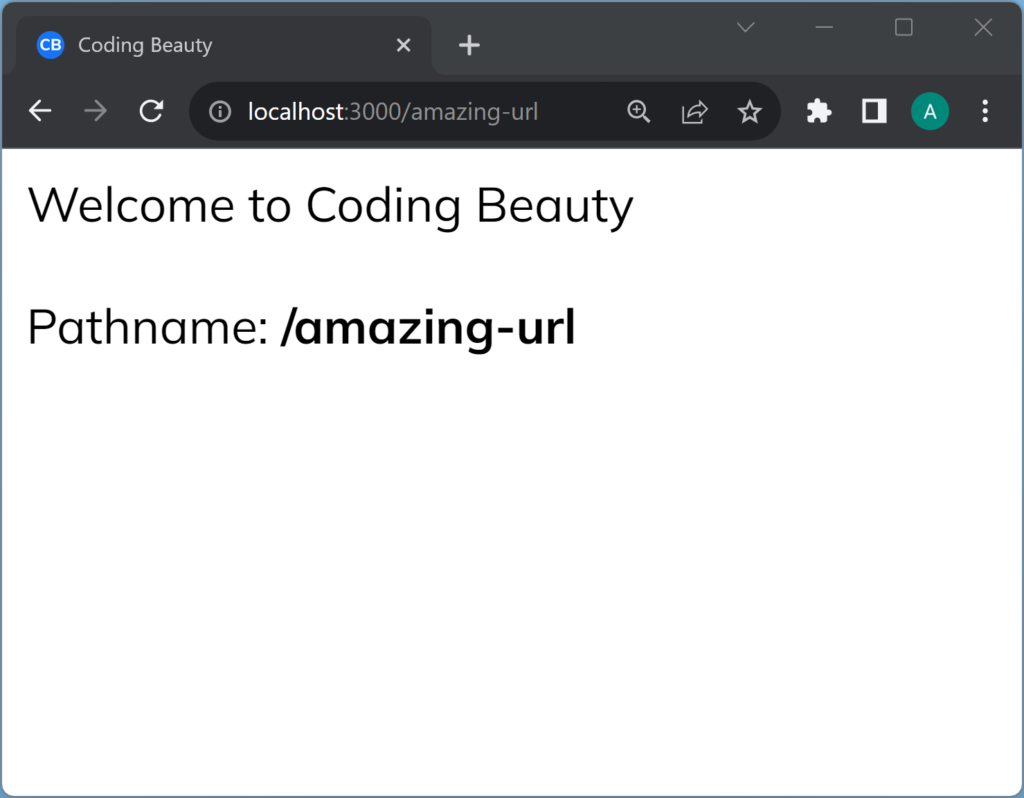
To get the current route in a Next.js app router component, use the usePathname hook from next/navigation:

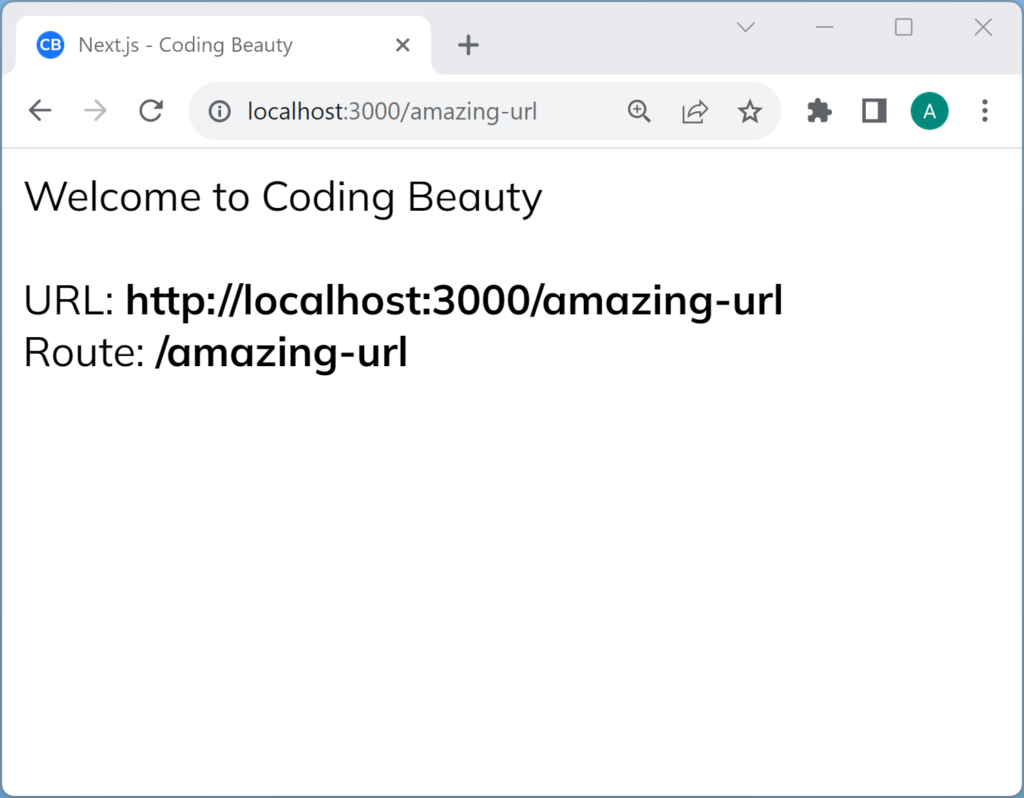
src/app/amazing-url/page.tsx
'use client'; import React from 'react'; import { Metadata } from 'next'; import { usePathname } from 'next/navigation'; export const metadata: Metadata = { title: 'Next.js - Coding Beauty', description: 'Next.js Tutorials by Coding Beauty', }; export default function Page() { const pathname = usePathname(); return ( <main> Welcome to Coding Beauty 😄 <br /> <br /> Route: <b>{pathname}</b> </main> ); }

We need 'use client' in Next.js 13 App Router

Notice the 'use client' statement at the top.

It’s there because all components in the new app directory are server components by default, which means we can’t access client-side specific APIs.

We’ll get an error if we try to do anything interactive with useEffect or other hooks, as it’s a server environment.

Get current route in Next.js getServerSideProps

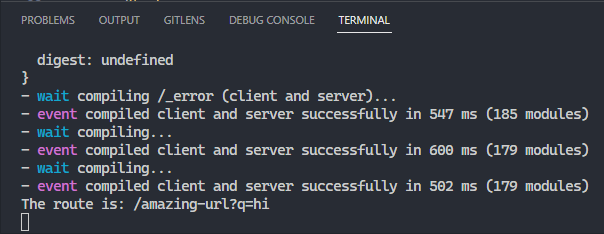
To get the current route in getServerSideProps, use req.url from the context argument.

src/pages/amazing-url.tsx
import { NextPageContext } from 'next'; import Head from 'next/head'; export function getServerSideProps(context: NextPageContext) { const route = context.req!.url; console.log(`The route is: ${route}`); return { props: { route, }, }; } export default function Page({ route }: { route: string }) { return ( <> <Head> <title>Next.js - Coding Beauty</title> <meta name="description" content="Generated by create next app" /> <meta name="viewport" content="width=device-width, initial-scale=1" /> <link rel="icon" href="/favicon.png" /> </Head> <main> Welcome to Coding Beauty 😃 <br /> Route: <b>{route}</b> </main> </> ); }
The current route printed in the console

How to easily get the current URL in Next.js

We use the current URL in a web app to track user activity, maintain history, or modify displayed elements based on route. So, let’s see how to quickly get the current URL in a Next.js app.

In this article

Get current URL in Next.js Pages Router component

To get the current URL in a Next.js component, use the useUrl hook from the nextjs-current-url package:

With pages directory:

src/pages/index.tsx
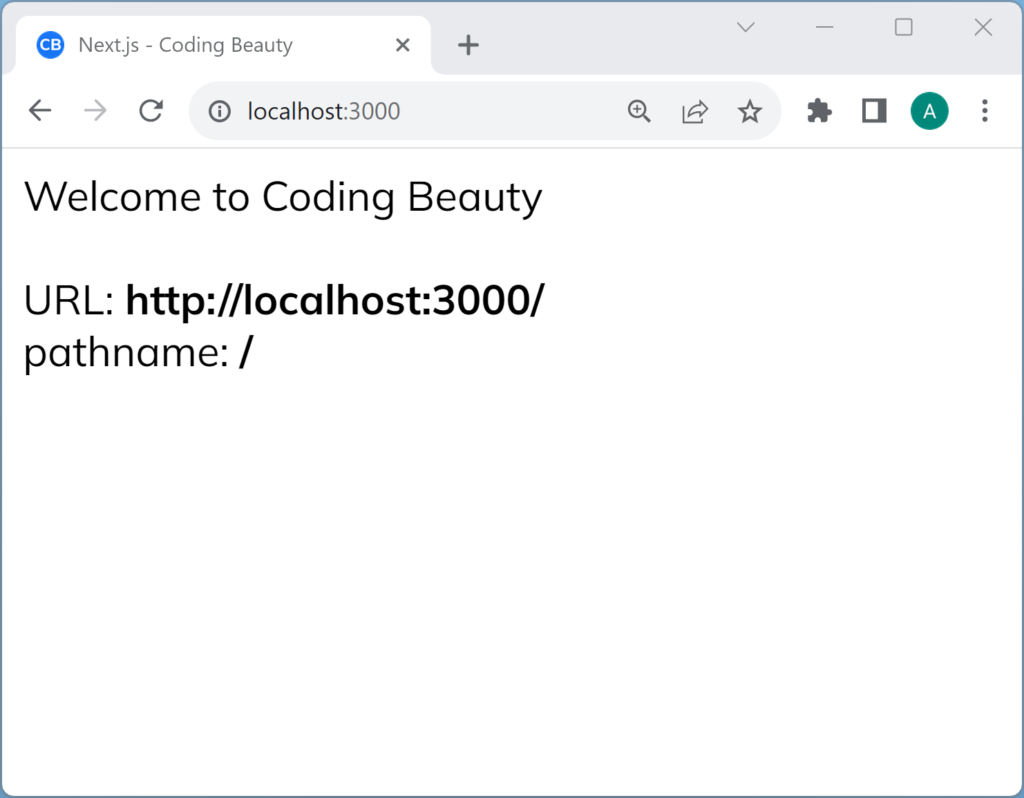
import { useUrl } from 'nextjs-current-url'; import Head from 'next/head'; export default function Home() { const { href: currentUrl, pathname } = useUrl() ?? {}; return ( <> <Head> <title>Next.js - Coding Beauty</title> <meta name="description" content="Next.js Tutorials by Coding Beauty" /> <meta name="viewport" content="width=device-width, initial-scale=1" /> <link rel="icon" href="/favicon.png" /> </Head> <main> Welcome to Coding Beauty 😄 <br /> <br /> URL: <b>{currentUrl}</b> <br /> pathname: <b>{pathname}</b> </main> </> ); }
The current URL is displayed on the Next.js page.

useUrl() returns a URL object that gives us more info on the current URL.

Get current URL with useState and window.location.href

We can also get the current URL in a client component using useState and window.location.href.

src/pages/index.tsx
import Head from 'next/head'; import { useRouter } from 'next/router'; import { useEffect } from 'react'; export default function Home() { const [currentUrl, setCurrentUrl] = useState<string | null>(null); const { pathname } = useRouter(); useEffect(() => { setCurrentUrl(window.location.href); }, []); return ( <> <Head> <title>Next.js - Coding Beauty</title> <meta name="description" content="Next.js Tutorials by Coding Beauty" /> <meta name="viewport" content="width=device-width, initial-scale=1" /> <link rel="icon" href="/favicon.ico" /> </Head> <main> Welcome to Coding Beauty 😄 <br /> <br /> URL: <b>{currentUrl}</b> <br /> pathname: <b>{pathname}</b> </main> </> ); }

The window.location.href property returns a string containing the entire page URL, and we use the useState and useEffect hooks to create and set state for storing the current URL.

window.location property

window.location has other properties that tell you more about the URL. Like:

  • pathname: the path of the URL after the domain name and any optional port number. Query and fragment identifier not included.
  • protocol: URL‘s protocol scheme, like https: or mailto:. Doesn’t include the //.
  • hostname: the URL‘s domain name without the port number.

Here’s an example where we use some of these properties:

src/pages/index.tsx
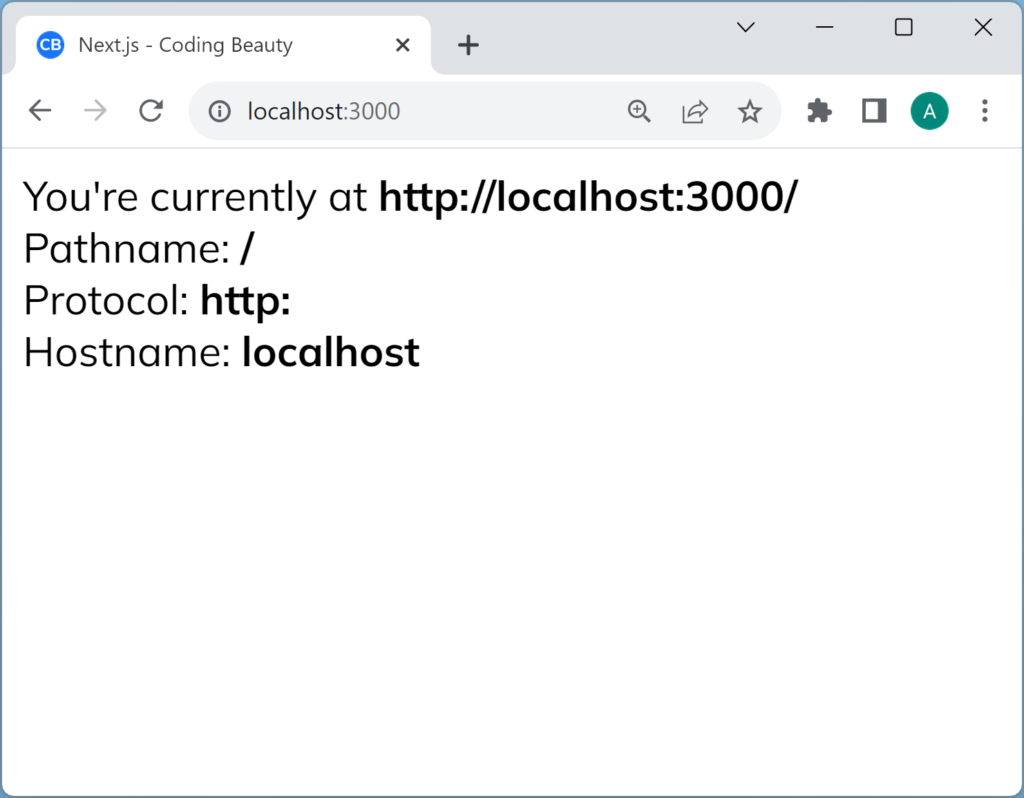
import { getUrl } from '@/lib/utils/get-url'; import { NextPageContext } from 'next'; import Head from 'next/head'; import { useEffect, useState } from 'react'; export function getServerSideProps(context: NextPageContext) { return { props: { currentUrl: getUrl({ req: context.req! })?.href, }, }; } export default function Home() { const [myLocation, setMyLocation] = useState<Location | null>(null); useEffect(() => { setMyLocation(window.location); }); return ( <> <Head> <title>Next.js - Coding Beauty</title> <meta name="description" content="Next.js Tutorials by Coding Beauty" /> <meta name="viewport" content="width=device-width, initial-scale=1" /> <link rel="icon" href="/favicon.png" /> </Head> <main> You are currently accessing <b>{myLocation?.href}</b> 😃 <br /> Pathname: <b>{myLocation?.pathname}</b> <br /> Protocol: <b>{myLocation?.protocol}</b> <br /> Hostname: <b>{myLocation?.hostname}</b> </main> </> ); }
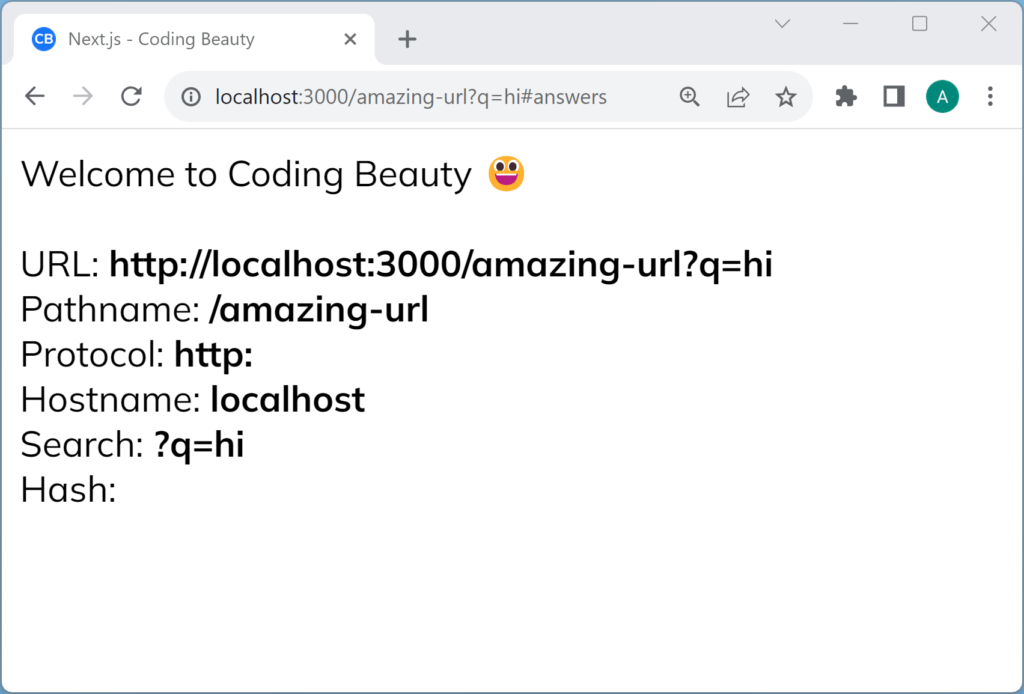
Display various segments of the current URL in a Next.js page.

We need useEffect to get the current URL

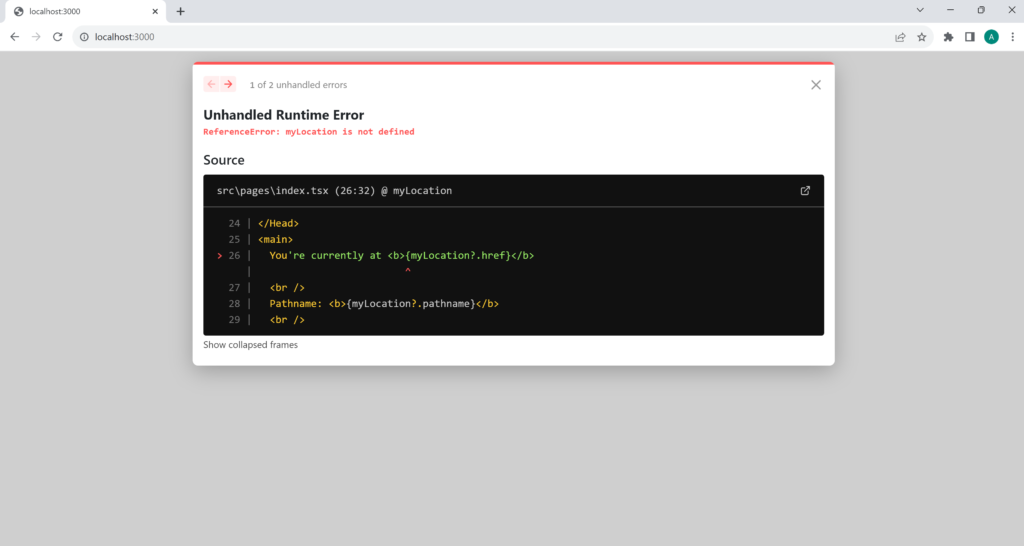
Pages render on both the server and client in Next.js, so when the server renders the page, there’s no window object available.

So you’ll get a “window is not defined” error if you try to use window before hydration:

"window is not defined" error in Next.js page

That’s why we use useEffect – to wait till mounting/hydration is done.

What’s hydration?

Hydration is when a server-generated web page gets extra client-side features added by the user’s web browser. Features like event listeners, client-side routing, etc.

Get current URL in Next.js App Router component

To get the current URL in a Next.js app router component, we can also use the useUrl hook from the nextjs-current-url library.

src/app/page.tsx
'use client'; import React from 'react'; import { useUrl } from 'nextjs-current-url'; import { Metadata } from 'next'; export const metadata: Metadata = { title: 'Next.js - Coding Beauty', description: 'Next.js Tutorials by Coding Beauty', }; export default function Page() { const { pathname, href } = useUrl() ?? {}; return ( <main> Welcome to Coding Beauty <br /> <br /> URL: <b>{href}</b> <br /> route: <b>{pathname}</b> </main> ); }
The current URL is displayed on the Next.js app router component

Next.js App Router: We need 'use client'

Notice the 'use client' statement at the top.

It’s there because all components in the new app directory are server components by default, so we can’t use any client-side specific APIS.

We’ll get an error if we try to do anything interactive with useEffect or other hooks like useUrl, because it’s a server environment.

Get current URL in Next.js getServerSideProps

To get the current URL in getServerSideProps of a Next.js page, use the getUrl function from the nextjs-current-url library.

src/pages/amazing-url.tsx
import { NextPageContext } from 'next'; import Head from 'next/head'; import { getUrl } from 'nextjs-current-url/server'; export function getServerSideProps(context: NextPageContext) { const url = getUrl({ req: context.req }); return { props: { url: url.href, }, }; } export default function Home({ url }: { url: string }) { const urlObj = new URL(url); const { pathname } = urlObj; return ( <> <Head> <title>Next.js - Coding Beauty</title> <meta name="description" content="Generated by create next app" /> <meta name="viewport" content="width=device-width, initial-scale=1" /> <link rel="icon" href="/favicon.png" /> </Head> <main> Welcome to Coding Beauty 😃 <br /> <br /> URL: <b>{url}</b> <br /> Route: <b>{pathname}</b> </main> </> ); }
The current URL is displayed on the Next.js page from getServerSideProps()

Let’s check out some more properties of URL:

src/pages/amazing-url.tsx
import { NextPageContext } from 'next'; import Head from 'next/head'; import { getUrl } from 'nextjs-current-url/server'; export function getServerSideProps(context: NextPageContext) { const url = getUrl({ req: context.req }); return { props: { url: url.href, }, }; } export default function Home({ url }: { url: string }) { const urlObj = new URL(url); const { pathname, href, protocol, hostname, search, hash } = urlObj; return ( <> <Head> <title>Next.js - Coding Beauty</title> <meta name="description" content="Generated by create next app" /> <meta name="viewport" content="width=device-width, initial-scale=1" /> <link rel="icon" href="/favicon.png" /> </Head> <main> Welcome to Coding Beauty 😃 <br /> <br /> URL: <b>{href}</b> <br /> Pathname: <b>{pathname}</b> <br /> Protocol: <b>{protocol}</b> <br /> Hostname: <b>{hostname}</b> <br /> Search: <b>{search}</b> <br /> Hash: <b>{hash}</b> </main> </> ); }

Here’s what these properties do:

  • href: the complete URL, including the protocol, hostname, port number, path, query parameters, and fragment identifier.
  • protocol: URL’s protocol scheme, like https: or mailto:. Doesn’t include the //.
  • hostname: the URL’s domain name without the port number.
  • pathname: the URL’s path and filename without the query and fragment identifier.
  • search: the URL’s query parameters. Includes the ?
  • hash: the fragment identifier, the part after the #.
Various properties of the current URL are displayed on the Next.js page.

Note: As you can see it’s not possible to get the hash/fragment in getServerSideProps because the browser never sends the part after the # to the server. That’s why there’s no hash here. We’d have to get the current URL in the client-side to access the fragment identifier.

How to Scroll to the Top of a Div in React

To scroll to the top of a div element in React, create a ref for the div, then call scrollTo() on the ref.

App.jsx
import React, { useRef } from 'react'; function YourComponent() { const divRef = useRef(null); const onClick = () => { divRef.current.scrollTo({ top: 0, behavior: 'smooth' }); }; return ( <div ref={divRef} style={{ height: '200px', width: '400px', overflow: 'auto', border: '1px solid #c0c0c0', }} > {[...Array(100)].map((_, index) => ( <div key={index}>Item {index + 1}</div> ))} <button onClick={onClick}>Go to top</button> </div> ); } export default function App() { return ( <div> <YourComponent /> </div> ); }

Related: How to Scroll to the Bottom of a Div in React

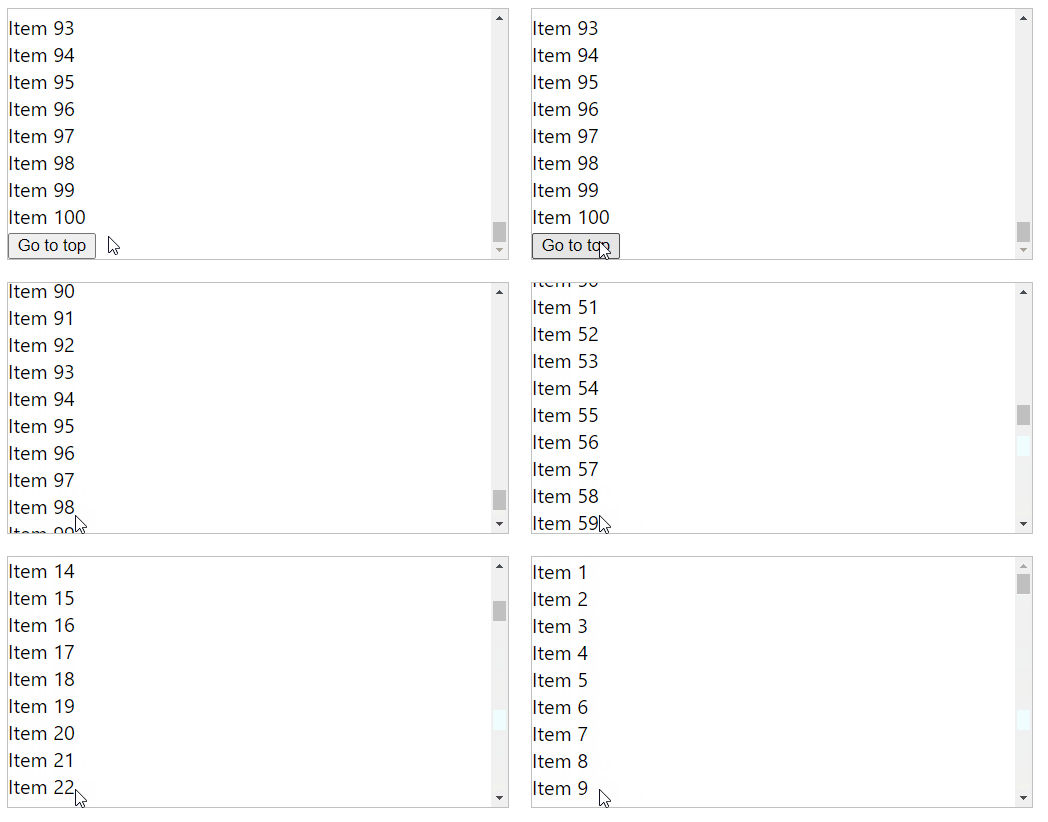
When the button is clicked, the div smoothly scrolls to the top.

When reading long content, scroll-to-top helps users get back to the start easily.

Think of a lengthy blog post or an extensive list of items.

The useRef hook from React plays a key role here.

It holds the reference to our scrollable div in divRef.

The scrollTo function accepts an object specifying the top position and scroll behavior.

This creates the scrollable effect due to the div’s fixed height and width.

The button at the end does the magic.

Clicking it triggers the onClick function, smoothly scrolling the div to the top.

We enabled smooth scrolling by setting behavior to smooth in scrollTo().

In smooth scrolling, the scrolling happens gradually – an animation.

By default behavior is auto.

In auto the scroll happens instantly.

A smooth scroll back to the top adds a slick, professional touch to the user experience.

Let’s dive deeper into a slightly different case in the next section.

How to scroll to the top of a div on item add in React

Imagine you have a list in a div.

This list is overflowing the div.

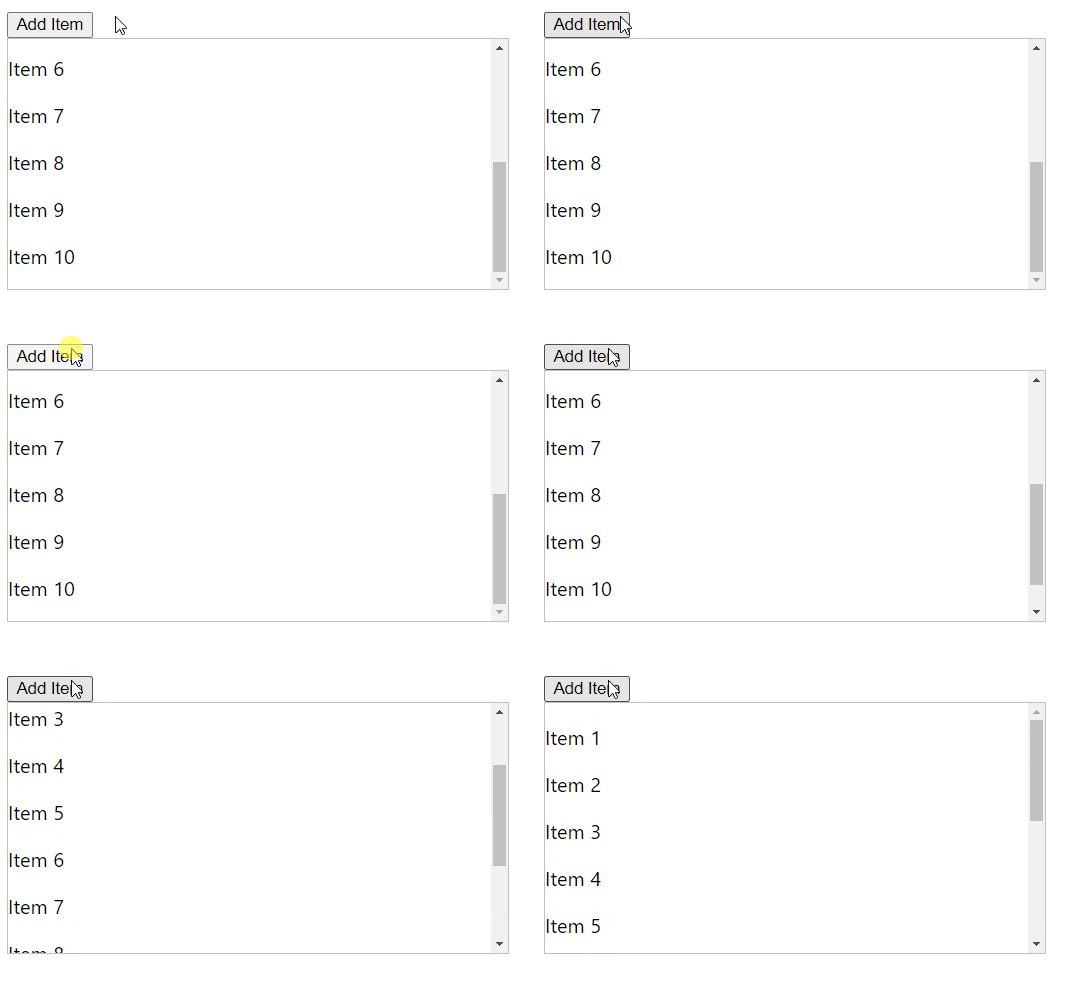
Each time a new item is added, we want to scroll back to the top.

React makes this quite easy:

App.jsx
import React, { useRef, useEffect } from 'react'; const MyComponent = () => { const divRef = useRef(null); const initialItems = Array.from({ length: 10 }, (_, i) => `Item ${i + 1}`); const [items, setItems] = React.useState(initialItems); const addItem = () => { setItems([...items, `Item ${items.length + 1}`]); }; useEffect(() => { if (divRef.current) { divRef.current.scrollTo({ top: 0, behavior: 'smooth' }); } }, [items]); return ( <div> <button onClick={addItem}>Add Item</button> <div ref={divRef} style={{ height: '200px', width: '400px', overflow: 'auto', border: '1px solid #c0c0c0', }} > {items.map((item, index) => ( <p key={index}>{item}</p> ))} </div> </div> ); }; const App = () => { return ( <div> <MyComponent /> </div> ); }; export default App;
The div scrolls to the top when a new element gets added to it.

We use useRef to create a new ref – divRef.

This ref will be attached to our div.

The addItem function adds new items to items.

The useEffect hook is activated every time items is updated.

It takes care of scrolling the div to the top.

The component includes a button and the div.

Clicking the button adds a new item.

The div is linked to divRef.

We display each item in items as a paragraph.

That’s it.

With each new item added, the div scrolls to the top.

Give it a shot!

Scroll to top of page in React

To scroll to the top of a page in React, call window.scrollTo({ top: 0, left: 0}).

App.jsx
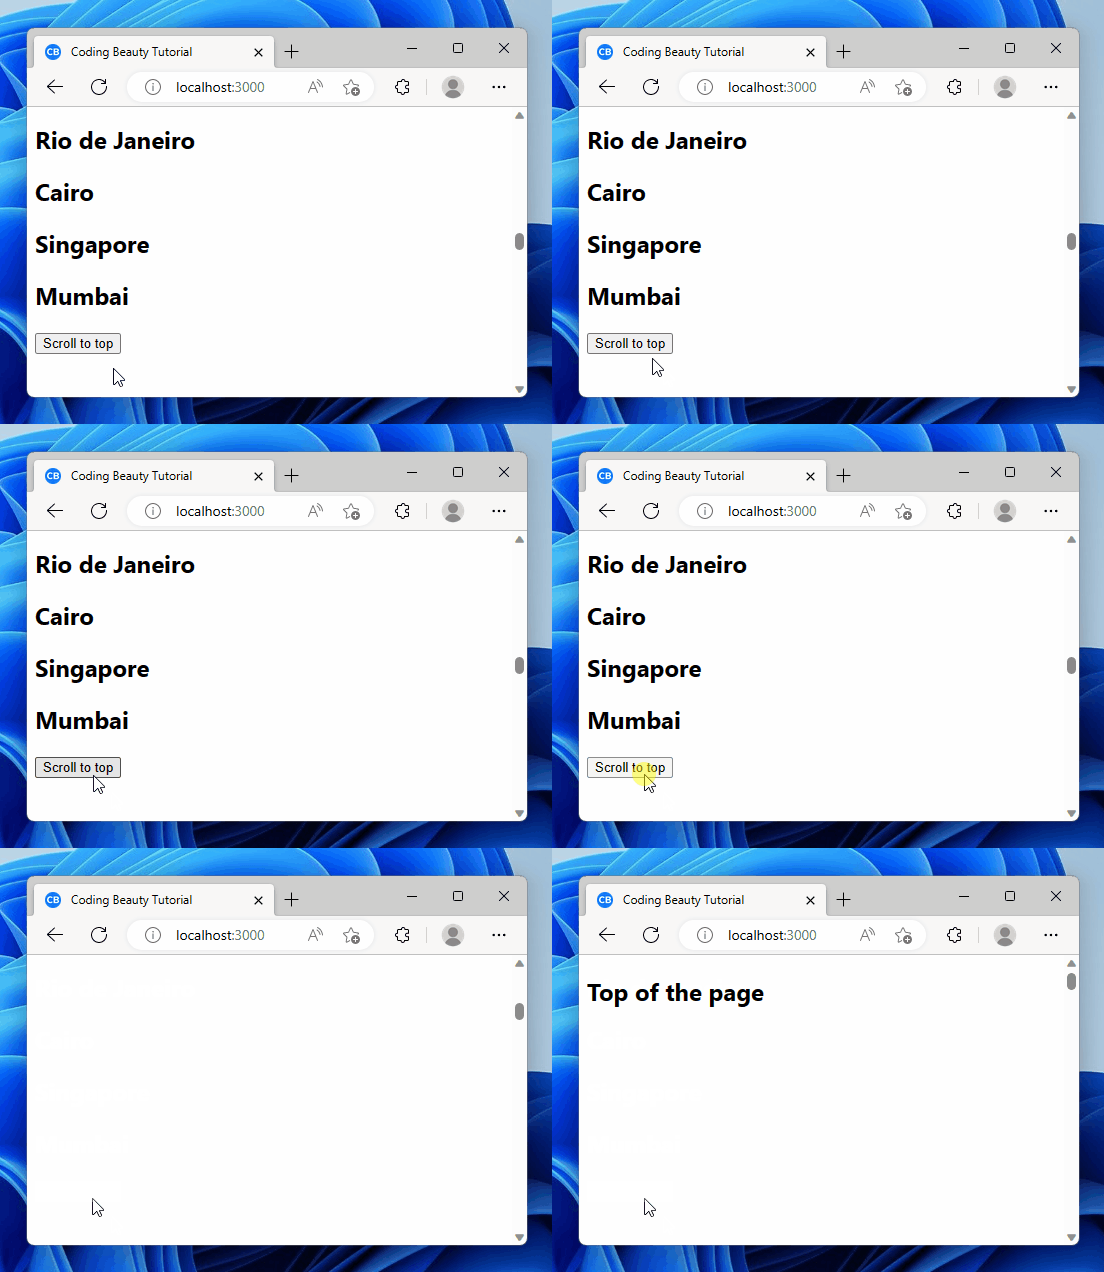
import { useRef } from 'react'; const allCities = [ 'Tokyo', 'New York City', 'Paris', 'London', 'Dubai', 'Sydney', 'Rio de Janeiro', 'Cairo', 'Singapore', 'Mumbai', ]; export default function App() { const ref = useRef(null); const scrollToTop = () => { window.scrollTo({ top: 0, left: 0, behavior: 'smooth' }); }; return ( <div> <h2>Top of the page</h2> <div style={{ height: '100rem' }} /> <div ref={ref}> {allCities.map((fruit) => ( <h2 key={fruit}>{fruit}</h2> ))} </div> <button onClick={scrollToTop}>Scroll to top</button> <div style={{ height: '150rem' }} /> </div> ); }
Clicking the button to scroll to the top of the page in React.

The window.scrollTo() method scrolls to a particular position on a page.

App.jsx
const scrollToTop = () => { window.scrollTo({ top: 0, left: 0, behavior: 'smooth' }); };

We could have called it with two arguments: window.scrollTo(0, 0).

But this overload doesn’t let us set a smooth scroll behavior.

When behavior is smooth, the browser scrolls to the top of the page in a gradual animation.

But when it’s auto, the scroll happens instantly. We immediately jump to the top of the page.

We use the onClick prop of the button to set a click listener.

This listener will get called when the user clicks the button.

Key takeaways

  1. The useRef hook in React is essential for managing scrolling operations. This allows you to create a reference for your scrollable div.
  2. With the scrollTo() function, you can easily scroll within your referenced div.
  3. Adding new items to your list and wish to scroll back to the top of your div? React has got you covered!
  4. React’s useEffect hook comes to the rescue by triggering the scrollTo() function each time your list of items is updated.
  5. You can choose how you want your scrolling to behave – smoothly and gradually, or instantly for quick results.
  6. The onClick prop is perfect for activating your button click listener. A simple click, and you’re back at the top!

So, there you have it. Try implementing these in your upcoming React projects. Happy coding!