tutorial

How to Convert XML to JSON in JavaScript

We can use the xml-js library from NPM to easily convert XML to JSON in JavaScript, i.e.:

import { xml2json } from 'xml-js';

// ...

const json = xml2json(xml);

For example:

index.js

import { xml2json } from 'xml-js';

const xml = `<name>Garage</name>
<cars>
    <color>red</color>
    <maxSpeed>120</maxSpeed>
    <age>2</age>
</cars>
<cars>
    <color>blue</color>
    <maxSpeed>100</maxSpeed>
    <age>3</age>
</cars>
<cars>
    <color>green</color>
    <maxSpeed>130</maxSpeed>
    <age>2</age>
</cars>`;

const json = xmltojson(xml, );

console.log(json);

This code will have the following output:

{"declaration":{"attributes":{"version":"1.0","encoding":"UTF-8"}},"elements":[{"type":"element","name":"languages","elements":[{"type":"element","name":"language","elements":[{"type":"text","text":"\n      English\n   "}]},{"type":"element","name":"language","elements":[{"type":"text","text":"\n      French\n   "}]},{"type":"element","name":"language","elements":[{"type":"text","text":"\n      Spanish\n   "}]}]}]}

What are XML and JSON?

Let’s go through these terms in case you’re not familiar with them

XML (eXtensible Markup Language) is a markup language similar to HTML that was designed to store and transport data. Unlike HTML, XML doesn’t have any predefined tags. Instead, we define our own tags according to our requirements.

JSON (JavaScript Object Notation) is a text format used to store and transport data based on JavaScript object syntax and is commonly used to build RESTful APIs.

Install xml-js

Before using xml-js, we need to install it in our project. We can do this with the NPM CLI.

npm i xml-js

Or with the Yarn CLI:

yarn add xml-js

After installation, we’ll be able to import it into a JavaScript module, like this:

import { xml2json } from 'xml-js';

We use import destructuring to access the xml2json() method directly from the library.

For a CommonJS module, we’ll import it like this instead:

const { xml2json } = require('xml-js');

The xml2json() function

The xml2json() function has two parameters. The first is the XML string to convert to JSON, and the second is an optional object.

const json = xml2json(xml, { spaces: 2, compact: true });

Customize conversion of XML to JSON

We use this object to specify various options for customizing the conversion process.

In our example, we don’t pass an object, so the default options are used. We can pass an object with a spaces option to properly format and indent the resulting JSON.

import { xml2json } from 'xml-js';

const xml = `<?xml version="1.0" encoding="UTF-8"?>
<languages>
   <language>
      English
   </language>
   <language>
      French
   </language>
   <language>
      Spanish
   </language>
</languages>`;

// 👇 Set "spaces" option
const json = xml2json(xml, { spaces: 2 });

console.log(json);

Here’s the new output:

{
  "declaration": {
    "attributes": {
      "version": "1.0",
      "encoding": "UTF-8"
    }
  },
  "elements": [
    {
      "type": "element",
      "name": "languages",
      "elements": [
        {
          "type": "element",
          "name": "language",
          "elements": [
            {
              "type": "text",
              "text": "\n      English\n   "
            }
          ]
        },
        {
          "type": "element",
          "name": "language",
          "elements": [
            {
              "type": "text",
              "text": "\n      French\n   "
            }
          ]
        },
        {
          "type": "element",
          "name": "language",
          "elements": [
            {
              "type": "text",
              "text": "\n      Spanish\n   "
            }
          ]
        }
      ]
    }
  ]
}

The compact property to determine whether the resulting JSON should be detailed or compact. It is false by default.

import { xml2json } from 'xml-js';

const xml = `<?xml version="1.0" encoding="UTF-8"?>
<languages>
   <language>
      English
   </language>
   <language>
      French
   </language>
   <language>
      Spanish
   </language>
</languages>`;

// 👇 Set "compact" option
const json = xml2json(xml, { spaces: 2, compact: true });

console.log(json);

Now the resulting JSON will have a significantly smaller size than before:

{
  "_declaration": {
    "_attributes": {
      "version": "1.0",
      "encoding": "UTF-8"
    }
  },
  "languages": {
    "language": [
      {
        "_text": "\n      English\n   "
      },
      {
        "_text": "\n      French\n   "
      },
      {
        "_text": "\n      Spanish\n   "
      }
    ]
  }
}

How to Detect a Browser or Tab Close Event in JavaScript

To detect a browser or tab close event in JavaScript:

  1. Add a beforeunload event listener to the global window object.
  2. In this listener, call the preventDefault() method on the Event object passed to it.
  3. Set the returnValue property of this Event object to an empty string ('').

JavaScript

window.addEventListener('beforeunload', (event) => {
  event.preventDefault();
  event.returnValue = '';
});

We’ll need to detect the event of a browser or tab close to alert the user of any unsaved changes on the webpage.

We use the addEventListener() method to attach an event handler to any DOM objects such as HTML elements, the HTML document, or the window object.

The beforeunload event is fired right before the window, document, and its resources are about to be unloaded. At this point, the document is still visible, and the event is still cancelable.

We have to call preventDefault() on the Event object the handler receives to show the confirmation dialog in the browser. The preventDefault() method prevents the default action of an event. For the beforeunload event, preventDefault() stops the unloading of the resources, the window, and the document.

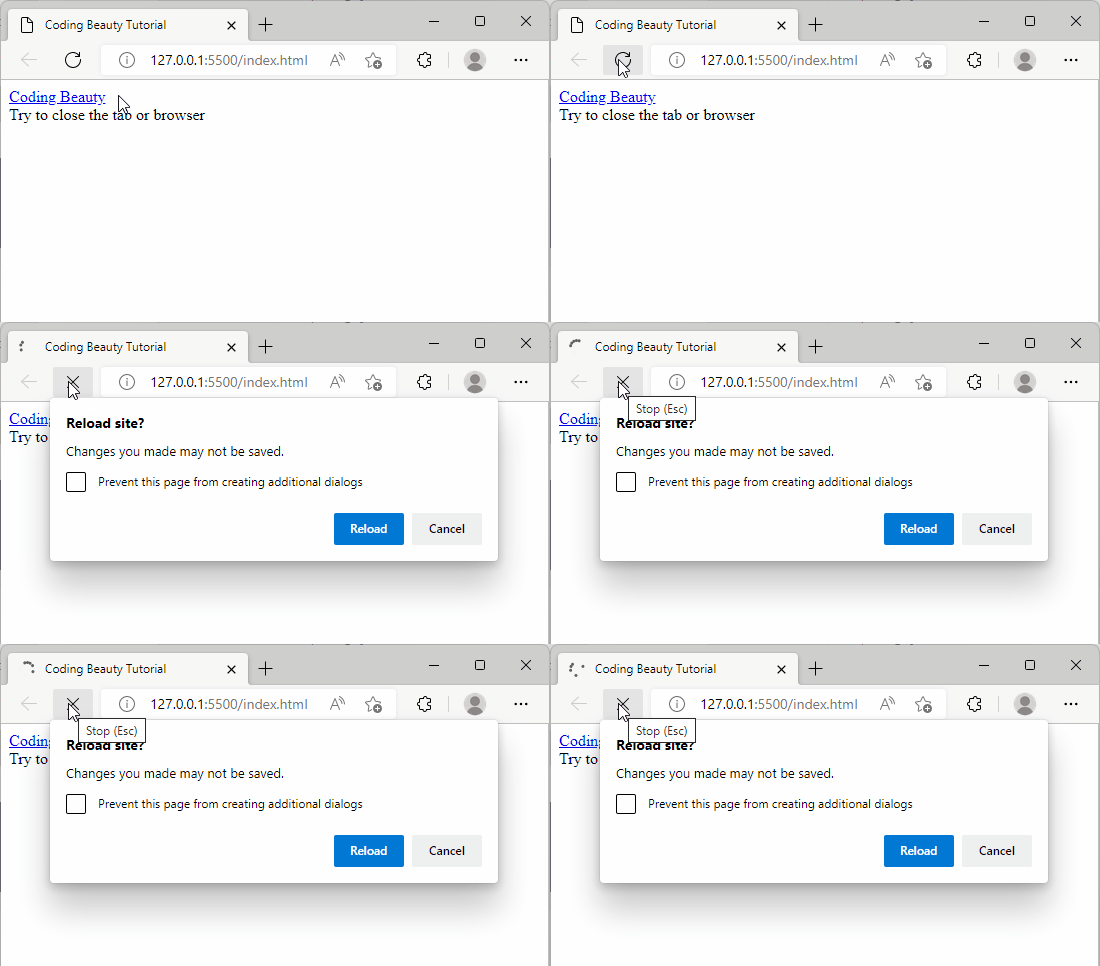
This JavaScript code will cause a confirmation dialog to be displayed when the user tries to close the browser or tab. Here’s some sample HTML to use the JavaScript in.

HTML

<a href="api2.codingbeautydev.com">Coding Beauty</a>
<br />
Try to close the tab or browser
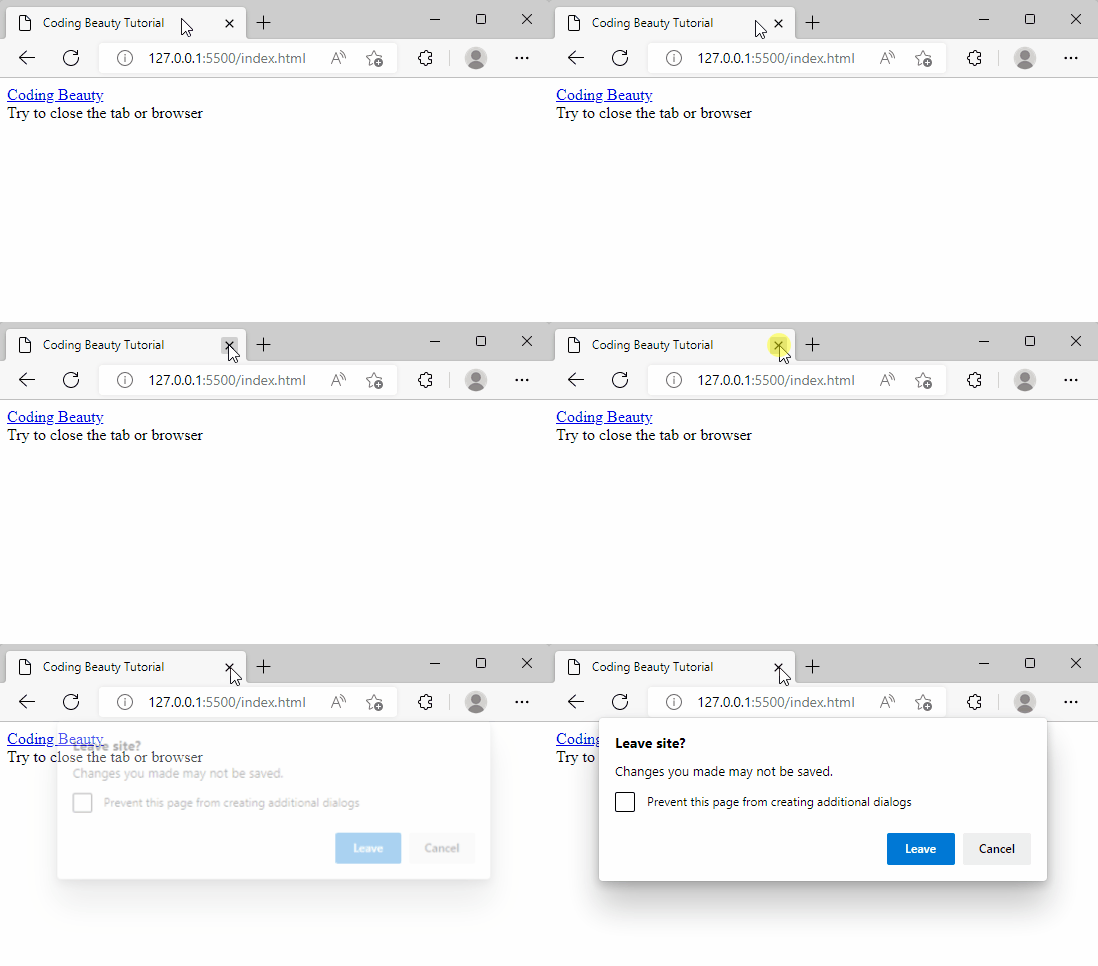
A confirmation dialog is shown when the user tries to close the tab.
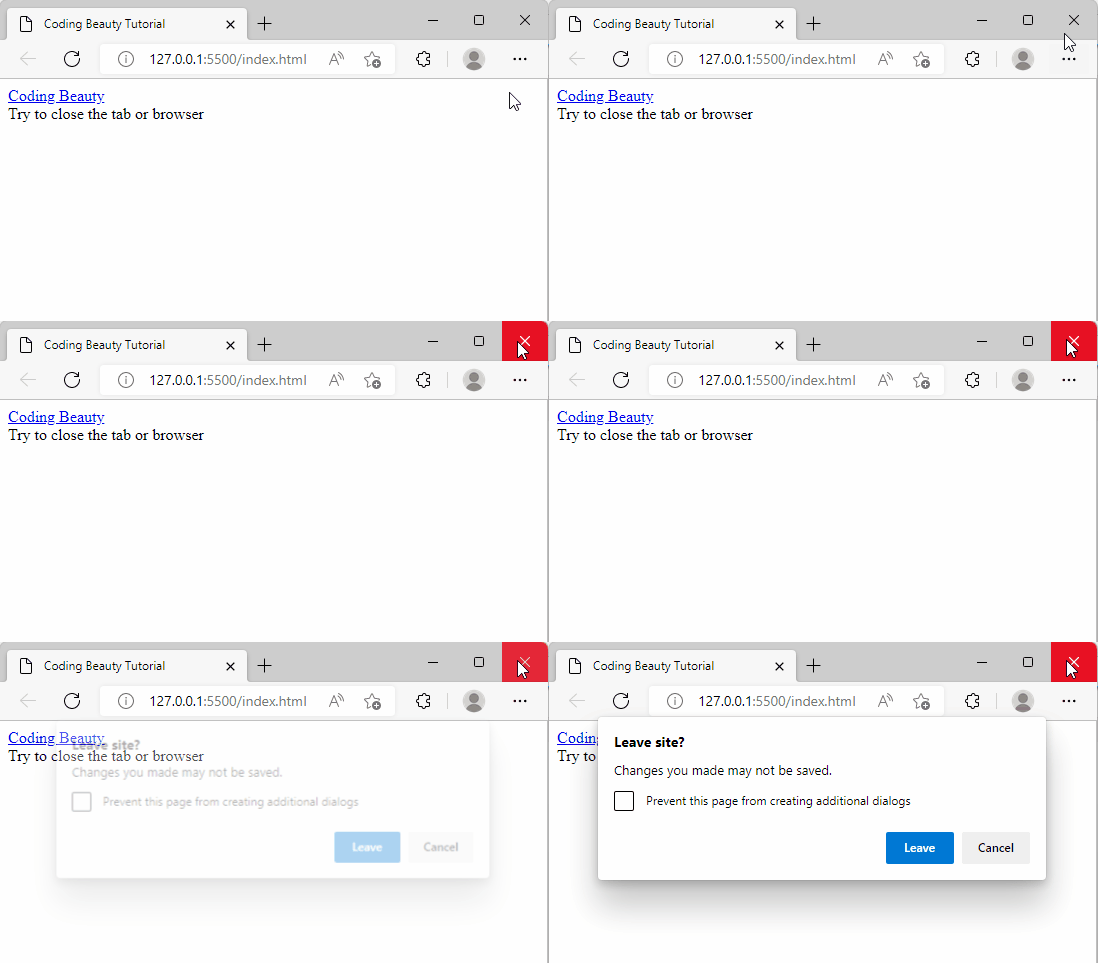
A confirmation dialog is shown when the user tries to close the browser.

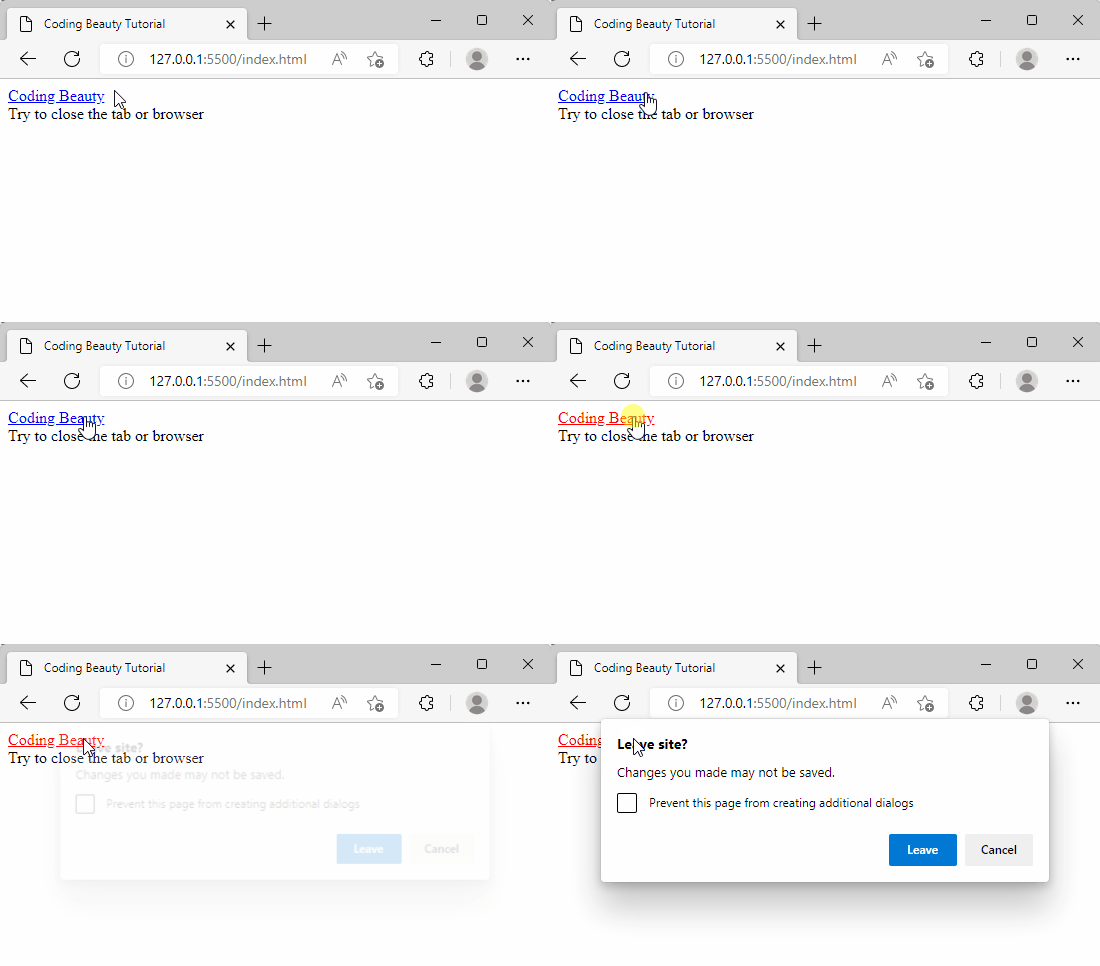
Note that the beforeunload event is triggered not only when the browser or tab is closed, but also when a link is clicked, a form is submitted, the backward/forward button is pressed, or the page is refreshed.

A confirmation dialog is shown when a link is clicked on the page.
A confirmation dialog is shown when the user tries to refresh the page.

How to Get an Input Value On Change in React

To get the value of an input on change in React, set an onChange event handler on the input, then use the target.value property of the Event object passed to the handler to get the input value.

For example:

App.js

import { useState } from 'react';

export default function App() {
  const [message, setMessage] = useState('');

  const handleChange = (event) => {
    // 👇 Get input value from "event"
    setMessage(event.target.value);
  };

  return (
    <div>
      <input
        type="text"
        id="message"
        name="message"
        onChange={handleChange}
      />

      <h2>Message: {message}</h2>
    </div>
  );
}
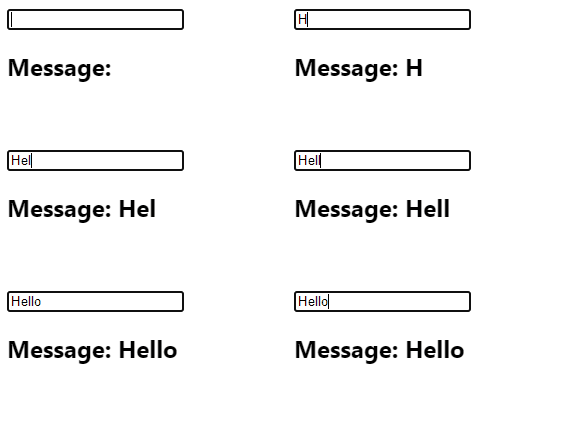
Getting an input value on change in React.
The message is updated when the input value changes.

Here we create a state variable (message) to track the input value. By setting an onChange event handler, the handler function will get called whenever the text in the input field changes.

The handler function will be called with an Event object containing data and allowing actions related to the event. The target property of this object lets us access the object representing the input element.

This input element object has a value property which returns the text currently in the input field. So we call the setMessage() function with this property as an argument to update the message variable with the input value, and this reflects on the page after the DOM is updated.

The Complete Guide to JavaScript Symbols

In this article, we’re going to learn all about JavaScript symbols and how to use them in practice.

Creating symbols

The Symbol is a data type that was added to JavaScript in ES6. To create a symbol, you can use the global Symbol() function.

const sym1 = Symbol();

The Symbol() function accepts an optional string that serves as the description of the symbol.

const sym2 = Symbol('color');

const sym3 = Symbol('maxSpeed');

const sym4 = Symbol('age');

You can access this description with the description property of the Symbol. If no description was set, this property would be undefined.

console.log(sym1.description); // undefined

console.log(sym2.description); // color

console.log(sym3.description); // maxSpeed

console.log(sym4.description); // age

Every time you call the Symbol() function, it returns a new unique value.

console.log(Symbol() === Symbol()); // false

console.log(Symbol('color') === Symbol('color')); // false

console.log(Symbol('age') === Symbol('age')); // false

As a symbol is a primitive value, using the typeof operator on it will return a symbol string.

console.log(typeof sym1); // symbol

Trying to use the new operator to create a symbol will cause a TypeError. This prevents the creation of an explicit Symbol wrapper object in place of a new symbol value.

const num1 = Number(2);
console.log(typeof num1); // number

const num2 = new Number();
console.log(typeof num2); // object

const bool1 = Boolean(true);
console.log(typeof bool1); // boolean

const bool2 = new Boolean(true);
console.log(typeof bool2); // object

const sym1 = Symbol('color');
console.log(typeof sym1); // symbol

// ❌ TypeError
const sym2 = new Symbol('color');
console.log(typeof sym2);

Sharing symbols

ES6 comes with a global symbol registry that allows you to share symbols globally. To create a symbol for sharing, you use the Symbol.for() method instead of the Symbol() function. Symbol.for() takes a key and returns a symbol value from the registry.

For example:

const color = Symbol.for('color');

The Symbol.for() method first searches the global symbol registry for a symbol with the color key and returns it if it exists. Otherwise, Symbol.for() creates a new symbol, adds it to the registry with the specified color key, and returns the symbol.

Afterward, calling Symbol.for() with the same key returns this same symbol, as it now exists in the registry.

const carColor = Symbol.for('color');

console.log(color === carColor); // true

The Symbol.keyFor() method works together with Symbol.for() to retrieve information from the global symbol registry. You can get the key of a symbol that exists in the registry with Symbol.keyFor().

console.log(Symbol.keyFor(carColor)); // 'color'

If the key doesn’t exist, Symbol.keyFor() returns undefined.

const filename = Symbol('filename');

console.log(Symbol.keyFor(filename)); // undefined;

Uses of symbols

1. Enumerations

With symbols, we can define a group of constants to set a variable to a predefined set of values – an enumeration.

Let’s say we want to create a variable to store a value representing the day of the week. To create an enum, we could use strings like ‘Mon', 'Tue', 'Wed', etc.

const daysOfWeek = {
  Mon: 'Mon',
  Tue: 'Tue',
  Wed: 'Wed',
  Thu: 'Thu',
  Fri: 'Fri',
  Sat: 'Sat',
  Sun: 'Sun',
};

const dayOfWeek = daysOfWeek.Tue;

By using symbols in place of the string, we can ensure that the constants are always distinct from one another, and not worry about duplicate string values.

const daysOfWeek = {
  Mon: Symbol('Mon'),
  Tue: Symbol('Tue'),
  Wed: Symbol('Wed'),
  Thu: Symbol('Thu'),
  Fri: Symbol('Fri'),
  Sat: Symbol('Sat'),
  Sun: Symbol('Sun'),
};

const dayOfWeek = daysOfWeek.Tue;

2. Prevention of property name clashes

Since a symbol is always guaranteed to be unique, we can use it to avoid name clashes when entirely separate sections of code need to store data on an object. The different sections may not be aware of each other, but each wants to make sure that the property it uses is not going to be used by another.

For example:

// module-1.js

const module1 = () => {
  // Prevent external access with closure
  const module1Sym = Symbol();
  return (obj) => {
    // Put some data on obj that this module can access later
    obj[module1Sym] = 'module 1 data';
  };
};

// module-2.js

const module2 = () => {
  // Prevent external access with closure
  const module2Sym = Symbol();
  return (obj) => {
    // Put some data on obj that this module can access later
    obj[module2Sym] = 'module 2 data';
  };
};

// index.js

const obj = {};
module1(obj);
module2(obj);

If the modules each used a string instead of a symbol for the property name, it could cause problems as the names could clash.

For example:

// module-1.js

const module1 = () => {
  return (obj) => {
    // Put some data on obj that this module can access later
    obj.moduleData = 'module 1 data';
  };
};

// module-2.js

const module2 = () => {
  return (obj) => {
    // Put some data on obj that this module can access later
    obj.moduleData = 'module 2 data';
  };
};

// index.js

const obj = {};
module1(obj);
module2(obj);

// 'module 1 data' has been overwritten by the call the module2()

Note that symbol properties are not enumerable, if you call Object.keys() on the object, they will not be included in the array result.

const dayOfWeek = Symbol('dayOfWeek');
const event = {
  [dayOfWeek]: daysOfWeek.Tue,
  description: 'Birthday',
};

console.log(Object.keys(event)); // [ 'description' ]

Object.getOwnPropertyNames() returns an array of all the enumerable and non-enumerable properties of an object, but symbol properties are still excluded.

console.log(Object.getOwnPropertyNames(event)); // [ 'description' ]

To get all the symbol properties, you use the Object.getOwnPropertySymbols() method. This method returns an array of all symbol properties found directly on a given object.

console.log(Object.getOwnPropertySymbols(event)); // [ Symbol(dayOfWeek) ]

Well-known symbols

The Symbol class comes with static properties known as well-known symbols. They are used to implement and customize the behavior of certain built-in JavaScript operations.

Let’s explore some of these well-known symbols:

Symbol.hasInstance

The Symbol.hasInstance method customizes the behavior of the instanceof operator. Generally, when you use the instanceof operator like this:

obj instanceof type

JavaScript will call the Symbol.instanceof method like this:

type[Symbol.hasInstance](obj);

Here’s an example where we use the instanceof method on an instance of a user-defined class.

class List {}

console.log([] instanceof List); // false

Going by the default behavior of instanceof, [] is an Array, not an instance of the List class, so instanceof returns false here.

If we want to change this behavior and make instanceof return true in this scenario, we would customize the Symbol.hasInstance method like this:

class List {
  static [Symbol.hasInstance](obj) {
    return Array.isArray(obj);
  }
}

console.log([] instanceof List); // true

Symbol.iterator

With the Symbol.iterator method, we can specify if and how objects of a class can be iterated over. When this method is present, we will be able to use the for...of loop and spread syntax (...) on the objects of the class.

When you use the for...of loop on an array:

const numbers = [1, 2, 3];

for (const num of numbers) {
  console.log(num);
}

/*
1
2
3
*/

Internally, JavaScript first calls the Symbol.iterator method of the numbers array to get the iterator object. Then it continuously calls the next() method on the iterator object and copies the value property in the num variable, It exits the loop when the done property of the iterator object is true.

var iterator = numbers[Symbol.iterator]();

console.log(iterator.next()); // Object {value: 1, done: false}

console.log(iterator.next()); // Object {value: 2, done: false}

console.log(iterator.next()); // Object {value: 3, done: false}

console.log(iterator.next()); // Object {value: undefined, done: true}

By default, objects of a user-defined class are not iterable. But we can make them iterable with the Symbol.iterator method, as you’ll use in the following example:

class List {
  elements = [];

  add(element) {
    this.elements.push(element);
    return this;
  }

  // Generator
  *[Symbol.iterator]() {
    for (const element of this.elements) {
      yield element;
    }
  }
}

const colors = new List();
colors.add('red').add('blue').add('yellow');

// Works because of Symbol.iterator
for (const color of colors) {
  console.log(color);
}

/*
red
blue
yellow
*/

console.log([...colors]);
// [ 'red', 'blue', 'yellow' ]

Symbol.toStringTag

This symbol lets us customize the default string description of the object. It is used internally by the Object.prototype.toString() method.

class CarClass {
  constructor(color, maxSpeed, age) {
    this.color = color;
    this.maxSpeed = maxSpeed;
    this.age = age;
  }
}

const car = new CarClass('red', 100, 2);

console.log(Object.prototype.toString.call(car));
// [object Object]

Here is the default implementation of Symbol.toStringTag was outputted. Here’s how we can customize it:

class CarClass {
  constructor(color, maxSpeed, age) {
    this.color = color;
    this.maxSpeed = maxSpeed;
    this.age = age;
  }

  get [Symbol.toStringTag]() {
    return 'Car';
  }
}

const car = new CarClass('red', 100, 2);

console.log(Object.prototype.toString.call(car));
// [object Car]

Symbol.toPrimitive

The Symbol.toPrimitive method makes it possible for an object to be converted to a primitive value. It takes a hint argument that specifies the type of the resulting primitive value. This hint argument can be one of 'number', 'string', or 'default'.

Here’s an example of using the Symbol.toPrimitive method.

class Money {
  constructor(amount, currency) {
    this.amount = amount;
    this.currency = currency;
  }

  [Symbol.toPrimitive](hint) {
    if (hint === 'string') {
      return `${this.amount} ${this.currency}`;
    } else if (hint === 'number') {
      return this.amount;
    } else if (hint === 'default') {
      return `${this.amount} ${this.currency}`;
    }
  }
}

const price = new Money(500, 'USD');

console.log(String(price)); // 500 USD
console.log(+price); // 500
console.log('Price is ' + price); // Price is 500 USD

Conclusion

In this article, we learned how to create JavaScript symbols and share them in the global symbol registry. We saw the advantages of using symbols, and how well-known symbols can be used to customize the behavior of built-in JavaScript operations.

How to Get a File Name Without the Extension in Node.js

To get the name of a file without the extension in Node.js, use the parse() method from the path module to get an object representing the path. The name property of this object will contain the file name without the extension.

For example:

const path = require('path');

path.parse('index.html').name; // index

path.parse('package.json').name; // package

path.parse('image.png').name; // image

The parse() method

The parse() method returns an object with properties that represent the major parts of the given path. The object it returns has the following properties:

  1. dir – the directory of the path.
  2. root – the topmost directory in the operating system.
  3. base – the last portion of the path.
  4. ext – the extension of the file.
  5. name – the name of the file without the extension.
path.parse('C://Code/my-website/index.html');

/*
Returns:
{
  root: 'C:/',
  dir: 'C://Code/my-website',
  base: 'index.html',
  ext: '.html',
  name: 'index'
}
*/

If the path is not a string, parse() throws a TypeError.

// ❌ TypeError: Received type of number instead of string
path.parse(123).name;

// ❌ TypeError: Received type of boolean instead of string
path.parse(false).name;

// ❌ TypeError: Received type of URL instead of string
path.parse(new URL('https://example.com/file.txt')).name;

// ✅ Received correct type of string
path.parse('index.html').name; // index

How to Get a File Extension in Node.js

To get the extension of a file in Node.js, we can use the extname() method from the path module.

For example:

const path = require('path');

path.extname('style.css') // .css

path.extname('image.png') // .png

path.extname('prettier.config.js') // .js

The extname() method

The extname() method returns the extension of the given path from the last occurrence of the . (period) character to the end of the string in the last part of the path.

If there is no . in the last part of the path, or if the path starts with . and it is the only . character in the path, extname() returns an empty string.

path.extname('index.'); // .

path.extname('index'); // '' (empty string)

path.extname('.index');   // '' (empty string)

path.extname('.index.html'); // .html

If the path is not a string, extname() throws a TypeError.

const path = require('path');

// ❌ TypeError: Received type number instead of string
path.extname(123);

// ❌ TypeError: Received type boolean instead of string
path.extname(false);

// ❌ TypeError: Received URL instance instead of string
path.extname(new URL('https://example.com/file.txt'));

// ✅ Received type of string
path.extname('package.json'); // .json

How to Subtract 30 Days From the Current Date in JavaScript

1. Date setDate() and getDate() methods

To subtract 30 days from the current date in JavaScript:

  1. Use the Date() constructor to create a new Date object with the current date.
  2. Call the getDate() method on this object to get the days.
  3. Subtract 30 from the return value of getDate().
  4. Pass the result of the subtraction to the setDate() method.
// Current date: September 29, 2022
const date = new Date();

date.setDate(date.getDate() - 30);

// New date: August 30, 2022
console.log(date);

The Date getDate() method returns a number between 1 and 31 that represents the day of the month of the particular Date.

The Date setDate() method changes the day of the month of the Date object to the number passed as an argument.

If the days you specify would change the month or year of the Date, setDate() automatically updates the Date information to reflect this.

// April 25, 2022
const date = new Date('2022-04-25T00:00:00.000Z');

date.setDate(40);

// May 10, 2022
console.log(date); // 2022-05-10T00:00:00.000Z

console.log(date.getDate()); // 10

April has only 30 days, so passing 40 to setDate() here increments the month by one and sets the day of the month to 10.

2. date-fns subDays() function

Alternatively, we can use the subDays() function from the date-fns NPM package to subtract 30 days from the current date. subDays() takes a Date object and the number of days to subtract as arguments. It returns a new Date object with the days subtracted.

import { subDays } from 'date-fns';

// Current date: September 29, 2022
const date = new Date();

const newDate = subDays(date, 30);

// New date: August 30, 2022
console.log(newDate);

Note that subDays() returns a new Date object without mutating the one passed to it.

How to Get the Value of an Input When a Button is Clicked in React

Related: How to Get an Input Field’s Value in React

To get the value of an input field on button click in React:

  1. Create a state variable to store the value of the input field.
  2. Set an onChange event handler on the input to update the state variable when the input field value changes.
  3. Set an onClick event handler on a button element.
  4. Access the state variable in the event handler.

For example:

App.js

import { useState } from 'react';

export default function App() {
  const [message, setMessage] = useState('');

  const [updated, setUpdated] = useState(message);

  const handleChange = (event) => {
    setMessage(event.target.value);
  };

  const handleClick = () => {
    // 👇 "message" stores input field value
    setUpdated(message);
  };

  return (
    <div>
      <input
        type="text"
        id="message"
        name="message"
        onChange={handleChange}
        value={message}
      />

      <h2>Message: {message}</h2>

      <h2>Updated: {updated}</h2>

      <button onClick={handleClick}>Update</button>
    </div>
  );
}
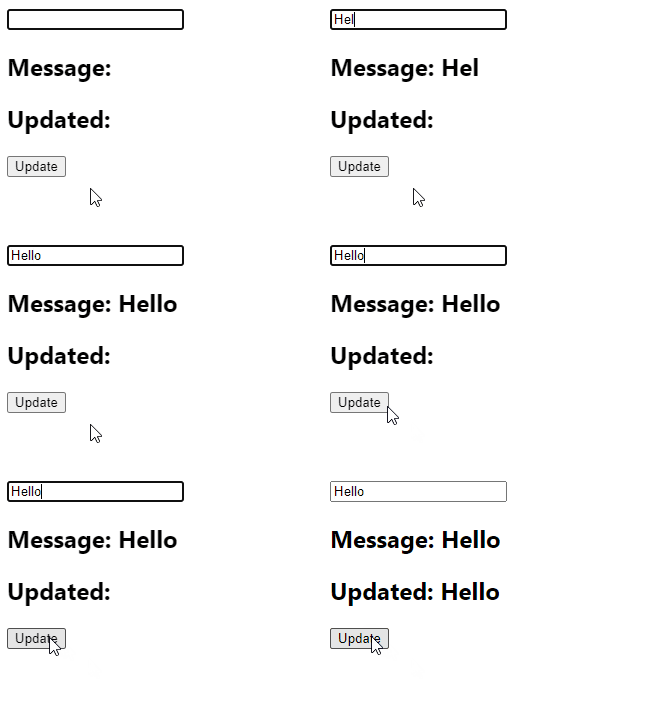
Getting the input value on button click.

With the useState() hook we create a state variable (message) to store the current value of the input field. We also create another state variable (updated) that will be updated with the input field value when the button is clicked.

We set an onChange event handler on the input field to make this handler get called whenever the input value changes. In the handler, we use the event.target property to access the object representing the input element. The value property of this object contains the input value, so we pass it to setMessage() to update message, and this reflects on the page.

After setting up the controlled input, we can now use message outside the handleChange handler to access the current value of the input field.

So in the onClick event handler we set on the button, we use setUpdated(message) to update the updated variable with the current input field value.

Get value of uncontrolled input on button click

To get the value of an uncontrolled input on button click in React:

  1. Create a ref for the input field
  2. Set an onClick event handler on the button.
  3. Use the ref object to access the current input value in the event handler.

For example:

App.js

import { useRef, useState } from 'react';

export default function App() {
  const inputRef = useRef(null);

  const [updated, setUpdated] = useState('');

  const handleClick = () => {
    // 👇 "inputRef.current.value" is input value
    setUpdated(inputRef.current.value);
  };

  return (
    <div>
      <input
        ref={inputRef}
        type="text"
        id="message"
        name="message"
      />

      <h2>Updated: {updated}</h2>

      <button onClick={handleClick}>Update</button>
    </div>
  );
}
Updating text with the value of an input field on button click.

While the data in a controlled input is handled by React state, the data in an uncontrolled input is handled by the DOM itself. This is why the input in the example above doesn’t have a value prop or onChange event handler set. Instead, we access the input field value with a React ref. The DOM updates this value when the text in the input is changed.

We create a ref object with the useRef() hook and set it to the ref prop of the input. Doing this sets the current property of the ref object to the DOM object that represents the input element.

useRef() returns a mutable ref object that does not change value when a component is updated. Also, modifying the value of this object’s current property does not cause a re-render. This is in contrast to the setState update function returned from useState().

Although the React documentation recommends using controlled components, uncontrolled components offer some advantages. You might prefer them if the form is very simple and doesn’t need instant validation, and values only need to be accessed when the form is submitted.

How to Fix the “Cannot Find name ‘describe'” Error in TypeScript

To fix the “cannot find name ‘describe'” error, install the type definitions for your testing framework, and then add the definitions to the types array in your tsconfig.json file.

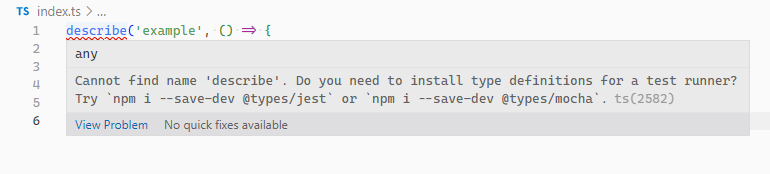
This error happens if you try to use the describe() function in a TypeScript file, but type definitions for the package are missing.

The "cannot find name 'describe'" error happening in a TypeScript file in VS Code.
index.ts
/* Cannot find name 'it'. Do you need to install type definitions for a test runner? Try `npm i --save-dev @types/jest` or `npm i --save-dev @types/mocha`. ts(2582) */ describe('example', () => { it('adds two numbers together', () => { expect(2 + 2).toBe(4); }); }); 

Install the type definitions for the testing framework you’re using by running one of the following commands at the root of your project directory.

Shell
# 👇 Jest npm i -D @types/jest jest # 👇 Mocha npm i -D @types/mocha mocha # Yarn # 👇 Jest yarn add --dev @types/jest jest # 👇 Mocha yarn add --dev @types/mocha mocha

Add typings to types array in tsconfig.json

In some cases, this is all you need to fix the error. But if it persists, you might need to add the newly installed typings to the types array of your tsconfig.json file.

So if you’re using Jest, you’ll add a jest string to the types array, and then your tsconfig.json file will look something like this:

tsconfig.json
{ "compilerOptions": { "types": [ // ... other types "jest" ] // ..other settings } }

If you’re using Mocha too, you’ll add a mocha string to the types array.

tsconfig.json
{ "compilerOptions": { "types": [ // ... other types "mocha" ] // ..other settings } }

Include test files

If the error still doesn’t go away after doing this, make sure that TypeScript is not ignoring the directory containing your test files.

If you’ve set the include array in your tsconfig.json file, make sure the patterns specified in this array match the directory where your test files are located.

For example, if your test files are located in a src directory, TypeScript will detect them with a configuration like this:

tsconfig.json
{ "compilerOptions": {}, "include": ["src/**/*"], }

But if they’re located in a tests directory, we’ll need to add an additional glob pattern to make TypeScript detect them:

tsconfig.json
{ "compilerOptions": {}, "include": [ "src/**/*", "tests/**/*" ], }

We can also include glob patterns to match files with a specific ending or extension.

For example, we can include all files ending with .spec.ts and .test.ts with this config:

tsconfig.json
{ "compilerOptions": {}, "include": [ "src/**/*", "**/*.spec.ts", "**/*.test.ts" ], }

If you’ve set the exclude array in your tsconfig.json file, make sure that none of the patterns in the array match the directory containing the test files, as this will prevent TypeScript from detecting them.

For example, in the tsconfig.json file below, files ending with .spec.ts have been excluded, so TypeScript will ignore them and the error will occur when you attempt to use describe() in them.

tsconfig.json
{ "compilerOptions": {}, "include": [ "src/**/*" ], "exclude": [ "**/*.test.ts" ], }

We’ll fix this issue by simply moving the pattern string from exclude to include:

tsconfig.json
{ "compilerOptions": {}, "include": [ "src/**/*", "**/*.test.ts" ], }

Import module in file

Instead of adding the typings to the types array, you can also import them at the top of the file where you are using describe().

So if we’re using Jest, we’ll add an import 'jest' line at the beginning of the file.

index.ts
// 👇 import 'jest'; // ✅ No error describe('example', () => { it('adds two numbers together', () => { expect(2 + 2).toBe(4); }); }); 

If we’re also using Mocha, we’ll add an import 'mocha' line:

index.ts
// 👇 import 'mocha'; // ✅ No error describe('example', () => { it('adds two numbers together', () => { expect(2 + 2).toBe(4); }); }); 

Restart IDE

If the error persists after doing all of this, restarting your IDE might help.

How to Create the Material Design Text Field With HTML, CSS, and JavaScript

Material Design is a popular UI design system developed by Google. Apps using Material Design typically include responsive animations, attractive color combinations, and depth effects such as lighting and shadows.

In this article, we’ll learn how to recreate the design and animation of the Material Design text field, using only HTML, CSS, and JavaScript. We’ll be cloning the outlined text field variant, but similar steps can be taken to create the filled variant.

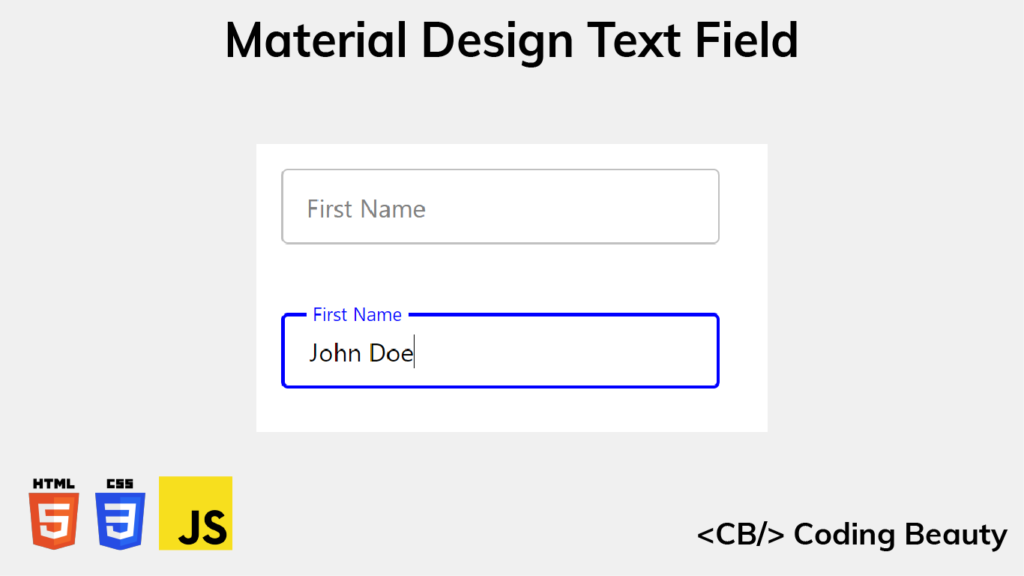
Here’s what we’ll have when we’re done:

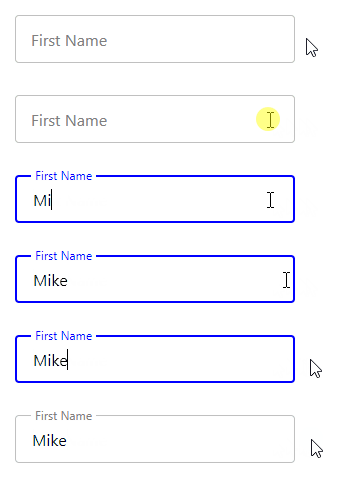
The completed Material Design text field.

Create basic input and label

We’ll get started by creating the basic structure of the text field with HTML.

HTML

<div class="input-container">
  <input
    type="text"
    id="fname"
    name="fname"
    value=""
    aria-labelledby="label-fname"
  />
  <label class="label" for="fname" id="label-fname">
    <div class="text">First Name</div>
  </label>
</div>

We create an input element to allow typing into the text field, and we use a label element as the label for the text field. The text for this label (First Name) is wrapped in a div (.text) for because of the text animation we’re going to do later.

We use another div (.input-container) to wrap both the input and label elements, so that later we’ll able to place the label on top of the input with absolute positioning.

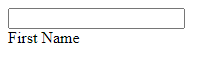
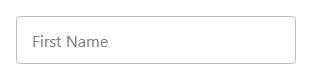
The basic input and label
The basic input and label.

Style input and label

Let’s add some styles for the input element and its container.

CSS

.input-container {
  position: relative;
}

input {
  height: 48px;
  width: 280px;
  border: 1px solid #c0c0c0;
  border-radius: 4px;
  box-sizing: border-box;
  padding: 16px;
}

We set position: relative for the container so that the label will be positioned relative to it when we set position: absolute for the label, instead of the entire page.

We’ll add styles for the label now.

CSS

.label {
  position: absolute;
  top: 0;
  bottom: 0;
  left: 16px;
  display: flex;
  align-items: center;
}

Apart from the position: absolute we just talked about, we set top: 0 and bottom: 0 to make the label match the height of the input container.

The input has a 16px padding, so we set left: 16px to make the label match this padding and start from the same position as any text the user will type. Lastly, we horizontally center the contents of label in the input container using display: flex and align-items: center.

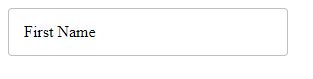
The input and label have been styled.

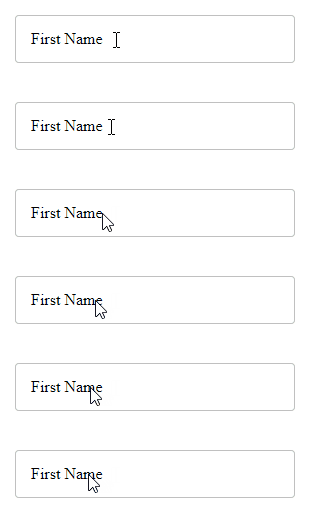
Remove pointer events

It looks like a text field now, but if you hover over the label, you’ll see the mouse pointer indicating that this is something that can be clicked. This means that it can block clicks on the input, which would create a bad user experience.

The label blocks clicks on the input.

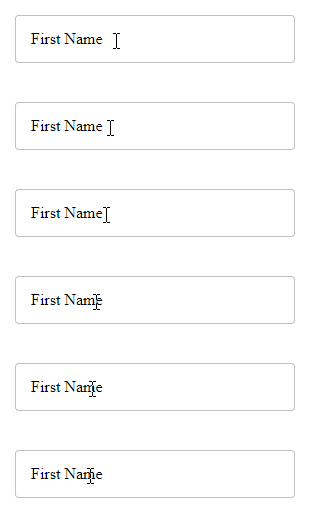
Luckily, we can easily fix this by setting pointer-events: none for the label element.

CSS

.label {
  ...
  pointer-events: none;
}
The label no longer blocks clicks on the input.

Style input font

Let’s change the font family and font size of the input text. We’ll do the same for the label.

CSS

input, .label .text {
  font-family: 'Segoe UI';
  font-size: 16px;
}
The font of the input and label has been changed.

Style input on focus

Let’s use the :focus CSS selector to change some of the input styles when it receives focus.

CSS

input:focus {
  outline: none;
  border: 2px solid blue;
}

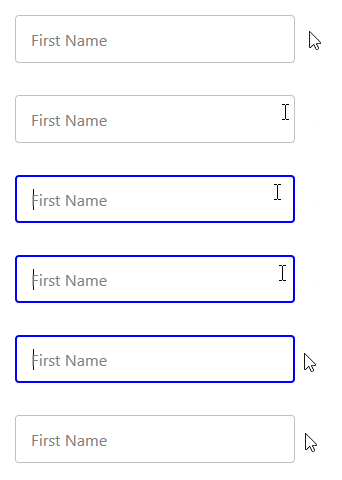
With this, the input border changes color and becomes thicker when the input gains focus.

The input border changes color and becomes thicker on input focus.

Style label on input focus

Let’s also style the input label when it is focused. On gaining focus the label should shrink, move up to meet the top input border, and change color to match the input border.

CSS

input:focus + .label .text {
  font-size: 12px;
  transform: translate(0, -50%);
  background-color: white;
  padding-left: 4px;
  padding-right: 4px;
  color: blue;
}

We set padding-left: 4px and padding-right: 4px to add some visual spacing between the label and the top input border.

Styling the label on input focus.

For a smooth transition, we’ll add a transition property to the label.

CSS

.label .text {
  transition: all 0.15s ease-out;
}
Adding a smooth transition to the label.

Keep label on top when non-empty input loses focus

There’s one more thing we have to do. When you enter text in the input element and remove the input, the label goes back to its original position.

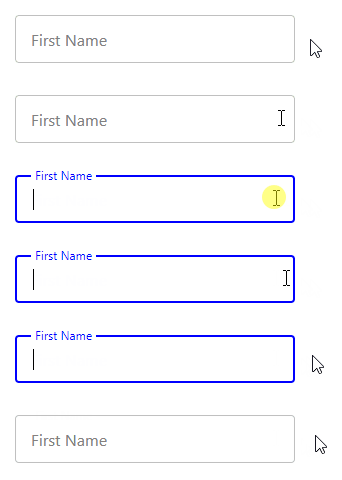
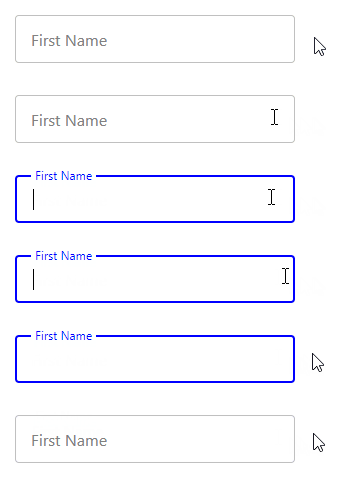
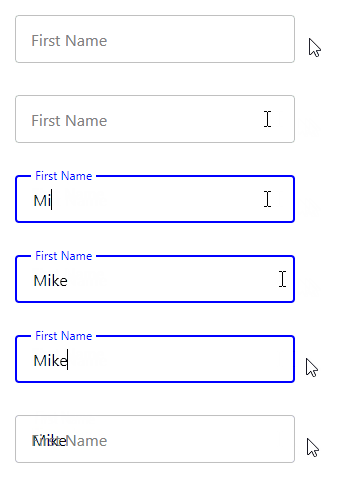
When you enter text in the input element and remove the input, the label goes back to its original position.

It shouldn’t behave in this manner. But now we’re going to fix it with some CSS and JavaScript.

Remember, we’ve already defined a value attribute for the input element. We set it to an empty string.

HTML

<input
  type="text"
  id="fname"
  name="fname"
  value=""
  aria-labelledby="label-fname"
/>

Using the :not pseudo-class, we make the input when focused have the same style as when it is unfocused and non-empty. The only difference will be the color of the input border and label.

CSS

input:focus + .label .text, :not(input[value=""]) + .label .text {
  font-size: 12px;
  transform: translate(0, -150%);
  background-color: white;
  padding-left: 4px;
  padding-right: 4px;
}

input:focus + .label .text {
  color: blue;
}

We’re not done yet. Even though the value DOM property of the input changes according to what is entered, the value HTML attribute stays the same. We need a way to keep it in sync with the value property.

We can do this by adding a listener for the input event, which fires whenever the text in the input field changes. In the listener, we’ll use the setAttribute() method to update the value attribute with the current value of the value property.

JavaScript

const input = document.getElementById('fname');

input.addEventListener('input', () => {
  input.setAttribute('value', input.value);
});
The Material Design text field is complete.

That’s it. We’ve successfully created an outlined Material Design text field.

If you’re using a framework like Vue or React, it should be pretty easy to abstract everything we’ve done into a reusable component.

Here’s the complete source code: